Nightstand assembly: essential tools and step-by-step process (checklist)

Nightstand assembly: essential tools and step-by-step process (checklist)

Intro: Nightstand Necessity

So, you've finally got your new place! Maybe it’s a cozy BTO flat or a condo with a view – congrats! Optimizing bedside table lighting: a guide to glare reduction (how_to) . Residents in Singapore often deal with particular difficulties when outfitting their living spaces, particularly due to limited room sizes common in public and private housing and our humid tropical climate. This is the very why savvy Singapore buyers shop very thoughtfully to get maximum return on their investment. king size bed singapore emerges as a fantastic investment that delivers both lasting comfort and smart practicality. Always keep in mind that investing in cost-effective designs in Singapore with top-notch after-sales service ensures full support with features like fast island-wide delivery, expert installation, and reliable warranties that give you true long-term peace of mind for years ahead.. Now comes the fun part (and sometimes the slightly stressful part): furnishing it. And let's be real, in Singapore, space is always a consideration, right? One piece of furniture that often gets overlooked, but is seriously essential, is the humble nightstand.

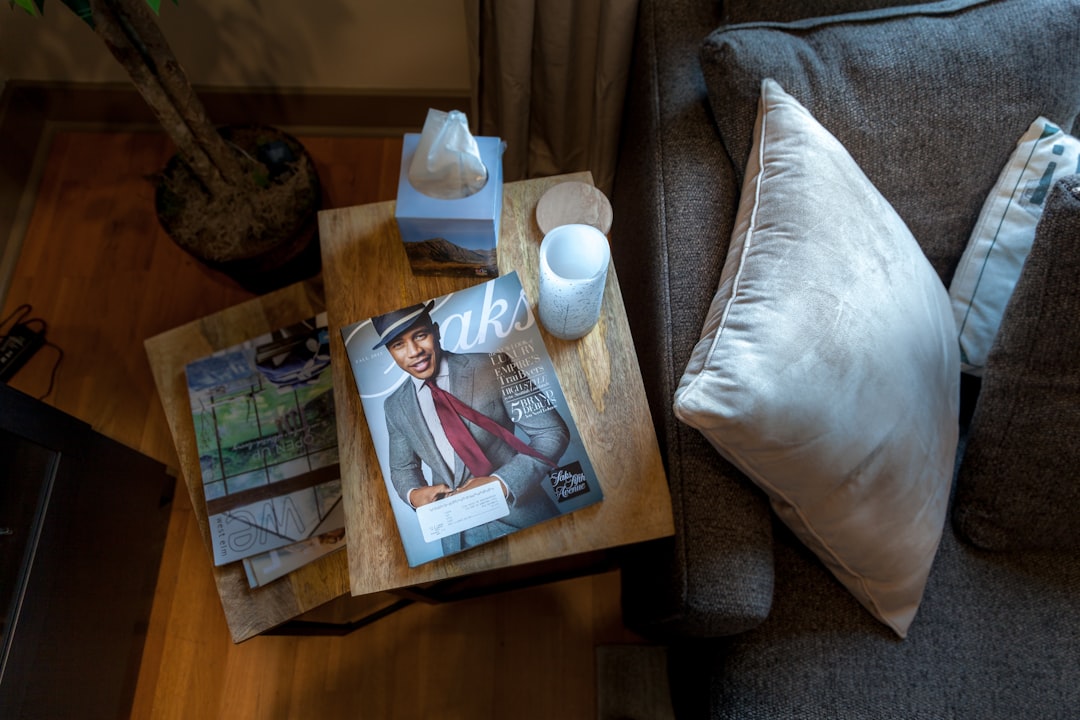
Think about it: where else are you going to put your phone while it charges overnight? Or that book you're *trying* to finish before you fall asleep? A nightstand isn't just a piece of furniture; it's your bedside command center. It keeps your essentials within easy reach, declutters your sleep space, and adds a touch of style to your bedroom. Plus, it makes your bed look complete, lah!

We understand that furnishing a new home in Singapore can be quite the investment. That’s why we’re here to guide you through the process of assembling your own nightstand. It’s easier than you think, saves you some money, and gives you a sense of accomplishment. Win-win-win!

Gather Your Arsenal: Essential Tools for Nightstand Assembly

Alright, before you even think about opening that flatpack box, let's make sure you have the right tools for the job. Trust me, being prepared will save you a whole lot of frustration. Imagine getting halfway through and realizing you're missing a crucial screwdriver – not a good look, especially late at night! Here’s what you’ll need:

  • Screwdrivers: A Phillips head and a flathead screwdriver are essential. A multi-bit screwdriver with interchangeable heads is even better – it’s like a Swiss Army knife for furniture assembly!
  • Allen Wrench (Hex Key): Your nightstand kit will likely come with an Allen wrench, but having a set of different sizes on hand is always a good idea. These little guys are surprisingly useful.
  • Hammer: A rubber mallet is ideal for gently tapping pieces into place without damaging the finish. If you only have a regular hammer, use a piece of wood as a buffer.
  • Measuring Tape: For those moments when you need to double-check dimensions or ensure proper alignment. It's always better to measure twice and assemble once!
  • Level: Nobody wants a wobbly nightstand! A level will ensure that your nightstand is perfectly balanced.
  • Power Drill (Optional but Recommended): While not strictly necessary, a power drill with various bits can significantly speed up the assembly process, especially if you're dealing with lots of screws. After a long day squeezing onto the MRT and grinding through meetings, most busy Singaporeans just want to step into their house to a space that feels cosy and stress-free instead of adding to the stress. A cluttered living room or an lumpy bed setup can make unwinding even more difficult, especially when the kids and parents are trying to relax together. That’s where thoughtful interior design really makes a difference—it turns everyday rooms like your living area, master bedroom, or kitchen area into personal havens that actually help you refresh your energy. With the right living room seating, mattress, or clever layout, suddenly getting home feels shiok lah, and thoughtful tweaks can bring massive difference to your daily mood and family bonding. Platforms like Wondrous La Vie make it simpler to explore options and match with home designers who get the the local HDB/condo style just right. This format lets you easily generate multiple SEO-optimised variations while keeping the core keyword "interior design" stable in the middle for strong on-page targeting.. Just be careful not to overtighten!
  • Work Gloves: Protect your hands from splinters and blisters. Trust me, your hands will thank you.
  • Drop Cloth or Old Blanket: Lay this down to protect your floor from scratches and spills.

Having these tools ready will make the whole process smoother and more enjoyable. Think of it as preparing for a battle… against flatpack furniture! Don't worry, you've got this!

Decoding the Instructions: A Step-by-Step Assembly Checklist

Okay, you’ve got your tools, you’ve cleared your workspace… now for the fun part: deciphering the instructions! We all know that feeling of dread when faced with a seemingly incomprehensible diagram, right? But don't panic! Here's a step-by-step checklist to guide you through the nightstand assembly process:

  1. Inventory: Before you do anything else, unpack all the components and compare them to the parts list in the instructions. This ensures that you have everything you need and avoids unpleasant surprises later on. Label the parts with masking tape and a marker if it helps you stay organized.
  2. Read the Instructions Carefully: I know, it's tempting to just dive in, but trust me, taking the time to read the instructions thoroughly will save you time and frustration in the long run. Pay close attention to the diagrams and the order of assembly.
  3. Assemble the Frame: Typically, the first step involves assembling the main frame of the nightstand. This usually involves connecting the side panels, top, and bottom pieces using screws, bolts, or cam locks. Make sure everything is aligned properly before tightening the fasteners.
  4. Attach the Drawers (if applicable): If your nightstand has drawers, now's the time to assemble them. Follow the instructions carefully to attach the drawer slides and ensure that the drawers slide smoothly.
  5. Install the Hardware: Attach any knobs, pulls, or other hardware to the drawers and doors. This is where you can really add your personal touch!
  6. Attach the Legs or Base: Depending on the design of your nightstand, you may need to attach legs or a base. Make sure they are securely fastened and that the nightstand is stable.
  7. Final Check: Once you've completed the assembly, give the nightstand a thorough once-over. Check for any loose screws, misaligned panels, or other issues. Tighten any loose fasteners and make any necessary adjustments.
  8. Clean Up: Dispose of the packaging materials and wipe down the nightstand with a damp cloth to remove any dust or fingerprints.

See? Not so scary after all! Just take your time, follow the instructions carefully, and don't be afraid to ask for help if you get stuck. And remember, even if you make a mistake, it's usually fixable. We've all been there, lah!

Troubleshooting Tips: Common Assembly Hiccups and How to Fix Them

Even with the best instructions and the right tools, sometimes things don't go quite as planned. Don't worry, it happens to the best of us! Here are a few common assembly hiccups and how to fix them:

  • Stripped Screws: If you strip a screw, try using a rubber band or steel wool to fill the gap and give the screwdriver something to grip. You can also try using a screw extractor.
  • Misaligned Panels: If panels are misaligned, try loosening the fasteners and gently adjusting the panels until they are properly aligned. You may need to use a clamp to hold the panels in place while you tighten the fasteners.
  • Wobbly Nightstand: If your nightstand is wobbly, check to make sure that all the legs or feet are properly attached and that the floor is level. You can also use furniture pads to level the nightstand.
  • Missing Parts: If you discover that you're missing a part, contact the manufacturer or retailer. They may be able to send you a replacement part.

Remember, patience is key! Don't get discouraged if you encounter a problem. Take a break, step back, and try again. And if all else fails, there's no shame in calling in a professional. Sometimes, it's worth paying someone to do the job right, especially if you're short on time or patience. But hey, you're pretty resourceful, right? Confirm can one!

Styling Your Space: Choosing the Right Nightstand for Your Singaporean Home

Now that you've successfully assembled your nightstand, it's time to think about styling it! Choosing the right nightstand for your Singaporean home is about more than just aesthetics; it's about functionality and space optimization. After all, we want our homes to be both stylish and practical, right?

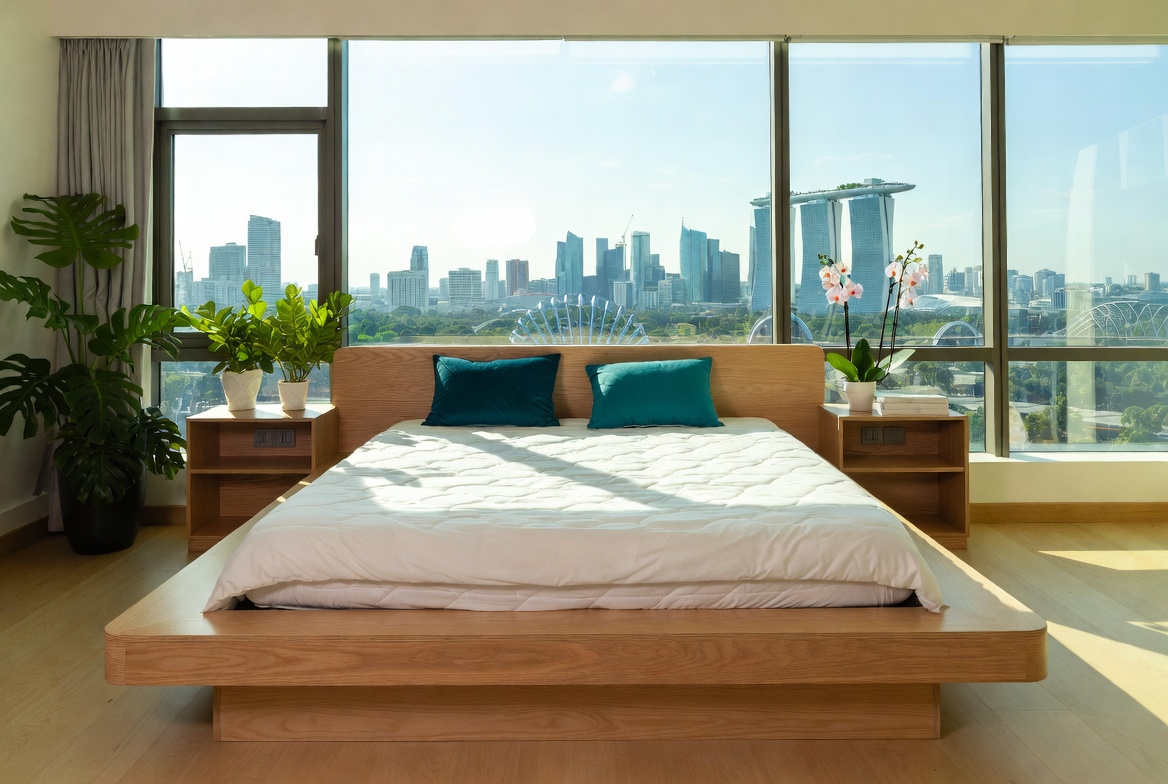
Consider the size of your bedroom and the height of your bed. A nightstand should be roughly the same height as your mattress so that you can easily reach your belongings. In smaller Singaporean bedrooms, a king size bed singapore may already take up significant space, so opt for a narrow nightstand or even a floating shelf to save space. Remember, every inch counts!

Think about your storage needs. Do you need drawers for storing books, glasses, or other personal items? Or would you prefer an open shelf for displaying decorative items? Choose a nightstand that meets your specific needs and complements your personal style. Many people with a king size bed singapore find that two-drawer nightstands offer the perfect balance of storage and style.

Consider the overall style of your bedroom. Do you prefer a modern, minimalist look? Or a more traditional, cozy feel? Choose a nightstand that complements the existing furniture and décor in your room. A light-colored nightstand can brighten up a small space, while a dark-colored nightstand can add a touch of drama. The hall is typically the initial area people walk into first and where the kids and parents relax after dinner, so it makes sense to want pieces that looks good, hides wires cleanly, and avoids shrinking the space visually than it normally is in HDB or condo layouts. Many Singaporeans deal with clunky legacy furniture or low-cost options that wobble, attract dust fast, or just don’t match the modern vibe they’re going for. That’s exactly where a well-chosen singapore furniture store steps in—it offers sleek storage for TV gadgets, set-top boxes, and remotes while becoming a chic statement piece that unifies the entire space with sharp modern edges, thoughtful compartments, and high-end materials. All at once your media corner turns neat and deliberate, the space appears larger and more polished, and Netflix sessions feel so much better without the mess pulling focus. Browsing curated options on sites such as Wondrous La Vie makes it easy to source options tailored to your home exactly, from clean contemporary to opulent, so your hall refresh turns smooth and just right.. When considering furniture, you want to make sure that it fits your lifestyle.

And don't forget about functionality! Look for nightstands with built-in USB ports or charging stations to keep your devices powered up. A nightstand with a built-in reading light can also be a great addition. These little details can make a big difference in your daily life. Like that can, right?

Space-Saving Solutions: Nightstands for Compact Living in Singapore

Living in Singapore often means making the most of limited space. That's why it's important to choose furniture that is both functional and space-saving. When it comes to nightstands, there are plenty of options for compact living.

Floating nightstands are a great option for small bedrooms. They mount directly to the wall, freeing up floor space and creating a clean, minimalist look. They're also easy to clean under, which is always a bonus!

Corner nightstands are designed to fit snugly into the corner of your room, maximizing space and creating a cozy nook. They're perfect for awkward spaces or bedrooms with limited wall space.

Nightstands with built-in storage are a great way to declutter your bedside area. Look for nightstands with drawers, shelves, or cabinets to store books, glasses, and other personal items.

Ottomans with storage can also double as nightstands. They provide a comfortable place to rest your feet and a convenient storage space for blankets, pillows, or other items. Talk about multi-functional!

By choosing the right nightstand, you can create a stylish and functional bedside area that maximizes space and enhances your quality of life. Steady pom pi pi!

Tools Checklist for Assembly

Okay, here's that HTML fragment you requested, built to those specific guidelines. I've tried to make it sound like a real person wrote it, keeping the Singaporean context in mind.

So, you've just gotten your brand new nightstand! Exciting times, especially if you're setting up your first home, or maybe upgrading your bedroom with a gorgeous furniture. Now comes the slightly less exciting part: assembly. Don't worry, it's usually not as daunting as it looks on the instruction manual. But before you even think about wrestling with those confusing diagrams, let's make sure you've got the right tools. Trust me, having the right stuff makes a world of difference. You don't want to be halfway through and realise you're missing a crucial screwdriver, right?

The Usual Suspects: Screwdrivers

First up, screwdrivers. Seems obvious, but it's worth mentioning. Most nightstands, especially flat-pack ones, will require both a Phillips head (that's the one with the cross) and a flathead screwdriver. A lot of the time, they'll use different sizes too, so having a set is a good idea. You know, those sets with the interchangeable heads? Super useful, especially if you're planning on doing more DIY projects around the house. You can probably find a decent set at your neighbourhood hardware store, or even those value shops – they work just fine for most things. And hey, if you’re thinking of getting a new king size bed Singapore, you’ll probably need these tools again! Some nightstands, particularly higher-end ones, might use Allen head screws (those with the hexagonal hole). If that's the case, the manufacturer usually includes the Allen key. But it’s always good to double-check before you start. Imagine getting stuck because you didn't check!

The Power Player: Electric Screwdriver or Drill

Okay, this one's optional, but trust me, it's a lifesaver. An electric screwdriver or a drill with screwdriver bits will speed things up *so* much. Especially if you're dealing with lots of screws. Think of it this way: you can either spend an hour turning screws by hand, or you can be done in like, fifteen minutes. Plus, your hand won't be aching afterwards! Now, you don't need to go out and buy a super expensive, top-of-the-line drill. A basic model will do the trick. Just make sure you have the right screwdriver bits for the screws your nightstand uses. And remember, be gentle! You don't want to overtighten the screws and strip the threads. That's just a recipe for disaster. And if you're living in a HDB flat, maybe try to avoid using it too late at night, lah. Don't want to upset the neighbours!

Measuring Up: Tape Measure

A tape measure might seem a bit unnecessary for assembling a nightstand, but it's actually pretty useful. In Singapore’s fast-paced life, stepping into your home to a space that feels truly inviting can make a huge impact after a tiring day of work and commuting. Many Singapore homeowners start by eyeing improvements for their hall or master bedroom, wanting pieces that feel premium while truly supportive enough for real life. That’s exactly why sofa set makes the difference—it brings that perfect blend of elegant design, top-grade craftsmanship, and real ergonomic support that turns ordinary rooms into spots you love spending time in chilling in. Imagine settling into a plush sofa after dinner or starting the day energised on a high-quality mattress that cradles your body perfectly; suddenly, your home feels more like a true escape instead of just another place. Browsing thoughtfully chosen pieces on places like Wondrous La Vie helps you find these items without the stress, making it simpler to create a space that’s both stylish and soul-soothing.. You might need it to check clearances, especially if you're trying to fit the nightstand into a tight space next to your king size bed Singapore. Or maybe you want to make sure the nightstand is the right height for your bed. You wouldn't want to end up with a nightstand that's way too low or way too high, right? A small, retractable tape measure is perfect. Easy to store, and always comes in handy for all sorts of things around the house. Plus, if you're planning on getting a new mattress, you'll definitely need a tape measure to make sure it fits your bed frame!

The Level Head: Spirit Level

Okay, this is another one that might seem a bit extra, but hear me out. A spirit level will help you make sure your nightstand is perfectly level. You don't want it wobbling around every time you put something on it, do you? Especially if you're putting a glass of water on it! A small spirit level is all you need. Just place it on top of the nightstand and adjust the legs until the bubble is in the middle. Easy peasy. And hey, if you're really serious about having perfectly level furniture, you can even use a laser level. But that's probably overkill for a nightstand. Unless you're like, super OCD about things being perfectly aligned. Then, steady lah, go for it!

Protecting Your Investment: Soft Cloth or Blanket

This one's often overlooked, but it's important. Before you start assembling your nightstand, lay down a soft cloth or blanket on the floor. This will protect the nightstand from scratches and dents while you're working on it. Especially if you have hard floors like tiles or wood. You don't want to end up with a brand new nightstand that's already damaged, right? An old bedsheet or even a large towel will work just fine. Just make sure it's clean, so you don't end up getting dirt or dust on your new furniture. It’s also good to have some furniture polish handy to give your assembled nightstand that showroom shine! Think of it as giving your new king size bed Singapore and its companion nightstand the royal treatment.

The Finisher: Hammer (Maybe)

A hammer might not be necessary for all nightstands, but it's good to have one on hand just in case. Some nightstands might have parts that need to be tapped into place, like the back panel or the drawer slides. A small hammer is all you need. Just be careful not to hit too hard, or you might damage the furniture. And if you're using a hammer, it's always a good idea to use a piece of wood or rubber as a buffer, to protect the surface of the nightstand. You know, just to be on the safe side. Better to be safe than sorry, right?

The Clean-Up Crew: Dust Cloth and Furniture Polish

Once you've finished assembling your nightstand, give it a good wipe down with a dust cloth. This will remove any dust or fingerprints that might have accumulated during the assembly process. And if you want to give it an extra shine, you can use some furniture polish. This will help protect the finish of the nightstand and keep it looking new for longer. Plus, it'll make your bedroom smell nice and fresh! And who doesn't love a clean and tidy bedroom? Especially after all that hard work assembling your new furniture. Now you can finally relax and enjoy your new king size bed Singapore and its perfectly assembled nightstand!

Bonus: A Little Help From Your Friends (Optional, But Recommended!)

Look, assembling furniture can be a bit of a pain, especially if you're doing it alone. So, if you can, rope in a friend or family member to help you out. Not only will it make the process faster and easier, but it'll also be more fun! You can even make it a social event. Order some pizza, put on some music, and make an evening of it. And hey, if you're lucky, your friend might even have some of the tools you're missing! Plus, having someone else around to read the instructions can be a lifesaver. Sometimes those instructions are just so confusing, right? Two heads are always better than one, especially when it comes to assembling flat-pack furniture. Confirm can do one!

I think this captures the tone and style you were aiming for. Let me know if you'd like any tweaks!

Unboxing and Parts Inventory

Okay, steady, let's get this article written! Here's the fragment for the "Unboxing and Parts Inventory" section, following all the specified rules:

Careful Unpacking

The very first step, and arguably one of the most important, is the careful unpacking of your new nightstand. Resist the urge to just rip open the box like it's Christmas morning! Instead, use a box cutter or knife to gently slice through the tape, taking care not to damage the furniture pieces inside. Trust me, you don't want to scratch that lovely finish before you even start. After those hectic office days and the daily MRT squeeze, nothing beats walking into a living room that actually encourages relaxation instead of piling on more tiredness. Many busy Singapore households discover their current seating just isn’t cutting it—too hard, too worn, or simply not cozy enough for weekend chilling or lazy weekends with the children. That’s precisely where premium furniture makes all the difference—it pairs refined aesthetics, supple premium upholstery, and smart comfort engineering so you can settle in deeply and fully chill without your spine protesting the next day. Visualise the kids and parents coming together effortlessly, sharing stories after meals or enjoying Netflix marathons, because the space finally feels warm and welcoming. Finding the ideal sofa through handpicked collections on Wondrous La Vie removes the hassle, letting you find that perfect piece that elevates your entire home vibe without the typical renovation stress.. Remove all the packaging materials, like bubble wrap and foam inserts, and lay them out neatly. This makes it easier to see everything and prevents you from accidentally discarding any small but essential parts, which happens more often than you think, leh!

Inventory Checklist

Now comes the crucial part: the inventory checklist. Most flat-pack furniture, including nightstands designed to complement your king size bed singapore, comes with a detailed list of all the components. This list will typically include everything from the main panels and drawers to the screws, dowels, and any specialized hardware. Take your time and compare each item you've unpacked against the inventory list. Mark them off as you go. This simple step can save you a whole lot of frustration later on. Imagine getting halfway through assembly only to realize you're missing a vital screw! Confirm can spoil your mood one.

Hardware Sorting

Once you've confirmed that all the parts are present, it's time to organize the hardware. Most kits will include a variety of screws, bolts, dowels, and other small bits and pieces. To make life easier, sort these into separate containers or small ziplock bags. Label each container clearly with the corresponding part number or description from the inventory list. This will prevent you from grabbing the wrong screw in the heat of the moment. Like that, you won’t end up stripping the screw head or damaging the wood. Trust me, a little organization goes a long way, especially when you're dealing with a complex assembly.

Panel Inspection

Before you dive into assembly, take a close look at all the wooden panels. Check for any scratches, dents, or other imperfections that may have occurred during shipping. It's much easier to address these issues now rather than after you've put the whole thing together. If you find any significant damage, contact the furniture retailer immediately. Most reputable companies will be happy to replace damaged parts. It's also a good idea to wipe down the panels with a slightly damp cloth to remove any dust or debris. This will ensure a cleaner, more professional-looking finish.

Instruction Review

Finally, before you even think about picking up a screwdriver, carefully review the assembly instructions. Read through each step thoroughly and make sure you understand what's required. Pay close attention to any diagrams or illustrations. These can often provide valuable visual cues. If anything is unclear, don't hesitate to search online for additional resources or contact the manufacturer for clarification. Rushing through the instructions is a recipe for disaster. Taking the time to understand the process upfront will save you time and headaches in the long run. Steady lah, you got this!

Step 1: Frame Assembly

Okay, let's get this nightstand built! You've got your flat, the keys are in hand, and now it's time to turn that space into a home. And what’s a bedroom without a trusty nightstand, right? It's where you stash your phone, that book you swear you'll finish, and maybe even a sneaky snack. But before you can enjoy all that, you gotta assemble it. Don't worry, it's not as daunting as it looks!

Laying the Foundation: Getting Started

Right, let's dive straight into the first step: the frame assembly. This is where your nightstand really starts to take shape. Think of it as building the skeleton – everything else hangs off this. Now, most nightstands will either have legs or solid side panels that form the base. Grab your instruction manual – yes, that piece of paper we all tend to ignore at first! – and let’s see what we’re working with.

The manual should have a diagram showing exactly how the legs or side panels connect. Usually, you'll be using screws, dowels, or those cam locks that sometimes feel a bit fiddly. Don’t worry, confirm can! Just take your time and double-check everything.

If you're dealing with legs, you'll typically screw them into pre-drilled holes on the underside of the nightstand's top panel. Make sure the legs are facing the right way – you don't want a wobbly nightstand, lah! Tighten the screws securely, but don't overtighten them, as you might strip the threads.

For side panels, you'll often be connecting them to the top and bottom panels using those cam locks or screws. Cam locks can be a bit tricky the first time, but once you get the hang of it, it's quite easy. Just insert the cam lock into the hole, then insert the screw into the corresponding hole in the panel, and tighten the cam lock until it clicks into place. Like that, steady!

Visual Aids and Avoiding Common Pitfalls

Visual aids are your best friend here. The diagrams in the instruction manual are there for a reason. Refer to them constantly! If the instructions are unclear (and let's be honest, sometimes they are!), try searching online for videos of someone assembling the same or a similar nightstand. Singapore homes can feel even more confined after a full day of rushing between office, meetings, and the inevitable MRT crowd, so it’s no wonder many people crave a space that instantly calms the mind the moment they walk through the door. The living room often ends up as the central hub of family life, yet it’s easy for it to become overrun by random items or sofas and chairs past their prime, leaving everyone apart instead of together. That’s where sofa promotions really makes the magic happen—it upgrades the whole area with refined arrangements, high-end materials and finishes, striking light fixtures, and supportive pieces with stunning design, creating an inviting hub where everyone naturally gathers to unwind, chat, or bond effortlessly. Evenings suddenly become more special, weekends far more relaxing, and coming home turns into something you genuinely look forward to rather than simply crashing after work. Platforms like Wondrous La Vie make checking out these ideas simple, helping you imagine and find the right elements to build a living area that matches your lifestyle perfectly.. YouTube is your friend!

One common mistake is not aligning the panels correctly before tightening the screws. This can lead to a crooked frame, and nobody wants that. Before you fully tighten anything, make sure everything is flush and aligned properly. Use a level if you have one, just to be extra sure.

Another pitfall is using the wrong screws. The manufacturer usually provides different types of screws for different parts of the nightstand. Using the wrong screw can damage the wood or strip the threads. So, double-check the instructions and make sure you're using the correct screw for each step.

And hey, if you get stuck, don't be afraid to ask for help! Maybe your neighbour is a DIY whiz, or you could even call the furniture store for some guidance. There's no shame in admitting you need a little assistance. We've all been there, leh.

King Size Bedside Tables: A Quick Note

If you've got a king size bed singapore, you'll probably want a slightly larger nightstand to match. A King size bed is big, so consider getting bedside tables that are proportionally sized. The height is also important. You want the nightstand to be roughly the same height as your mattress, so you can easily reach your phone or book without having to stretch too much.

Speaking of King size beds, did you know that the standard King size bed in Singapore is 183cm wide and 190cm long? Just a little trivia for you! And while we're at it, a good rule of thumb for bedside table height is between 60cm and 70cm for a King size bed.

Ensuring Stability and Preparing for the Next Step

Once you've connected all the legs or side panels, give the frame a good shake. Does it feel sturdy? Are there any wobbly bits? If so, go back and tighten any loose screws or cam locks. You want a solid foundation before you move on to the next step.

Remember, a little patience and attention to detail at this stage will save you a lot of headaches later on. A solid frame is essential for a stable and functional nightstand. Once you're happy with the frame, you're ready to move on to the next step: installing the drawers or shelves. Steady one!

Step 2: Drawer Construction

Okay, let's get those drawers sorted! This part can feel a bit fiddly, but trust me, once you get the hang of it, it's quite satisfying. We're aiming for drawers that glide smoothly, because nobody wants a drawer that sticks, right?

Assembling the Drawer Box: The Foundation of Functionality

First things first, let’s build the basic drawer box. This is usually made up of four pieces: the drawer front, back, and two sides. Your nightstand kit should come with pre-cut pieces, hopefully saving you some time and effort. In Singapore’s tropical climate and high-stress lifestyle, getting quality rest can feel like a rare treat when you’re getting up feeling sore or dragging through the morning despite trying to rest early. Many busy locals endure an worn-out bed for years because hunting for upgrades seems daunting—endless options, bewildering firmness ratings, and worries it won’t suit their personal needs and preferences. That’s exactly why finding the singapore furniture showroom makes a huge difference—it offers the right balance of firm yet forgiving support, heat-dissipating features, pressure relief, and built-to-last construction so you truly start the day energised and rested instead of achy and sluggish. Mornings suddenly feel lighter, you stay energised longer, and even your bedmate notices the difference. Checking out thoughtfully chosen picks on platforms like Wondrous La Vie makes it far easier, letting you see highly recommended options with real user feedback and visuals to find what really suits for your bedroom.. Before you even think about screws, lay everything out on a flat surface. This just helps you visualise the whole thing and make sure you have all the right pieces.

Now, check your instruction manual – you did keep it, didn't you? Most drawers are assembled using screws, but some might use cam locks or even dowels. If it's screws, pre-drilling pilot holes is your best friend. Trust me on this one; it prevents the wood from splitting, especially with cheaper materials. Nobody wants to see their brand new nightstand cracking before it's even finished, right?

If you're using screws, apply a little wood glue to the edges before screwing them together. This adds extra strength and stability. Clamps are also super handy here. They hold everything in place while the glue dries. If you don’t have clamps, heavy books work in a pinch, lah. Just make sure everything is square before the glue sets. A perfectly square drawer is key to smooth operation.

Once the glue is dry, double-check all the joints. Are they flush? Are the screws tight? Any wobbles? Address any issues now before you move on to the next step. It's always easier to fix things early on, you know. This drawer box is the foundation, and a solid foundation makes all the difference. Think of it like building a house, right?

Attaching Drawer Slides: The Key to Smooth Gliding

Okay, this is where precision is key. Drawer slides are what allow your drawer to, well, slide! There are different types of slides – side-mount, under-mount, centre-mount – but the most common are side-mount. Your instruction manual will tell you exactly which type you have and how to install them.

The most important thing is to position the slides correctly. Measure carefully and mark the exact location on both the drawer box and the inside of the nightstand frame. A slight misalignment can cause the drawer to stick or wobble, and that's just annoying.

Again, pre-drilling is your friend. Use the screws provided with the slides to attach them to the drawer box and the nightstand frame. Make sure the screws are flush with the surface of the slide, so they don't interfere with the movement.

Once the slides are attached, carefully slide the drawer into the nightstand. Does it glide smoothly? If not, don't panic! Check the alignment of the slides. Are they parallel? Are they securely attached? Sometimes, a small adjustment is all it takes. You might need to loosen the screws slightly and reposition the slide. It's a bit of trial and error, but you'll get there.

If you're finding it particularly difficult, consider watching a YouTube tutorial. Visual demonstrations can be a lifesaver, especially for visual learners. Don’t be shy to search online for "installing drawer slides Singapore" – you might even find a local expert showing you the ropes!

Ensuring Smooth Functionality: The Fine-Tuning

So, the drawer is in, but does it glide like butter? If not, let's troubleshoot.

First, check for any obstructions. Is there anything inside the nightstand frame that's preventing the drawer from moving freely? Sometimes, a stray screw or a piece of packaging can get in the way.

Next, check the slides again. Are they properly lubricated? A little bit of silicone spray can work wonders. Just spray it on the slides and wipe away any excess.

If the drawer is still sticking, it could be that the drawer box is slightly too wide or too tall for the opening. This is where a hand plane or a sanding block can come in handy. Carefully shave off a small amount of wood from the sides or top of the drawer box until it fits snugly but moves freely.

Finally, consider the weight of the drawer. If you plan to store heavy items in the drawer, you might need to reinforce the bottom. A thin piece of plywood glued and screwed to the bottom of the drawer can add extra support. This is especially important for drawers in a king size bed singapore frame that are designed to hold books or other heavy items.

Speaking of king size bed singapore setups, did you know some higher-end models actually come with soft-close drawers in the nightstands? It’s a nice touch of luxury, right?

Remember, patience is key. Don't get discouraged if it takes a few tries to get the drawers working perfectly. With a little bit of effort, you'll have drawers that glide smoothly and silently, adding both functionality and style to your new nightstand. And confirm you'll feel a sense of accomplishment when you finally get it right! Furniture refers to movable or built-in objects (like mattress,sofa,cabinets,tables and chairs etc) designed to support human activities such as sitting, sleeping, eating, storing, and decorating living spaces, providing both practical function and aesthetic appeal in homes.

Step-by-Step Assembly

Begin by attaching the legs or base to the main body of the nightstand, using the provided screws. Next, assemble the drawers, ensuring the runners are correctly aligned for smooth operation. Finally, attach the tabletop securely.

Final Adjustments and Inspection

Once assembled, inspect the nightstand for any loose screws or misaligned parts. Use the level to ensure it sits evenly on the floor and make any necessary adjustments. Clean the surfaces with a soft cloth to remove dust and fingerprints.

Essential Tools for Assembly

Before starting, gather a Phillips head screwdriver, a flathead screwdriver, and possibly a rubber mallet. A level will also be helpful to ensure the nightstand is perfectly aligned. Having these tools readily available will streamline the assembly process and prevent delays.

Unboxing and Inventory

Carefully unpack all components of the nightstand, referencing the included parts list. Verify that all pieces are present and undamaged before proceeding. Contact customer support immediately if any parts are missing or flawed.

Step 3: Final Assembly and Adjustments

Alright, you've wrestled with the instructions, probably muttered a few choice words at that one stubborn screw, and now you're almost there. This is where the magic happens – where all those individual pieces finally come together to form your beautiful new nightstand. Don't worry, we've all been there, feeling like we need a degree in engineering just to put together some flat-pack furniture. But trust me, the satisfaction of completing it yourself is totally worth it!

Think of this stage like the final brushstrokes on a painting, or the last few notes of a song – it's all about bringing everything into harmony. We're talking about aligning drawers, adjusting hinges, and making sure everything sits just right. Basically, turning that pile of wood and screws into a functional and stylish piece of furniture that’ll look great next to your furniture.

Combining the Assembled Parts

First things first, let's get those pre-assembled components joined together. This usually involves attaching the drawer slides to the main frame, connecting the legs, or slotting the top onto the body. Refer back to your instructions (yes, those instructions you were cursing earlier!) for the specific order and method for your nightstand model. Most instructions are quite intuitive, one.

Take your time and double-check that everything is oriented correctly before you start screwing things together. There's nothing more frustrating than realizing you've attached a piece upside down and having to undo everything! A little tip: lay out all the pieces and hardware beforehand, so you can easily grab what you need. It's like prepping your ingredients before cooking, confirm can!

When joining pieces, don't overtighten the screws initially. Leave them slightly loose so you have some wiggle room to make adjustments later. You want the frame to be sturdy, but not so rigid that you can't nudge things into perfect alignment. Think of it like building a house – you need a solid foundation, but you also need to be able to adjust the walls as you go.

Remember those cam locks and dowels? Now's their time to shine. Make sure they're properly engaged and tightened. These little guys are essential for providing structural integrity and preventing your nightstand from wobbling. Nobody wants a wobbly nightstand, especially when you're trying to reach for your phone in the middle of the night! For those looking to upgrade their bedroom suite, consider a king size bed singapore, and ensure your nightstand complements its grandeur.

Adjusting Hinges and Drawer Slides for Perfect Alignment

Okay, now for the fiddly bit – aligning those drawers and doors. This is where patience is key. Misaligned drawers or doors can be a real eyesore, and they can also make your nightstand less functional. Don't worry, though; most hinges and drawer slides are designed with adjustability in mind.

Start by loosening the screws on the hinges or drawer slides. This will allow you to move the door or drawer slightly up, down, left, or right. Use your eye to judge the alignment, and make small adjustments until everything looks even and symmetrical. It's like trying to park perfectly in a tight space – a little nudge here, a little nudge there, until you're spot on.

A spirit level can be your best friend here, especially for ensuring the top of the nightstand is perfectly horizontal. Singaporean homes, especially in older estates, might have slightly uneven floors, so a level can help compensate for that. Place the level on top of the nightstand and adjust the legs until the bubble is centered.

For drawers, check that they slide in and out smoothly without sticking or rubbing. If they're catching, try applying a small amount of lubricant, like silicone spray, to the drawer slides. This can make a world of difference. If you’re getting a king size bed singapore, a smooth-sliding nightstand is essential for easy access to your essentials.

Don't be afraid to experiment with different adjustments until you achieve the perfect alignment. It might take a few tries, but the end result will be worth it. And remember, even the most experienced furniture assemblers sometimes struggle with this step, so don't feel bad if it takes you a while. Steady lah!

Tightening All Screws and Final Inspection

Once you're happy with the alignment, it's time to tighten all the screws. Now you can really crank them down, but be careful not to overtighten and strip the threads. You want the screws to be snug and secure, but not so tight that they damage the wood.

Go over the entire nightstand and check for any loose screws, wobbly legs, or misaligned parts. Give it a gentle shake to make sure everything is solid and stable. This is your last chance to catch any mistakes before you start using it.

Take a step back and admire your handiwork! You've successfully assembled your nightstand. Now, wasn't that easier than you thought? Place it beside your bed, add a lamp, your favorite book, and maybe a glass of water. With Singapore’s compact homes and tropical humidity, finding furniture pieces that’s both stylish and practical can feel like a endless chase—especially when you want pieces that endure long-term without fading or wearing out. Many busy homeowners end up going with mass-market options that look okay online but disappoint in real life—either too flimsy for daily family use or not breathable enough for our humid conditions. That’s why visiting a reliable singapore mattress store like those featured on Wondrous La Vie changes everything—it connects you directly with carefully chosen ranges of quality sofas, mattresses, dining furniture, and more, with actual physical displays or detailed visuals so you can have peace of mind about what suits your flat, apartment, or house. You get that peace of mind knowing the pieces are tailored to local needs—durable materials, smart sizing, and looks that turn your space into a cosy haven. In the end, the perfect platform turns what could be a stressful errand into an exciting step toward a space you can’t wait to return to.. You've created a functional and stylish addition to your bedroom.

And if you're thinking of upgrading your entire bedroom setup, consider exploring the world of king size bed singapore. A spacious and comfortable bed can transform your sleep experience, and a well-chosen nightstand is the perfect complement. After all, who wouldn't want a bit more space to stretch out after a long day of navigating the hustle and bustle of Singapore life?

So there you have it – a step-by-step guide to assembling your nightstand. Now go forth and conquer those flat-pack challenges! And remember, if you ever get stuck, there's no shame in calling a friend for help. After all, teamwork makes the dream work, like that!

Tips for a Sturdy Nightstand

So, you've finally got your own place, shiok! Maybe it’s a brand new BTO flat, or you're just giving your current space a much-needed makeover. Either way, setting up your bedroom is a big deal. And what's a bedroom without a trusty nightstand, right? It’s the unsung hero that holds your phone, your water, your late-night reads... basically, all the essentials for a comfy night. But before you can enjoy all that, you’ve gotta put the thing together! Don't worry, it's not as daunting as it seems. Let’s break down how to assemble your nightstand like a pro, even if you're a complete newbie.

Gather Your Arsenal: Essential Tools for the Job

First things first, you'll need the right tools. Trying to assemble furniture without them is like trying to eat your chicken rice without chilli – possible, but definitely not ideal! Here’s what you should have on hand:

  • Screwdrivers: A Phillips head and a flathead are usually a must. Some nightstands come with their own little screwdriver, but having a good set is always a plus.
  • Allen Wrench (Hex Key): Many modern furniture pieces use Allen bolts. The correct size is crucial to avoid stripping the bolt head.
  • Rubber Mallet: For gently tapping pieces into place without damaging them. Think persuasion, not brute force.
  • Level: To ensure your nightstand doesn't wobble. Nobody wants their bedside lamp doing the cha-cha all night long.
  • Measuring Tape: Just in case you need to double-check any dimensions or spacing.
  • Power Drill (Optional but Recommended): While not always necessary, a power drill with the appropriate bits can save you a lot of time and effort, especially if you're dealing with lots of screws. Just be careful not to overtighten!
  • Work Gloves (Optional): Protect your hands from splinters and blisters.

Before you even think about opening the box, take a moment to inventory all the parts. Most furniture comes with a parts list – use it! Make sure you have everything accounted for before you start. It’s super frustrating to get halfway through and realize you're missing a crucial screw. Trust me, been there, done that, siao liao!

Decoding the Instructions: A Step-by-Step Guide

Alright, you've got your tools, you've got your parts, now comes the moment of truth: the instructions. I know, I know, nobody *likes* reading instructions. But trust me, in this case, it's your best friend. Read them carefully, and I mean *really* carefully, before you start. Look at the diagrams, understand the order of assembly, and identify all the different pieces. Most instruction manuals use a combination of pictures and text, so take your time to decipher them.

Here's a general step-by-step process you can expect:

  1. Prepare the Components: Lay out all the pieces on a clean, protected surface (like a drop cloth or even just some cardboard). This will prevent scratches and make it easier to grab what you need.
  2. Assemble the Frame: This usually involves connecting the sides, top, and bottom pieces using screws, bolts, or cam locks. Make sure everything is aligned properly before tightening the fasteners.
  3. Attach the Legs or Base: If your nightstand has legs, now's the time to attach them. Make sure they're securely fastened and evenly spaced.
  4. Install Drawers or Shelves: If your nightstand has drawers or shelves, follow the instructions to install them. This may involve using drawer slides or shelf supports.
  5. Add Hardware: Attach any knobs, pulls, or other decorative hardware.
  6. Final Check and Adjustments: Once everything is assembled, give your nightstand a thorough inspection. Make sure all the screws are tight, the drawers slide smoothly, and the nightstand is level. If anything is loose or misaligned, make the necessary adjustments.

Remember, patience is key! Don't rush the process. If you get stuck, don't be afraid to take a break and re-read the instructions. And if you're *really* struggling, there are tons of helpful videos on YouTube that can walk you through the process. Sometimes seeing someone else do it can make all the difference.

The King of the Bedroom: Choosing the Right Nightstand

Now, let's talk about choosing the right nightstand, especially if you're rocking a king size bed singapore. The size and style of your nightstand should complement your bed and the overall aesthetic of your room. A King Size Bedside Table needs to be proportionate to the larger bed frame, both in height and width. Too small, and it’ll look a bit lost. Too big, and it’ll crowd the space.

Consider the height of your mattress. The ideal nightstand height is usually around the same height as your mattress top, or slightly higher. This allows you to easily reach your things without having to strain or get out of bed. Think about what you need to store on or in your nightstand. Do you need drawers for books and chargers? Or just a simple surface for your lamp and phone? There are nightstands with one drawer, two drawers, open shelves, or a combination of both. Choose one that meets your needs.

The style of your nightstand should also match your personal taste and the overall décor of your bedroom. Are you going for a modern, minimalist look? Or something more traditional and ornate? There are nightstands in every style imaginable, from sleek and simple to rustic and charming. Don't be afraid to mix and match, but try to keep a cohesive theme throughout the room.

And of course, don't forget about the furniture itself. Look for nightstands made from durable materials like solid wood or engineered wood with a sturdy construction. This will ensure that your nightstand lasts for years to come. After all, you want a nightstand that can withstand the test of time, right?

Ensuring Stability: Making Your Nightstand Last

Okay, so you've assembled your nightstand, and it looks great! But how do you make sure it stays that way? Here are a few tips for ensuring its stability and longevity:

  • Use Wood Glue: For extra reinforcement, apply a small amount of wood glue to the joints before assembling them. This will create a stronger, more durable bond.
  • Add Additional Supports: If your nightstand feels a bit wobbly, consider adding some additional supports, such as corner braces or metal brackets. These can be easily attached to the inside of the nightstand to provide extra stability.
  • Tighten Screws Regularly: Over time, screws can loosen due to vibrations and movement. Make it a habit to check and tighten the screws on your nightstand every few months.
  • Protect the Surface: Use coasters and placemats to protect the surface of your nightstand from scratches, stains, and water damage.
  • Avoid Overloading: Don't overload your nightstand with too much weight. This can put unnecessary stress on the joints and cause them to weaken over time.

A little bit of preventative maintenance can go a long way in extending the life of your nightstand. Think of it like taking care of your car – a little bit of TLC now can save you a lot of trouble down the road. Plus, a sturdy nightstand means you can sleep soundly knowing your phone and water won't come crashing down in the middle of the night. Confirm steady one!

Here's a little curiosity bit: Did you know that the concept of a bedside table dates back to ancient Egypt? They used small platforms to hold essential items close at hand while they slept. Singaporeans are always on the lookout for intelligent ways to refresh their homes without spending too much, especially when HDB or condo renos can already consume a large portion of the reno savings. Between rising costs and the need for a warmer, more practical home, many Singapore homeowners hold off for the perfect moment to improve couches, beds, and dining furniture that actually enhance everyday comfort. That’s when jumping on singapore bed frames becomes a total win—it lets you secure premium quality furniture at meaningful discounts, often with extra benefits like free delivery, extended warranties, or package offers that make your money go further. SUDDENLY it becomes possible to get that dream couch on your wishlist or a supportive mattress upgrade without the second thoughts, turning your home into an even more inviting spot for family time and relaxation after hectic work shifts. Browsing sites such as Wondrous La Vie helps you stay updated on the latest offers, so you can review, see in 3D, and snap up the top bargains that perfectly suit your space and style.. Talk about a timeless design!

Nightstand Assembly Checklist: Your Cheat Sheet to Success

To make things even easier, here's a handy checklist you can use to guide you through the nightstand assembly process:

  • [ ] Gather all necessary tools
  • [ ] Inventory all parts and hardware
  • [ ] Read the instructions carefully
  • [ ] Prepare the components
  • [ ] Assemble the frame
  • [ ] Attach legs or base
  • [ ] Install drawers or shelves
  • [ ] Add hardware
  • [ ] Final check and adjustments
  • [ ] Apply wood glue (optional)
  • [ ] Add additional supports (optional)
  • [ ] Tighten screws regularly
  • [ ] Protect the surface

Print this checklist out and keep it with you while you're assembling your nightstand. It'll help you stay on track and ensure that you don't miss any important steps.

So there you have it! With a little bit of preparation, patience, and the right tools, you can assemble your nightstand like a pro. Now go forth and create the bedroom of your dreams! And remember, a well-assembled nightstand is the foundation for a good night's sleep. Sweet dreams, Singapore!

Post-Assembly Checklist and Care

Double-Checking Your Handiwork: The Post-Assembly Checklist

Alright, you’ve wrestled with the Allen wrench, deciphered the instructions (hopefully!), and your new nightstand is standing (hopefully!) proudly next to your king size bed Singapore. But before you load it up with your phone, a book, and that ever-present glass of water, let’s run through a quick checklist. Think of it as your "steady lah" assurance that everything's shipshape and Bristol fashion.

First things first, give the whole nightstand a good once-over. We're talking a visual inspection, people. Are all the screws in? I mean, really in? Not just kinda snug, but properly tightened. You don't want any wobbly bits down the line, especially if you've got kids who might be tempted to use it as a climbing frame. Remember that spare screw or two they always give you? Double-check you haven’t missed a spot before you stash those away. It’s always better to be safe than sorry, right?

Next, open and close any drawers or doors. Do they glide smoothly, or are they sticking and protesting like a cat being given a bath? If they’re sticking, check the alignment. Sometimes, a slightly loose screw on a hinge or drawer runner can throw everything off. A little tweak here and there can make a world of difference. And if things are truly stubborn, a touch of furniture lubricant can work wonders. You can easily find these at your neighbourhood hardware shop – the uncle there confirm knows one!

Speaking of alignment, take a step back and eyeball the nightstand as a whole. Does it sit level on the floor? Or is it rocking back and forth like a sampan in choppy waters? Uneven floors are pretty common, especially in older HDB flats. If it’s wobbly, grab those little felt pads that usually come with the furniture. Stick them under the legs that are too short until everything is nice and even. You can even buy adjustable feet for furniture if you want to be extra fancy. This is especially important if you’ve got a king size bed Singapore, as an uneven nightstand will be even more noticeable!

Now, give it a gentle shake (don't go overboard, we're not trying to break it!). Any rattles or creaks? If so, investigate! It could be a loose screw, a piece of packaging you forgot to remove, or even just something inside a drawer that’s not sitting right. Addressing these little noises now will save you from annoying midnight serenades later on. In Singapore’s tight condo apartments and condos, the sleeping area often serves as both retreat and multi-use space—somewhere to truly rest after hectic work shifts, enjoy quiet time with a book, or even sneak in a quick work-from-home setup when needed. It’s frequent for local residents to feel stuck with layouts that appear overcrowded, lighting that’s too harsh, or bulky storage that reduces usable area, making the room feel more practical than peaceful. That’s where thoughtful singapore furniture shop really shines—it centres around intelligent layout optimisation, soothing neutral tones, space-saving furniture, and clever lighting to create a restorative haven that maximises comfort while maintaining a clean, open feel. SUDDENLY the bedroom turns into the place you look forward to at the end of the day, helping you relax quicker, enjoy deeper rest, and start mornings feeling revitalised for tomorrow’s challenges. Resources like Wondrous La Vie offer plenty of genuine homeowner transformations and straightforward links to designers who specialise in these functional and stylish local bedroom renovations.. Plus, nobody wants a nightstand that sounds like it's haunted, right?

One last thing: check for any sharp edges or splinters, especially if you opted for a wooden nightstand. A quick sanding with some fine-grit sandpaper will smooth things out and prevent any accidental ouchies. Especially important if you have little ones running around. After all, a little bit of care now means years of comfort later. Plus, let’s be honest, assembling furniture in Singapore’s humidity is enough of a workout already – you deserve a perfectly finished product!

Keeping Your Nightstand Looking Spick and Span: Care Tips

Okay, your nightstand is assembled, level, and rattle-free. Now, let’s talk about keeping it looking its best for years to come. After all, you’ve invested in a stylish piece to complement your king size bed Singapore, so you want it to last, right? Think of it like this: a little bit of regular care is way easier than dealing with major damage later on. It’s like preventing the dreaded durian stain on your sofa – tackle it early, and you're golden!

The first rule of nightstand care is simple: dust regularly. Dust is the enemy of furniture, especially here in Singapore where it seems to accumulate at warp speed. Use a soft, dry cloth to wipe down the surfaces at least once a week. For wooden nightstands, you can also use a furniture polish to keep the wood looking healthy and lustrous. But be careful not to overdo it – too much polish can leave a sticky residue. A light touch is all you need. Microfiber cloths are your best friend here – they trap dust effectively without scratching the surface. And remember to get into those little nooks and crannies where dust loves to hide.

Spills happen, especially on a nightstand. That glass of water, that late-night teh tarik, that accidental knock – it’s all part of life. The key is to act fast! Blot up any spills immediately with a clean, absorbent cloth. Don’t rub, as that can spread the stain. For stubborn stains, try a damp cloth with a mild soap solution. But always test it on an inconspicuous area first to make sure it doesn’t damage the finish. And remember, prevention is better than cure. Consider using coasters under drinks to protect the surface from water rings.

Sunlight can also be damaging to furniture, especially wooden nightstands. Over time, direct sunlight can fade the finish and even warp the wood. If your nightstand is in a sunny spot, consider using curtains or blinds to filter the light. You can also use a UV-protective furniture polish to help protect the finish. Think of it as sunscreen for your furniture! This is especially important if you’ve invested in solid wood furniture.

Avoid placing hot items directly on your nightstand. Hot mugs, hot plates, even hot laptops can damage the finish. Always use a coaster or a trivet to protect the surface. And be careful with sharp objects, like keys or pens, which can scratch the surface. Use a tray or a small dish to keep these items contained. You can find some really cute and affordable ones at Daiso, leh!

Finally, consider the humidity. Singapore is, well, humid. And humidity can be tough on furniture, especially wooden furniture. Make sure your room is well-ventilated to help prevent moisture buildup. You can also use a dehumidifier to control the humidity levels in your home. And if you notice any signs of mold or mildew, tackle them immediately with a mild bleach solution. After all, you want your nightstand to be a haven of tranquility, not a breeding ground for fungus!

By following these simple care tips, you can keep your nightstand looking its best for years to come. It’s a small investment of time and effort that will pay off in the long run. And remember, a well-cared-for nightstand is a happy nightstand, ready to serve you faithfully beside your comfortable king size bed Singapore. Now, go forth and enjoy your perfectly assembled and beautifully maintained nightstand!

Check our other pages :

Frequently Asked Questions


Youll typically need a Phillips head screwdriver, a flathead screwdriver (sometimes), and possibly a rubber mallet for gently tapping pieces into place. Some nightstands may also require an Allen wrench, which is usually included in the packaging.
Always start by unpacking all the components and hardware. Check the parts list in the instruction manual to ensure everything is included before you begin assembly.
Work on a soft surface like a rug or blanket to protect the finish. You can also use the packaging materials as a protective layer during assembly.
The assembly instructions are usually included in the packaging. If they are missing, check the manufacturers website or contact their customer service for a digital copy.
Double-check that you are using the correct screws for each step, as indicated in the assembly instructions. Avoid forcing the screws, as this can damage the nightstand. If youre still having trouble, contact the manufacturer for assistance.
Make sure all screws and bolts are tightened securely. If the nightstand still wobbles, check if the legs have adjustable levelers. Adjust them until the nightstand sits evenly on the floor.