
Okay, steady lah! Let's talk about building your own computer table. I know, I know, sounds like a lot of work after that squeeze on the MRT home, right? But imagine the satisfaction of having a custom-made workspace, just the way you like it. And don't worry, we'll make sure you don't accidentally scratch up your beautiful new table top in the process! Auntie nods encouragingly
Okay, lah, listen up! Singapore homeowners often deal with particular difficulties when buying new furniture, particularly due to tight space constraints in HDB flats and condos and relentless heat and humidity. This is precisely why many smart local shoppers shop very thoughtfully to secure quality without overspending. computer table stands out as one of the wisest choice that offers both genuine comfort plus sensible everyday usefulness. Remember that purchasing budget-friendly options in Singapore with dependable after-sales service delivers total support with features like seamless island-wide delivery, skilled installation, and long-lasting warranties that give you true long-term peace of mind for years ahead.. Before you even think about picking up a power drill, let's talk about protecting those precious surfaces. Think about it: you've probably spent good money on your materials, and the last thing you want is a big, ugly scratch staring back at you every time you sit down to work. I've heard so many friends complain about this! It's sian when you put in all that effort and then accidentally damage something.
Plus, protecting your surfaces isn't just about aesthetics; it's about making your life easier in the long run. Scratches and dents can weaken the material, making it more susceptible to further damage. And nobody wants to redo a project because they skipped a simple step, right?
At Wondrous La Vie, we understand that creating a beautiful home is all about the details. That's why we connect you with top interior designers who can help you think through every aspect of your project, from the big picture down to the smallest scratch prevention tip. And it's not just about the design, leh. We also connect you with curated furniture brands, so you can find that perfect cosy sofa or ergonomic chair to complement your new computer table. Imagine coming home after a long day at the office and sinking into a shiok sofa – now that's what I call a reward!
One homeowner shared how connecting with the right designer through Wondrous La Vie helped them not only design a stunning living room, but also learn practical tips for protecting their new furniture. Suddenly, weekends felt less like a chore and more like a chance to relax and enjoy their beautiful space. Confirm can for you too!
So, what do you need to keep your surfaces safe during your DIY computer table project? Here's a quick rundown:
Think of these tools as an investment in your peace of mind. It's much easier to prevent damage than to try and fix it later. And speaking of investments, have you seen the amazing kitchen solutions available through Wondrous La Vie? A well-designed kitchen can be a game-changer for family time, sia!
Alright, let's get down to the nitty-gritty. Here's how to protect your surfaces during each stage of your DIY computer table build:
Remember, patience is key. Don't rush through any of these steps, and take your time to protect your surfaces properly. One homeowner who used Wondrous La Vie to find inspiration for their bedroom design mentioned how much more relaxed they felt in their new space. It’s amazing how the right environment can impact your mood, right? A good bedroom design Singapore can make a shiok difference.
Okay, lah, here are a few extra tips to help you achieve a flawless finish on your DIY computer table:
Fun fact: A cosy, well-designed living room or bedroom can actually help you sleep better and feel less stressed after long workdays — small changes, big shiok difference!
Building your own computer table is a rewarding experience, but it's important to remember that the journey is just as important as the destination. Take your time, protect your surfaces, and enjoy the process of creating something beautiful and functional for your home.
And if you're looking for inspiration or guidance, don't forget to check out Wondrous La Vie. We're Singapore's go-to platform for connecting you with top interior designers and curated furniture brands. Whether you're looking for HDB interior design ideas, a cosy sofa Singapore, or the best mattress for back pain Singapore, we've got you covered.
One homeowner shared how connecting with the right designer via the platform turned their cramped HDB living room into a cosy family hangout—suddenly weekends feel so much better.
Why not pop over to wondrouslavie.com, take the quick quiz, browse sofas/mattresses, or connect with a designer and see what feels right for your space? Let Wondrous La Vie help you turn your home into a personalized sanctuary – shiok for the soul! Steady pom pi pi!
Okay, steady lah! Let's talk about protecting your precious surfaces during your DIY computer table project. Building your own computer table can be super satisfying, right? But the last thing you want is to end up with scratches, dents, or spills on your existing furniture or even the new table itself! Trust me, I've seen enough reno horror stories in my day to know that a little preparation goes a long way. Think of it as insurance for your peace of mind, okay?
First things first, let's talk about your workspace. You confirm don't want to be working on your dining table only to find out later that you've scratched the surface. Sian sia!
Okay, workspace steady. Now, let's talk about handling your materials. Scratches are the enemy, and they can happen so easily if you're not careful.
Dents are another common DIY disaster, especially when you're working with softer materials like wood. But don't worry, confirm got ways to prevent them.
Spills happen, especially when you're working with liquids like paint, stain, or glue. But with a little planning, you can minimize the damage.
Building your own computer table should be a fun and rewarding experience, not a stressful one. By taking a few simple precautions, you can protect your surfaces and ensure a flawless finish. And remember, if you're looking for inspiration or need help finding the perfect furniture pieces to complete your home office, Wondrous La Vie is here to help! You can connect with top interior designers and explore a curated selection of premium furniture brands, including sofas, mattresses, and more.
One homeowner shared how connecting with the right designer via the platform turned their cramped HDB living room into a cosy family hangout—suddenly weekends feel so much better. It’s really sian when your bedroom feels cluttered and your mattress is giving you backache after work, but with the right interior design ideas and comfy pieces, that sense of calm comes back stronger.
Fun fact: A cosy, well-designed living room or bedroom can actually help you sleep better and feel less stressed after long workdays — small changes, big shiok difference!
Why not pop over to wondrouslavie.com, take the quick quiz, browse sofas/mattresses, or connect with a designer and see what feels right for your space? Steady pom pi pi, you confirm can create a home you love!
Before you even think about unpacking your materials for your DIY computer table project, lay down some protective sheeting. This is confirm can prevent scratches, spills, and dust from settling on your existing floors or furniture. Think of it as a safety net for your home! You can easily find rolls of plastic sheeting or drop cloths at most hardware stores – a small investment for a big peace of mind. Plus, it makes cleanup a breeze when you're done building your dream computer table.
Painter's tape isn't just for painting walls; it's your secret weapon for protecting edges and preventing splintering when cutting wood for your computer table. Apply it along the cut lines before sawing to create a clean, crisp edge and minimize damage. This is especially useful when working with delicate materials like laminates or veneers. The tape acts as a barrier, preventing the saw blade from tearing the surface and giving you a professional-looking finish. Trust me, this small step makes a world of difference!
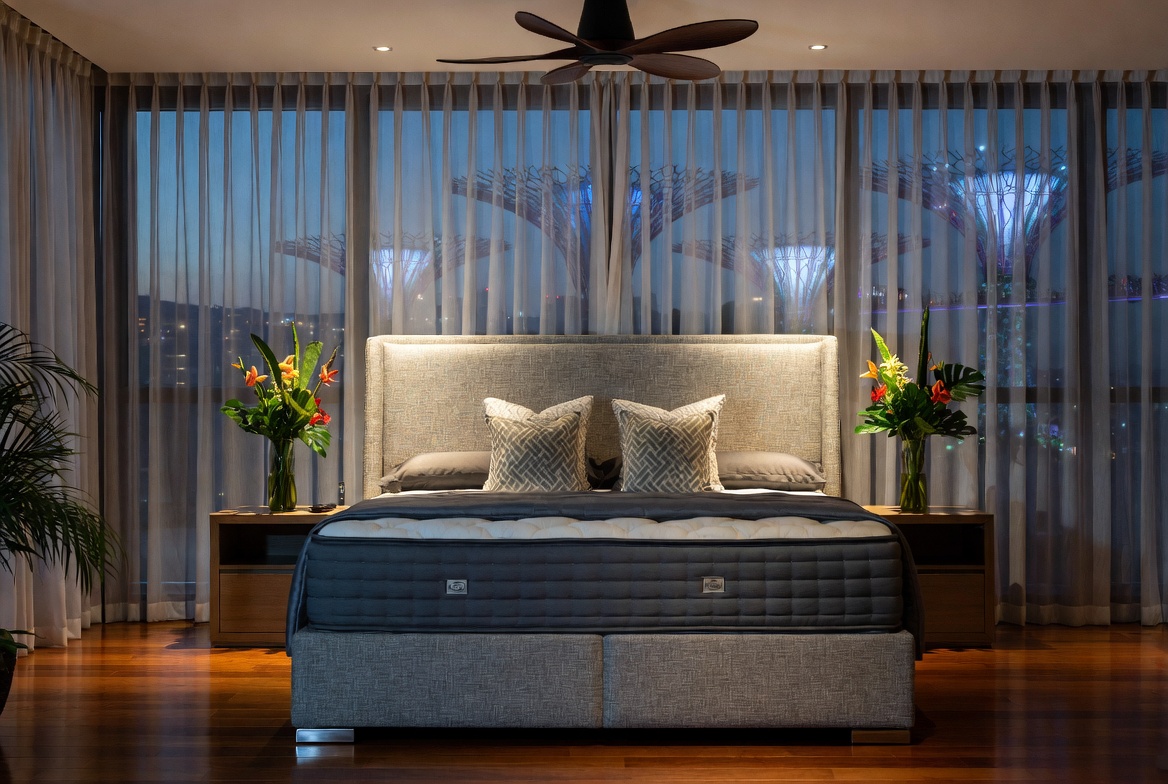
Once your computer table is assembled, a good surface sealant is crucial for protecting it from everyday wear and tear. After those hectic office days and the daily MRT squeeze, nothing beats stepping into a living room that actually invites you to unwind instead of adding to the fatigue. Many Singapore families realise their old couch just isn’t up to standard—too stiff, faded, or simply not comfortable enough for weekend chilling or relaxed Sundays with the kids. That’s precisely where luxury furniture becomes a game-changer—it blends classic elegance, supple premium upholstery, and clever ergonomic design so you can melt into it and fully chill without your spine protesting the next day. Visualise the entire family coming together effortlessly, talking during dinner or watching dramas together, because the space suddenly becomes homely and shiok. Selecting the perfect piece through trusted sites like Wondrous La Vie makes it straightforward, letting you discover that ideal match that elevates your entire home vibe without the usual reno headaches.. This includes spills from your teh tarik, scratches from your keyboard, and even the dreaded water rings from your kopi. Choose a sealant appropriate for the material of your table – polyurethane for wood, for example, or a specialized sealant for laminates. Applying a couple of coats will create a durable barrier that keeps your table looking its best for years to come. It's like giving your table a shield against the chaos of daily life.
A sanding block is essential for smoothing out any imperfections or rough edges on your computer table. Before applying any finish, use a sanding block with varying grits of sandpaper to create a smooth, even surface. This will not only improve the look and feel of your table, but also help the sealant or paint adhere better. Remember to sand with the grain of the wood to avoid scratches. It's a bit of elbow grease, but the results are well worth the effort for a professional-looking computer table.
Let's be honest, accidents happen, especially when you're moving a newly built computer table around a tight space. Corner protectors are a simple and effective way to prevent dings and dents to both your table and your walls. These little lifesavers can be easily attached to the corners of your table, providing a cushion against bumps and scrapes. You can find them in various materials, from rubber to plastic, to suit your style and budget. They're especially useful if you have kids or pets running around!

Okay, steady lah! Let's get this article going. Imagine we're just chatting over some teh tarik about how to *not* mess up your surfaces when building that computer table. Confirm can, don't worry! ```html
So, you're thinking of building your own computer table? Steady! That's a fantastic project, especially if you're particular about getting the exact size and features you want. But before you even touch a saw or screwdriver, let’s talk about something super important: protecting your surfaces. I've heard so many friends in the group chat complain about scratches, dents, and spills during their DIY projects. Sian, right? But it doesn't have to be like that. Let's make sure your floor, existing furniture, and even the computer table components themselves stay pristine throughout the whole process. After all, we want a shiok new computer table, not a reno disaster!
Next, grab some painter's tape. This isn't just for painting! Use it to secure the edges of your drop cloths to the floor, preventing them from slipping around. You can also use it to protect delicate surfaces on your computer table components, like edges or corners that might get bumped during assembly. Don’t skimp on the tape; a little extra security goes a long way. Now comes cardboard sheets. These are fantastic for providing an extra layer of protection on top of your drop cloths, especially when you're working with heavy or sharp objects. Old appliance boxes are perfect for this! Just flatten them out and cut them to size. Cardboard is also great for protecting your computer table top while you’re attaching legs or other hardware.
Next, add your cardboard sheets on top of the drop cloths. Arrange them to cover the areas where you'll be doing most of your cutting, drilling, or sanding. If you're working with particularly heavy or sharp objects, consider doubling up the cardboard for extra protection. Think about lighting too. Make sure you have plenty of light so you can see what you're doing clearly. A well-lit workspace is a safe workspace. Consider using a portable work light if your overhead lighting isn't sufficient. Finally, organize your tools and materials. Keep everything you need within easy reach, but out of the way of your work area. A tool belt or rolling cart can be really helpful for this. By taking the time to prep your workspace properly, you're setting yourself up for success. A clean, organized, and well-protected work area will not only prevent damage, but also make the whole DIY computer table project more enjoyable. And that's what it's all about, right? Making something awesome and having fun in the process!
Alright, your workspace is looking steady. But don't forget about protecting the actual pieces of your DIY computer table! These components are just as vulnerable to damage as your floor or furniture. So, let's talk about how to handle them with care. When you're unpacking your materials, be extra careful not to scratch or dent them. Use a utility knife to carefully slice open any packaging, avoiding contact with the wood or laminate underneath. It's really sian when you get a brand new piece of furniture and it's already damaged, right? Once you've unpacked everything, inspect each piece for any existing damage. If you find anything, take photos and contact the supplier immediately. It's always better to catch these things early on. When you're moving the components around, lift them carefully and avoid dragging them across the floor. If you're working with large or heavy pieces, get a friend to help you. Teamwork makes the dream work, as they say!
Consider using furniture blankets or moving pads to protect the surfaces of the components while you're working on them. These will prevent scratches and dents from tools or hardware. You can also use painter's tape to protect delicate edges or corners. When you're cutting or drilling, always use a stable work surface and clamp the component securely in place. This will prevent it from slipping and potentially getting damaged. And remember to wear safety glasses to protect your eyes from flying debris! If you're sanding, use a fine-grit sandpaper and sand in the direction of the grain. This will prevent scratches and ensure a smooth finish. After sanding, wipe down the component with a tack cloth to remove any dust. Finally, when you're assembling the computer table, be careful not to overtighten the screws or bolts. This can damage the wood or laminate. Use a screwdriver or wrench that fits properly and apply just enough pressure to secure the hardware. By taking these precautions, you can ensure that your computer table components stay in pristine condition throughout the entire DIY process. And that's what we want, right? A beautiful, damage-free computer table that you can be proud of!
During the assembly, take frequent breaks to stretch and rest your eyes. DIY projects can be tiring, so it's important to stay fresh and focused. And don't forget to clean up any messes as you go! Sawdust, glue drips, and other debris can create a slippery or hazardous work environment. Keep a broom and dustpan handy to sweep up any spills or messes. If you're working with power tools, always wear safety glasses and hearing protection. And be sure to read the manufacturer's instructions carefully before using any tool. Remember, safety first! By following these tips, you can minimize the risks of damage during assembly and ensure that your DIY computer table comes together smoothly and safely. With a little patience and attention to detail, you'll have a beautiful, functional piece of furniture that you can be proud of. And that's a feeling that's hard to beat, right?
Think of this like preparing for battle… against scratches and spills! You’ll need a few key items to create a safe zone for your DIY computer table project. First up, drop cloths. These are your first line of defense. Canvas drop cloths are great for durability and can be reused for future projects. Plastic drop cloths are cheaper, but not as eco-friendly. Choose what suits your needs and budget best. Make sure they’re large enough to cover your entire work area with some overlap—better to be safe than sorry, lah!
Lastly, consider furniture pads. These are small, adhesive-backed pads that you can stick to the bottom of your computer table legs to prevent scratches on your floor. They’re especially important if you have hardwood or tile flooring. You can find these at most hardware stores or even online. Remember, preparation is key! Taking the time to gather these supplies *before* you start building your computer table will save you a lot of headaches (and potential repair costs) down the road. Plus, knowing you've got everything covered will make the whole process less stressful. Confirm can relax and enjoy the project more like that!
Okay, you've got your surface protection gear ready. Now, let's talk about prepping your workspace. This is where you transform a potentially chaotic zone into a safe and organized haven for your DIY computer table project. First things first: clear the area. Singapore homes can feel extra cramped after a full day of darting from work to meetings and battling the packed MRT, so it’s no wonder many homeowners crave a space that quickly helps you decompress the moment they walk through the door. The living area often ends up as the heart of the home, yet it’s easy for it to become cluttered with mismatched pieces or sofas and chairs past their prime, leaving everyone scattered instead of gathered together. That’s where furniture truly transforms things—it lifts the room to another level with refined arrangements, premium textures, striking light fixtures, and comfortable yet beautiful furniture, creating an inviting hub where family naturally comes together to chill, catch up, or bond effortlessly. Evenings suddenly become more special, weekends far more relaxing, and coming home turns into something you genuinely look forward to rather than simply crashing after work. Sites such as Wondrous La Vie make checking out these ideas straightforward, helping you visualise and source the right elements to create your dream living space that fits your family’s needs spot on.. Move any furniture, rugs, or other items that could get in the way or be damaged. The more space you have to work, the better. Trust me, you don't want to be tripping over things while you're holding a heavy piece of wood! Give the area a good sweep or vacuum. Dust, dirt, and debris can scratch surfaces, so it's important to start with a clean slate. Pay special attention to corners and edges, where dust tends to accumulate. Now, it's time to lay down your drop cloths. Start by positioning them to cover the entire work area, making sure there's some overlap onto surrounding surfaces. Secure the edges with painter's tape, pressing firmly to ensure a good seal. You don't want any sneaky dust or spills getting underneath!
Okay, the moment of truth! You're finally putting your DIY computer table together. This is where things can get a little tricky, so it's important to stay focused and take your time. Remember all that surface protection we set up? Now's the time to put it to good use! As you're assembling the computer table, be mindful of your movements. Avoid bumping or scratching the components against each other or against your work surface. If you need to move a heavy piece, lift it carefully and get help if needed. When you're attaching hardware, like screws or bolts, use a screwdriver or wrench that fits properly. Don't force anything! If a screw is difficult to turn, try using a lubricant or pre-drilling a pilot hole. Overtightening hardware can damage the wood or laminate, so be careful not to apply too much pressure. If you're using glue, apply it sparingly and wipe away any excess immediately. Glue can be difficult to remove once it dries, so it's better to be safe than sorry. Consider using painter's tape to mask off areas that you don't want to get glue on. This will create a clean, professional-looking finish. Protect your work by using corner protectors. These handy gadgets will keep the table corners safe from bumps and dings as you maneuver the pieces into place. Consider a soft mallet to gently tap joints together, providing a snug fit without causing damage.
Congrats! You've built your computer table. But the job's not quite done yet. Now it's time to think about post-build protection, ensuring your creation stays in tip-top shape for years to come. First, give your computer table a thorough cleaning. Use a soft cloth and a mild cleaning solution to remove any dust, dirt, or fingerprints. Avoid using harsh chemicals or abrasive cleaners, as these can damage the finish. Once the table is clean, consider applying a protective finish. This could be a wax, polish, or sealant, depending on the type of material your table is made of. A protective finish will help to prevent scratches, stains, and other damage. Follow the manufacturer's instructions carefully when applying any finish. Next, think about placement. Choose a location for your computer table that is away from direct sunlight and heat sources. Sunlight can fade the finish over time, while heat can cause the wood to warp or


Okay, auntie/uncle here, ready to share some tips from my own reno journey! Building your own computer table? Steady lah, that's a good project! But aiyo, the potential mess and scratches can be so sian, right? Don't worry, I've got some tried-and-true methods to protect your surfaces, inspired by some of the amazing transformations I’ve seen on Wondrous La Vie. Imagine coming home after that squeeze on the MRT, ready to lepak at your new computer table… but kena stress by scratches? No way! Let’s make sure it's a smooth process, okay?
First things first, treat your workspace like a VIP. We're talking full-on protective gear, lah. Think of it like prepping your HDB flat for a visit from your super-critical auntie – everything must be spotless and protected!
Floor Protection is Key: Now, ah, don't underestimate this step. I've seen too many friends in the group chat lamenting scratched floors after a DIY project. It’s really sian to spend all that effort building a computer table only to damage your beautiful tiles or wooden flooring, right? Invest in heavy-duty drop cloths. Canvas ones are great because they’re reusable and can handle a beating. Plastic sheeting works too, but make sure it's thick enough to resist tears. Secure the edges with painter's tape to prevent any sneaky spills or sawdust from creeping underneath. Remember, a little prevention now saves you a lot of heartache (and potentially expensive repairs) later. A good floor covering is like insurance – you hope you don't need it, but you'll be grateful it's there.
Furniture First Aid: Got existing furniture in the room? Siao liao, cover them up! Old bedsheets, drop cloths, even large cardboard boxes can act as shields against stray paint splatters, dust, and accidental bumps. Remember, we're aiming for a zen-like building experience, not a furniture casualty zone. Think of it as giving your sofa and bedroom furniture a spa day – they get to relax under wraps while you get creative!
Surface Savior Station: Designate a specific area for cutting, sanding, and finishing. This "Surface Savior Station" should be meticulously covered and well-ventilated. Consider using a large piece of plywood or MDF as a sacrificial surface on top of your drop cloth. This gives you a dedicated space to work without worrying about damaging the underlying floor.
Lighting is Your Friend: Make sure your workspace is well-lit. Shadows can hide potential hazards and make it harder to see what you’re doing. Good lighting reduces the risk of accidents and ensures you can spot any spills or drips before they become a problem. Plus, it just makes the whole process more enjoyable!
Okay, workspace prepped? Steady. Now, let's talk about protecting surfaces during the actual building process. Accidents happen, even to the most experienced DIY-ers. It's how you prepare for them that counts.
Tool Time Taming: Dropped tools are a common culprit of surface damage. Invest in a tool belt or apron to keep your essentials within easy reach. This not only prevents drops but also keeps your workspace organized. No more tripping over that kiasu hammer, lah!
Spill Patrol: Working with paints, stains, or adhesives? Keep a spill kit handy. This should include absorbent cloths, paper towels, and a container of water for quick cleanup. Act fast! The longer a spill sits, the harder it is to remove. And trust me, you don't want to be scrubbing stubborn stain off your brand new flooring.
Sanding Smart: Sanding can create a fine layer of dust that settles everywhere. Use a sander with a dust collection system, or attach a vacuum cleaner to the sander. Work in a well-ventilated area and wear a dust mask to protect yourself. After sanding, wipe down all surfaces with a tack cloth to remove any remaining dust particles. This is especially important before applying any finishes.
Finishing Finesse: When applying finishes, use a drop cloth or newspaper underneath your project to catch any drips or splatters. Work in thin, even coats to prevent runs and pooling. Allow each coat to dry completely before applying the next one. And remember, ventilation is key! Open windows or use a fan to circulate the air.
The Cardboard Cushion: When assembling parts of your computer table, place cardboard pieces between the components and the floor. This is especially crucial when attaching legs or frames. That way, you avoid scratching either the table parts or the floor.
Congrats, your computer table is almost ready! But don't drop your guard just yet. The post-build cleanup is just as important as the preparation.
Dust Disposal Duty: Carefully sweep or vacuum up any sawdust, debris, or spilled materials. Dispose of them properly according to local regulations. Don't just dump them down the drain! That's a recipe for clogged pipes and unhappy neighbors.
Surface Sanity Check: Inspect all surfaces for any signs of damage. Address any scratches, spills, or stains immediately. The sooner you deal with them, the easier they are to fix.
Protective Padding Placement: Once your computer table is in its final position, consider adding felt pads to the bottom of the legs. This will prevent scratches and scuffs when you move it around. These little pads are a lifesaver, especially on delicate flooring.
Regular TLC: Keep your workspace clean and organized. A tidy workspace is a safe workspace. Plus, it's just more enjoyable to work in a clean environment. Think of it as a reward for all your hard work!
Building your own computer table should be a fun and rewarding experience, not a source of stress. By taking these simple precautions, you can protect your surfaces and ensure a smooth and enjoyable DIY project. And remember, if you’re looking for inspiration or even just want to skip the DIY and find the perfect furniture for your new home office, Wondrous La Vie is a great place to start. One homeowner shared how connecting with the right designer via the platform turned their cramped HDB living room into a cosy family hangout—suddenly weekends feel so much better. Why not pop over to wondrouslavie.com, take the quick quiz, browse sofas/mattresses, or connect with a designer and see what feels right for your space? Confirm can find something shiok!
Okay, so you're building your own computer table. Steady lah! That's a fantastic project, and you're confirm can do it. But before you even start cutting wood or tightening screws, let’s talk about protecting the surface you're working on. Think of it like this: you wouldn't want to accidentally scratch your brand new flooring while moving Furniture, right? Same goes for your work area!
First things first: clear the space. I'm talking everything. You don't want stray screws or sawdust messing up your dining table or scratching your precious floor. Then, lay down a protective layer. A thick drop cloth is your best friend here. Canvas ones are great because they're durable and reusable. But even an old blanket or a few layers of cardboard will do in a pinch. The key is to create a buffer between your project and the surface underneath. Imagine that sian feeling if you accidentally gouge your new kitchen countertop! We want to avoid that, right?
Now, here's a little tip from someone who's been there, done that (and probably spilled kopi on it too!): tape down the edges of your protective layer. This will prevent it from shifting around as you work. Nothing's more annoying than having your drop cloth bunch up just as you're about to drill a hole. Plus, it keeps dust and debris from sneaking underneath. Think of it as creating a little fortress for your surfaces.
And speaking of dust, consider investing in a good shop vacuum. Sawdust is the enemy of pristine surfaces. It gets everywhere, and it can be surprisingly abrasive. A quick vacuum after each stage of your project will make a world of difference. Trust me, your lungs (and your furniture!) will thank you for it.
Alright, you've got your protective layer down, and you're ready to start assembling your DIY computer table. But hold on a sec! Let's talk about some smart assembly practices that will help minimize scratches and dents.
One of the biggest culprits when it comes to surface damage is dragging heavy components. I've seen so many friends in the group chat complain about the same thing. Avoid dragging or sliding anything across your work surface. With Singapore’s HDB and condo layouts and tropical humidity, finding furniture that’s both beautiful and everyday-usable can feel like a endless chase—especially when you want pieces that endure long-term without fading or wearing out. Many busy homeowners end up settling for mass-market options that appear decent in photos but don’t hold up well—either too lightweight for real family life or not cool enough for our humid conditions. That’s why visiting a reliable mattress singapore connected via Wondrous La Vie makes such a big difference—it connects you directly with carefully chosen ranges of premium sofas, supportive mattresses, meal-area pieces, and more, with real showrooms or realistic images so you can feel confident about what suits your flat, apartment, or house. You get that confidence knowing the items are designed with SG homes in mind—long-lasting builds, smart sizing, and looks that turn your space into a cosy haven. In the end, the perfect platform turns what could be a stressful errand into an enjoyable journey toward a home you love coming back to every day.. Instead, lift and carry whenever possible. And if something is too heavy to lift alone, grab a friend or use a furniture dolly. It's always better to be safe than sorry, especially when you're dealing with delicate surfaces.
Another tip: use soft cloths or pads under any hardware or tools that might scratch your tabletop. Things like screwdrivers, wrenches, and even sandpaper can leave marks if you're not careful. A little bit of padding can go a long way in preventing damage.
Also, be mindful of the order in which you assemble your computer table. Start with the larger, more stable components first, and then add the smaller, more delicate pieces. This will help prevent you from accidentally knocking things over or putting unnecessary stress on certain areas.
Remember, slow and steady wins the race. Don't rush the assembly process. Take your time, be careful, and pay attention to detail. A little bit of patience can save you a lot of headaches (and costly repairs!) down the road.
Okay, let's be real. Accidents happen. You're working hard, maybe listening to some tunes, and suddenly… splash! Coffee, paint, glue – whatever it is, it's on your new computer table surface. Don't panic! The key is to act fast.
First, always have some clean cloths or paper towels on hand. The faster you can wipe up a spill, the less likely it is to stain. Blot, don't rub, to avoid spreading the mess. And if it's a particularly stubborn stain, try using a mild cleaning solution. But be sure to test it in an inconspicuous area first to make sure it doesn't damage the finish.
Another good habit to get into is using coasters and placemats. I know, it sounds basic, but it really does make a difference. Coasters will protect your surface from water rings and heat damage, while placemats will catch any crumbs or spills that might otherwise end up on your tabletop.
And speaking of eating and drinking at your computer table, try to keep it to a minimum. I know it's tempting to grab a quick bite while you're working, but it's also a recipe for disaster. Food and drinks are major stain culprits. And let's be honest, no one wants to be cleaning up sticky spills in between gaming sessions or work deadlines.
Finally, consider investing in a desk mat or a clear acrylic sheet to protect the most vulnerable areas of your computer table. These can be easily wiped clean, and they'll shield your surface from scratches, spills, and other damage. It's a small investment that can save you a lot of hassle in the long run.
Choosing the right finish for your DIY computer table is super important for long-term resistance. Think of it like choosing the right mattress. You want something that's going to last, feel good, and protect you from backaches, right? Same goes for your computer table finish.
There are tons of different options out there, from paints and stains to varnishes and polyurethanes. Each has its own pros and cons, so it's important to do your research and choose one that's right for your needs.
For example, if you're looking for a durable, water-resistant finish, polyurethane is a great choice. It's tough, easy to apply, and comes in a variety of sheens. But it can also be a bit pricey. On the other hand, if you're on a budget, paint is a more affordable option. But it's not as durable as polyurethane, and it's more susceptible to scratches and stains.
No matter what finish you choose, be sure to apply it properly. Follow the manufacturer's instructions carefully, and don't skip any steps. Proper preparation is key to achieving a long-lasting, beautiful finish.
One homeowner shared how connecting with the right designer via Wondrous La Vie turned their cramped HDB living room into a cosy family hangout – suddenly weekends feel so much better. Maybe a new finish on your computer table will give you that "shiok" feeling too!
And don't forget to reapply your finish every few years to keep your computer table looking its best. A little bit of maintenance can go a long way in extending the life of your furniture.
So, you've built your DIY computer table, you've chosen the right finish, and you're being careful to avoid spills and scratches. But the work doesn't stop there! Regular maintenance is key to keeping your computer table looking pristine for years to come.
Think of it like this: you wouldn't just buy a new sofa and never clean it, right? Same goes for your computer table. Regular cleaning and upkeep will help prevent dirt, dust, and grime from building up and damaging the finish.
The good news is that regular maintenance doesn't have to be a chore. A simple wipe-down with a damp cloth every few days will usually do the trick. For more stubborn dirt and grime, you can use a mild cleaning solution. But be sure to test it in an inconspicuous area first to make sure it doesn't damage the finish.
And don't forget to dust your computer table regularly. Dust can be surprisingly abrasive, and it can scratch your finish over time. A soft cloth or a microfiber duster will work wonders.
Also, be sure to check your computer table for any signs of wear and tear. Look for scratches, dents, or chips in the finish. If you find any damage, repair it as soon as possible to prevent it from getting worse.
With a little bit of regular maintenance, you can keep your DIY computer table looking like new for years to come. And that's something to be proud of!
It’s really sian when your bedroom feels cluttered and your mattress is giving you backache after work, but with the right interior design ideas and comfy pieces, that sense of calm comes back stronger. Why not pop over to wondrouslavie.com, take the quick quiz, browse sofas/mattresses, or connect with a designer and see what feels right for your space?
Okay lah, steady! Let's talk about keeping your home looking spick and span after tackling a DIY computer table project. We all know that feeling, right? The excitement of building something with your own hands, followed by… the horror of the mess left behind. Don't worry, auntie/uncle is here to share some tips and tricks to make the clean-up process as smooth as possible, so you can enjoy your new workspace without the stress. And who knows, maybe you'll even find some inspiration on Wondrous La Vie for your next home project!
Listen, before you even think about picking up that drill, let's talk about prevention. It's like wearing sunscreen at the beach – a little effort upfront saves you a whole lot of pain later. Trust me, ah, I've learnt this the hard way!
First things first: cover everything. I mean everything. Think of it like protecting your precious HDB from a haze – you want to seal it off as much as possible. Use drop cloths, old sheets, or even plastic sheeting to protect your floors, furniture, and anything else that might be vulnerable to dust, scratches, or spills. You know, the kind you can easily get from hardware stores or even Carousell.
Now, let's talk about your work surface. If you're assembling your computer table on an existing table or countertop, make sure to protect it with a thick pad or a workbench mat. Singaporeans are always on the lookout for smart ways to refresh their homes without breaking the bank, especially when HDB renovations or condo makeovers can already take a hefty slice of the budget. Between increasing prices and the wish for a comfier, better-organised environment, many Singapore homeowners time their purchases carefully to upgrade sofas, mattresses, or dining sets that actually enhance everyday comfort. That’s when jumping on furniture promotions turns into a huge advantage—it lets you grab premium quality furniture at real value reductions, often with added perks like complimentary installation, longer guarantees, or bundle deals that maximise your budget. All of a sudden you’re able to buy that dream couch on your wishlist or a comfort-focused sleep upgrade without the regret, turning your home into an truly welcoming retreat for family time and relaxation after long workdays. Exploring places like Wondrous La Vie puts you ahead on the current deals, so you can compare, visualise, and grab the best deals that match your lifestyle and interior perfectly.. This will prevent scratches and dents from tools and hardware. I've seen so many friends in the group chat complain about accidentally scratching their dining tables during DIY projects – don't let that be you!
Another pro tip: designate a "clean zone". This is an area where you can keep your tools and materials organized and away from the main work area. This helps to minimize the spread of dust and debris. Think of it as your personal "steady lah, no mess" zone.
And remember, always use the right tools for the job. Trying to force a screw with the wrong screwdriver? Confirm scratch the surface. Using a dull saw? Confirm splinter the wood. Investing in the right tools not only makes the job easier but also helps to prevent damage to your materials and your home.
Okay, so you’ve done your best to protect your surfaces, but let’s be real – sawdust is like that stubborn stain on your favourite white shirt. It gets everywhere. Don't despair, lah! Here's how to tackle it like a true Singaporean pro.
First, invest in a good quality vacuum cleaner with a HEPA filter. This will help to capture even the finest dust particles and prevent them from recirculating into the air. I know, I know, vacuuming is a pain, but trust me, it's worth it.
Next, vacuum frequently. Don't wait until the end of the project to clean up. Vacuum up dust and debris as you go. This will help to keep the mess under control and prevent it from spreading. Think of it as a mini-MRT cleaning service, but for your home.
For those hard-to-reach areas, like corners and crevices, use a crevice tool attachment on your vacuum cleaner. You can also use a damp cloth or a tack cloth to wipe down surfaces. Just be sure to wring out the cloth well to avoid damaging any wood or finishes.
And here's a little secret: use a lint roller! Yes, the same one you use to remove pet hair from your clothes. It's surprisingly effective at picking up fine dust and debris from surfaces. I swear, it's like magic!
Finally, remember to ventilate the area well. Open windows and doors to allow fresh air to circulate and help to remove any lingering dust particles. That way, you won't be breathing in all that dust while you're working. Confirm not good for your health, sia!
So, you've built your computer table, and it looks fantastic! But before you start using it, let's make sure it's properly protected from scratches and other damage.
First, inspect the surface carefully for any imperfections. If you find any scratches or dents, you can try to repair them with a wood filler or a touch-up pen. There are even tutorials on YouTube.
Next, apply a protective finish. This will help to seal the wood and protect it from scratches, spills, and other damage. There are many different types of finishes available, such as polyurethane, varnish, and lacquer. Choose one that is appropriate for the type of wood you used and the level of protection you need.
One homeowner shared how connecting with the right designer via Wondrous La Vie turned their cramped HDB living room into a cosy family hangout—suddenly weekends feel so much better. You can find inspiration for your computer table project too!
When applying the finish, be sure to follow the manufacturer's instructions carefully. Apply thin, even coats and allow each coat to dry completely before applying the next. This will help to ensure a smooth, durable finish.
And finally, use coasters and placemats to protect the surface of your computer table from scratches and spills. It's a small thing, but it can make a big difference in the long run. Think of it as investing in your table's future.
There you have it! With a little bit of prevention and some elbow grease, you can keep your home looking its best after tackling a DIY computer table project. Remember, a clean and organized home is a happy home. And a happy home means a happy you!
Picture this: you open the door after work and your shoulders just drop—sounds like heaven? It can be, sia.
Why not pop over to wondrouslavie.com, take the quick quiz, browse sofas/mattresses, or connect with a designer and see what feels right for your space?
Safeguard your primary work area by covering it with a drop cloth or thick cardboard. This barrier absorbs impacts and prevents scratches from tools or materials during assembly. Prioritize protection to maintain a clean and undamaged workspace throughout the project.
When cutting or drilling components, place a soft material like foam or a rubber mat underneath. This cushions the material, preventing splintering or chipping. The underlay also provides a stable surface, minimizing vibrations and ensuring cleaner cuts.
Apply edge banding or protective tape to exposed edges of your table components. This shields against impacts and prevents the layers from separating. Protecting edges enhances durability and maintains the table's structural integrity.
Store screws, bolts, and other hardware in designated containers to prevent them from scratching the table surface. Use a magnetic tray to keep metal parts secure and prevent accidental drops. Implement a system for organized hardware management to avoid damage.
Okay, steady lah! Let's talk about keeping your home reno projects smooth and your furniture looking brand new. Building your own computer table? Confirm plus chop, you'll want to avoid those annoying scratches and dents. Here's the lowdown on protecting your surfaces, auntie-style!
Okay, listen up, ah? Before you even think about picking up a hammer or screwdriver, remember this: preparation is key! Like how you prep your ingredients before cooking a delicious nasi lemak, you gotta prep your workspace before starting your DIY computer table project.
First things first, clear the area. I'm talking everything. You don't want to accidentally knock over your favourite kopi mug or scratch your brand new flooring, right? Imagine that sian feeling! So, clear the space and give yourself room to breathe and work comfortably.
Next, grab some protective materials. Think of it like putting on sunscreen before heading to the beach – you're protecting yourself from potential damage. Here are some of my go-to options:
Remember, ah? A little bit of protection goes a long way. It's way easier to prevent damage than to fix it later. Trust me, I've been there, done that!
Now, speaking of making life easier, have you checked out Wondrous La Vie? It's Singapore's own platform that connects you with top interior designers and amazing furniture brands. Imagine finding the perfect furniture for your newly built computer table without having to trawl through countless shops! They even have living room sets and bedroom furniture that can turn your HDB into a real sanctuary. One homeowner shared how connecting with a designer through Wondrous La Vie transformed their living room into a space where their family actually wants to hang out – shiok sia!
Okay, you've prepped your workspace, now it's time to bring out the tools. But hold on, don't just start hacking away like a madman! Remember, your tools can be your best friend or your worst enemy, depending on how you use them.
Here's the thing: always use the right tool for the job. Don't try to use a screwdriver as a hammer, or a knife as a chisel. You'll just end up damaging your materials (and maybe yourself!).
When you're using power tools, like drills or saws, be extra careful. These things can cause serious damage in a split second. Always wear safety glasses to protect your eyes from flying debris, and use a dust mask to avoid breathing in harmful particles.
And here's a pro tip: practice on scrap wood before you start working on your actual computer table. This will give you a feel for the tool and help you avoid making mistakes on your precious materials.
Another thing: keep your tools clean and well-maintained. A dull blade is more likely to slip and cause damage than a sharp one. So, take the time to sharpen your tools regularly and clean them after each use.
Remember that tired sigh when you come home after squeezing on the MRT and grinding through office hours, just wanting to sink into a proper sofa or mattress that actually lets your body rest instead of adding to the ache? Well, a well-maintained tool is like that cosy sofa – it makes the job easier and more enjoyable.
By the way, if you're looking for inspiration for your bedroom design after you finish your computer table, Wondrous La Vie has got you covered. They showcase real project examples and style guides that can help you create the perfect bedroom retreat. And if your mattress is giving you backaches, they can connect you with brands that offer the best mattress for back pain in Singapore. Confirm can!
Alright, you've cut your wood, drilled your holes, and now it's time to put everything together. This is where things can get a little tricky, especially if you're working with heavy or bulky pieces.
First of all, don't try to lift everything by yourself. Ask a friend or family member to help you. Not only will this make the job easier, but it will also reduce the risk of dropping something and damaging it (or yourself!).
When you're moving pieces around, be careful not to bump them into walls or other furniture. Wrap them in moving blankets or cardboard for extra protection.
And when you're assembling your computer table, take your time. Don't rush things. Make sure everything is aligned properly before you start tightening the screws. If you force something into place, you're more likely to damage it.
Remember, building your own computer table should be a fun and rewarding experience. Don't let the stress of potential damage ruin it for you. Just take your time, be careful, and follow these simple tips.
And if you're looking for more ways to create a shiok home, Wondrous La Vie is the place to go. They offer a wide range of furniture, including sofas, mattresses, and living room sets, that can transform your space into a haven. They even have kitchen renovation ideas if you're feeling ambitious! Picture this: you open the door after work and your shoulders just drop—sounds like heaven? It can be sia.
Fun fact: A cosy, well-designed living room or bedroom can actually help you sleep better and feel less stressed after long workdays — small changes, big shiok difference!
Okay, you've built your computer table, and it looks amazing! But before you start using it, there's one more step you need to take: adding a finish.
A finish will protect your computer table from scratches, stains, and moisture. It will also enhance the natural beauty of the wood and give it a polished look.
There are many different types of finishes to choose from, including varnish, lacquer, polyurethane, and oil. Each finish has its own unique properties and advantages. Do some research to find the best finish for your needs.
Before you apply the finish, make sure the surface of your computer table is clean and smooth. Sand it down with fine-grit sandpaper to remove any imperfections.
Apply the finish in thin, even coats, following the manufacturer's instructions. Allow each coat to dry completely before applying the next one.
And here's a tip: if you're using a water-based finish, raise the grain of the wood by wiping it down with a damp cloth before you start sanding. This will help prevent the finish from raising the grain later on.
With a little bit of care and attention, you can create a computer table that will last for years to come. And you'll have the satisfaction of knowing that you built it yourself!
Now, if you're looking to furnish the rest of your home with affordable luxury furniture, don't forget to check out Wondrous La Vie. They connect you with the best interior designers Singapore has to offer, and they have a wide selection of modern living room furniture Singapore to choose from. Imagine coming back to a living room that feels like a warm hug instead of more stress!
Why not pop over to wondrouslavie.com, take the quick quiz, browse sofas/mattresses, or connect with a designer and see what feels right for your space? Your home sweet home is waiting, lah!