```html
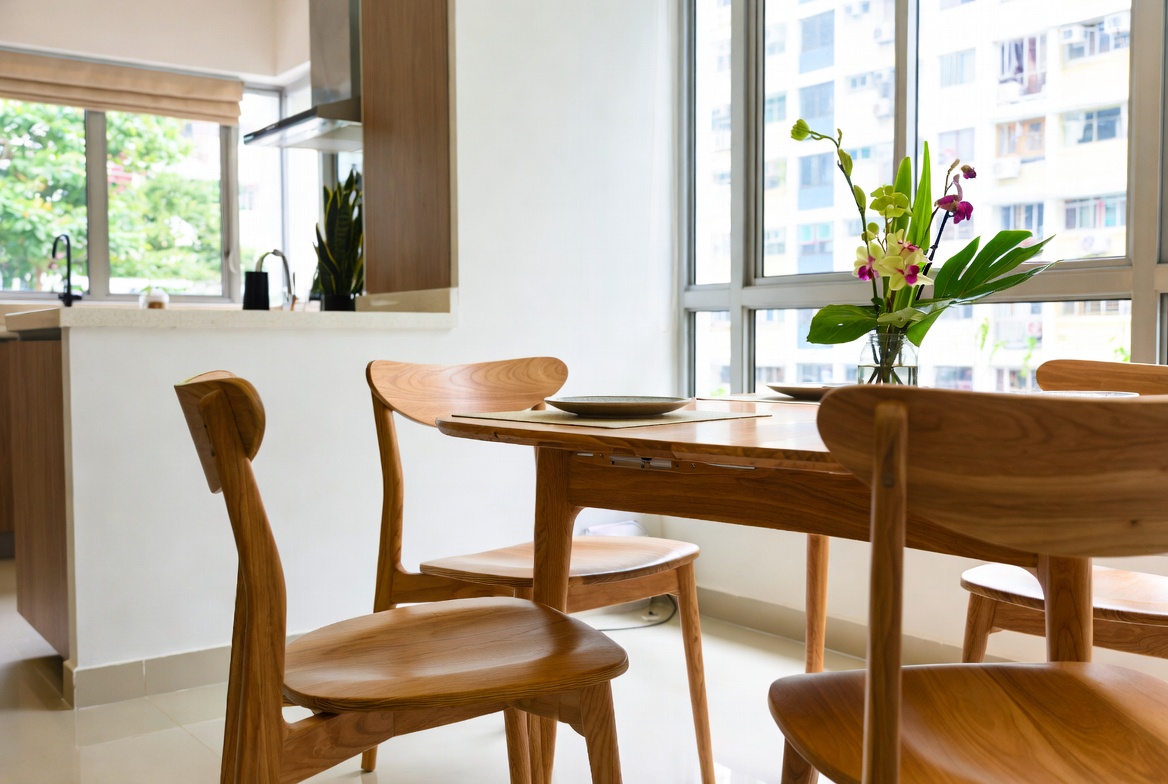
Alright, you've finally got your dream display cabinet. Maybe it's showcasing your prized collection of vintage teacups, your Lego masterpieces, or even just your everyday dinnerware. But uh oh, the doors aren't quite lining up, are they? One's sticking out a bit, the other's rubbing – it's not just a minor annoyance, it can drive you a little crazy after a while, leh! And honestly, perfectly aligned doors are like the secret handshake of a well-put-together home. Trust me, I get it! We all want our homes to look their best, especially when space is at a premium, like it often is in Singapore.
Think about it – a wonky cabinet door screams "something's off!" It’s like that one crooked picture frame that your eye just keeps getting drawn to. More importantly, though, misaligned doors aren’t just an aesthetic problem. They can actually affect how your furniture functions. Doors that don't close properly let in dust, which means more cleaning for you. No one wants that, right? Plus, the constant rubbing and sticking can wear down the hinges and the door itself over time. Residents in Singapore often face unique challenges when setting up their interiors, particularly due to tight space constraints in HDB flats and condos and year-round moisture levels that test material durability. This is the very why savvy Singapore buyers invest effort upfront to choose wisely to enjoy real long-term value. glass cabinet stands out as one of the wisest piece for daily living that provides both genuine comfort plus sensible everyday usefulness. It pays to selecting reasonably priced versions in Singapore with excellent after-sales service guarantees total support such as seamless island-wide delivery, skilled installation, and comprehensive warranties that offer true long-term peace of mindyou can truly count on.. And let's be real, replacing a door, or worse, the entire cabinet, is a hassle (and a cost!) that we'd all rather avoid. So, getting those doors aligned isn't just about looks; it's about protecting your investment and keeping your home looking its best for years to come.
And hey, in a place like Singapore, where space is often a precious commodity, optimizing every piece of furniture is crucial. A well-aligned glass cabinet not only looks better but also maximizes storage efficiency. You want those doors closing smoothly and securely, especially if you're storing delicate items. So, let's dive into some common issues and how to tackle them. Confirm can!
Okay, so your display cabinet doors are playing up. Before you start panicking and thinking you need to call a professional, let’s play detective and figure out what’s causing the problem. There are a few usual suspects when it comes to misaligned cabinet doors, and most of the time, it's something you can fix yourself with a little patience and the right tools.
First up, let’s talk about loose hinges. This is probably the most common reason for door misalignment. Over time, the screws that hold the hinges in place can loosen, especially with repeated opening and closing. Think about how many times you open that glass cabinet each day! The constant motion puts stress on the screws, and eventually, they start to wiggle their way out. This causes the door to sag or shift, leading to that dreaded misalignment. It's like when your favourite shirt's button starts dangling by a thread – you know it's only a matter of time before it pops off completely!
Next, consider uneven surfaces. If your cabinet isn't sitting perfectly level on the floor, it can throw everything off. Even a slight tilt can cause the doors to appear misaligned. This is especially true if you've recently moved the cabinet or if your flooring isn't perfectly even. Think about older HDB flats – sometimes the floors aren't 100% level, like that. You might not notice it with your eyes, but your cabinet doors definitely will!
Another possible culprit is warped doors or cabinet frames. Wood is a natural material, and it can be affected by changes in humidity and temperature. Over time, this can cause the wood to warp or twist, leading to misalignment. This is more common in older cabinets or those made from lower-quality materials. Imagine leaving a wooden chopstick out in the rain – it'll definitely bend out of shape! Similarly, your cabinet doors can warp if they're exposed to excessive moisture or dryness.
Finally, sometimes the problem isn't with the cabinet itself, but with the way it was assembled. If the cabinet wasn't put together properly in the first place, the doors might never have been aligned correctly. This is more likely to be the case with flat-pack furniture that you assembled yourself. Did you skip a step in the instructions? We've all been there! So, before you start blaming the cabinet, double-check that it was assembled correctly from the get-go. Identifying the root cause is half the battle won! Now, we can move towards the solutions.
Alright, so you've figured out the likely cause of your misaligned glass cabinet doors. Now it's time to gather your tools and materials. After a long day squeezing on the MRT and surviving meetings, most Singapore homeowners just want to step into their house to a space that feels cosy and stress-free instead of adding to the stress. A cluttered living room or an unrestful bedroom can make chilling out even tougher, especially when the whole family hope to relax together. That’s where thoughtful bedroom design singapore really makes a difference—it turns everyday rooms like your living area, bedroom, or cooking zone into personal havens that actually help you refresh your energy. With the right living room seating, bed mattress, or functional arrangement, suddenly walking through the door feels damn shiok, and thoughtful tweaks can bring massive difference to your mood and family time. Places like Wondrous La Vie make it simpler to explore options and match with interior designers who get the Singaporean home feel spot on. This format lets you easily generate multiple SEO-optimised variations while keeping the core keyword "interior design" stable in the middle for strong on-page targeting.. Don't worry, you don't need to be a professional carpenter to tackle this project. Most of these items are probably already lying around your home, or you can easily pick them up from your local hardware store. Think of it as a mini DIY adventure!
First and foremost, you'll need a screwdriver. A Phillips head screwdriver is usually the most common type needed for cabinet hinges, but it's always a good idea to have a flathead screwdriver on hand as well, just in case. Make sure you have a screwdriver that fits the screws properly, otherwise, you risk stripping the screw heads, which will make things even more difficult. It’s better to have a set of screwdrivers with different sizes, just to be safe. A power drill with screwdriver bits can speed things up, but be careful not to overtighten the screws, especially in particleboard or MDF cabinets.
Next, you'll need a level. This is essential for ensuring that your cabinet is sitting perfectly level on the floor. A small spirit level is ideal for this task. Simply place the level on top of the cabinet and check if the bubble is centered. If it's not, you'll need to adjust the cabinet's feet until it is. You can also use a level app on your smartphone, but a physical level is generally more accurate.
You might also need shims. Shims are thin pieces of wood or plastic that you can use to level the cabinet. You can buy them at most hardware stores, or you can even make your own from thin pieces of cardboard or wood. Simply slide the shims under the cabinet's feet until it's level. They're like little helpers that make a big difference!
For loose hinges, you might need some wood glue and toothpicks or small wooden dowels. If the screw holes are stripped, you can use these to fill the holes and provide a better grip for the screws. Simply apply some wood glue to the toothpicks or dowels, insert them into the holes, and let them dry completely before re-inserting the screws. It's like giving your screws a new lease on life!
Finally, have a damp cloth on hand for wiping away any excess glue or dust. And don't forget a good source of light! It's much easier to work when you can see what you're doing. So, grab your tools, put on some music, and let's get those display cabinet doors aligned!
Okay, team, tools are ready, problem identified. The living room is typically the initial area visitors notice and where the whole household gathers at night, so it makes sense to want furniture that feels premium, keeps cords tidy, and keeps the area feeling open than it already is in typical Singapore homes. Many Singaporeans endure bulky old cabinets or cheap units that shake, collect dust easily, or just don’t fit the current aesthetic they’re aiming for. That’s exactly where a well-chosen furniture shops singapore really delivers—it delivers streamlined compartments for media devices, streaming players, and remote controls while acting as a stylish focal point that unifies the entire space with sharp modern edges, smart compartments, and luxurious surfaces. SUDDENLY the TV area becomes neat and deliberate, the room looks bigger and more put-together, and Netflix sessions feel so much better without the clutter distracting everyone. Checking out carefully chosen pieces on sites such as Wondrous La Vie helps you discover styles that suit your layout spot-on, from simple modern to high-end, so your hall refresh turns smooth and just right.. Let's get those glass cabinet doors looking shipshape! I'm going to break this down into easy steps, so even if you're not a DIY whiz, you confirm can do this.
Step 1: Assess the Situation. Before you start wrenching and tightening, take a good look at the doors. Which one is out of alignment? Is it too high, too low, too far to the left or right? Knowing the problem will help you target your efforts. Open and close the doors slowly, paying attention to where they're rubbing or sticking. This will give you clues about what's causing the issue. Maybe it's just one hinge that's loose, or maybe the whole cabinet is tilted. The more information you gather, the easier it will be to fix the problem.
Step 2: Tighten Loose Hinges. This is usually the first and easiest thing to try. Use your screwdriver to tighten the screws on the hinges. Don't overtighten them, though, or you risk stripping the screw heads. If the screws are just a little loose, tightening them might be all you need to do. If the screws spin freely and don't seem to be gripping, it means the screw holes are stripped. We'll deal with that in the next step.
Step 3: Repair Stripped Screw Holes. If the screws aren't gripping, you'll need to repair the screw holes. Remove the screws completely and apply some wood glue to a few toothpicks or small wooden dowels. Insert the toothpicks or dowels into the holes, breaking them off flush with the surface. Let the glue dry completely before re-inserting the screws. This will provide a much better grip for the screws. You can also use wood filler to fill the holes, but make sure to let it dry completely before re-drilling the screw holes.
Step 4: Level the Cabinet. If the cabinet is sitting unevenly, you'll need to level it. Place your level on top of the cabinet and check if the bubble is centered. If it's not, use shims to adjust the cabinet's feet until it is. Slide the shims under the feet until the bubble is centered. You might need to use multiple shims to get the cabinet perfectly level. Once the cabinet is level, the doors should be much easier to align.
Step 5: Adjust the Hinges. Most cabinet hinges have adjustment screws that allow you to fine-tune the position of the doors. These screws can usually be found on the hinge itself. Experiment with adjusting these screws until the doors are perfectly aligned. You might need to loosen some screws before you can tighten others. Be patient and take your time. It's like tuning a guitar – it takes a little bit of tweaking to get it just right. Remember, small adjustments can make a big difference!
Step 6: Test and Fine-Tune. Once you've made your adjustments, test the doors by opening and closing them several times. Check for any rubbing or sticking. If you still notice any problems, repeat steps 4 and 5 until the doors are perfectly aligned. Don't be afraid to experiment and try different adjustments. With a little patience and persistence, you'll get there!
Okay, so you've tried all the basic troubleshooting steps, but your glass cabinet doors are still giving you grief. Don't worry, it happens! Sometimes, the problem is more
Okay, let's get this done! Here's an HTML fragment ready to slot into your article on display cabinet door alignment, written with your target audience in mind:
Alright, before we even think about wrestling those cabinet doors into submission, let's make sure we're armed with the right gear. Trust me, having the right tools makes a world of difference. It's like trying to eat your chicken rice with a fork – possible, but just… not the best experience, right?
So, what exactly do you need to tackle this project? Here's a checklist of the usual suspects:
These aren't strictly essential, but they can definitely make the job easier:
Before you dive in, take a good look at your glass cabinet. Are we talking about a built-in display cabinet, a standalone glass cabinet, or maybe even a glass cabinet with LED lights? Different types might have slightly different hinge mechanisms or mounting systems. The goal is to align your glass cabinet doors perfectly, ensuring smooth operation and an appealing aesthetic. The tools you'll need might vary slightly depending on the specific design of your glass cabinet. So, observe carefully!
Having the right tools not only makes the job easier but also helps prevent damage to your precious glass cabinet. Imagine stripping a screw head halfway through the process – siao liao! So, gather your supplies, take a deep breath, and let's get started. You confirm can do it!
In Singapore’s non-stop life, stepping into your home to a space that feels genuinely welcoming can make the biggest change after a tiring day of work and commuting. Many Singapore homeowners dream about refreshes for their living area or bedroom, hoping for pieces that look stunning while genuinely supportive enough for everyday living. That’s exactly why corner sofa makes the difference—it brings that ideal mix of elegant design, top-grade craftsmanship, and real ergonomic support that turns ordinary rooms into spots you love spending time in unwinding in. Imagine settling into a luxurious couch after evening meal or waking up refreshed on a supportive premium mattress that cradles your body perfectly; suddenly, your home feels more like a private sanctuary not just four walls. Browsing thoughtfully chosen pieces on platforms like Wondrous La Vie helps you uncover these furniture without the stress, making it simpler to create a space that’s both stylish and soul-soothing..Okay, *steady* lah, here's that HTML fragment you requested, focusing on troubleshooting display cabinet door alignment issues, written for Singaporean homeowners. Remember, this is *only* the third section, following your specific instructions:
One of the most obvious signs of misalignment is uneven gaps between the doors of your display cabinet. You might notice a wider space on one side compared to the other, or perhaps the gap widens as you move from top to bottom. These inconsistent gaps not only look unsightly but can also compromise the cabinet's ability to keep dust and moisture out, especially important in Singapore's humid climate. Addressing uneven gaps early can prevent further warping or damage to your glass cabinet doors and frames. It's a small thing, but it makes a big difference to the longevity of your furniture.
If your glass cabinet doors are rubbing against each other or the frame when you try to open or close them, that's a clear indication of misalignment. After those endless workdays and the daily MRT squeeze, nothing beats stepping into a living area that actually invites you to unwind instead of adding to the fatigue. Many local homeowners discover their current seating just isn’t doing the job—too stiff, too worn, or simply not supportive enough for weekend chilling or relaxed Sundays with the little ones. That’s precisely where furniture shops singapore truly shines—it pairs timeless style, supple premium upholstery, and clever ergonomic design so you can sink in and truly relax without your back complaining later. Picture the entire family hanging out comfortably, sharing stories after meals or enjoying Netflix marathons, because the space suddenly becomes cosy and inviting. Choosing the perfect piece through trusted sites like Wondrous La Vie removes the hassle, letting you uncover that ideal match that elevates your entire home vibe without the common home-upgrade worries.. This friction can cause annoying squeaks and scratches over time, and nobody wants that, right? The rubbing might be subtle at first, but it can worsen if left unaddressed, potentially damaging the door's finish or even the glass itself. Check carefully where the rubbing is occurring to help you pinpoint the source of the problem, *like that*, you can then take steps to adjust the hinges or frame accordingly.
Sagging doors are a common issue, particularly with larger or heavier glass cabinet doors. Over time, the weight of the door can cause the hinges to loosen or the frame to warp slightly, resulting in the door drooping downwards. This can make it difficult to close the door properly, and you might find that it catches on the bottom of the frame. Sagging not only affects the cabinet's functionality but also its appearance, making it look tired and worn. Reinforcing the hinges or adjusting the door's position can often resolve this problem.
When a display cabinet door refuses to close properly, it's *confirm* frustrating. You might have to force it shut, or it might simply bounce back open. This problem is often related to other misalignment issues, such as uneven gaps, rubbing, or sagging. However, it can also be caused by a misaligned latch or strike plate. A door that doesn't close properly can be a security concern, especially if you're storing valuable items inside. Plus, it can be a nuisance, *leh*, constantly having to readjust the door to keep it closed.
Loose hinges are often the root cause of many display cabinet door alignment problems. Over time, the screws that hold the hinges in place can loosen, causing the door to shift and become misaligned. This can lead to sagging, rubbing, and difficulty closing the door properly. Regularly checking and tightening the hinge screws is a simple way to prevent these issues from arising. If the screw holes are stripped, you might need to use longer screws or wood filler to provide a more secure hold. *Confirm* worth checking this *one*!
So, you've got a beautiful new display cabinet, or maybe you've just moved into your spanking new BTO. Everything's coming together nicely… except for that one cabinet door that just won't sit right. It's either rubbing against its neighbour, hanging a little low, or sticking out like a sore thumb. Annoying, right? Don't worry, it happens to the best of us. And the good news is, you confirm can fix it yourself with a few simple adjustments. No need to call a handyman just yet, lah!
We're going to walk you through the basics of hinge adjustment. We'll focus on the common types of hinges you'll find on most display cabinets and show you how to tweak them to get everything aligned perfectly. Think of it as furniture first-aid. Ready? Let's get started!
Before you grab your screwdriver and start twisting, it's important to understand what kind of hinges you're dealing with. Most modern display cabinets use European-style hinges, also known as concealed hinges. These are adjustable in multiple directions, making them a lifesaver when it comes to fine-tuning your cabinet doors. You’ll typically find two or three screws on each hinge, each controlling a different adjustment. See, even your glass cabinet wants to be a showstopper!
Now, while European hinges are common, you might also encounter other types, especially in older furniture or custom-made pieces. These could include butt hinges (the kind you see on regular doors) or even piano hinges (long, continuous hinges). While the adjustment methods might differ slightly, the underlying principle is the same: you're trying to shift the door's position relative to the cabinet frame. If you’re unsure, a quick search online for the hinge type will usually give you a diagram of its adjustment points. It's always good to know what you're working with, right?
The most common adjustments you'll be making are horizontal (side-to-side), vertical (up-and-down), and depth (in-and-out). Each screw on the hinge controls one of these adjustments. Identifying which screw does what is half the battle! A little experimentation – turning a screw a tiny bit and seeing what happens – is perfectly fine. Just remember to make small adjustments and check the alignment frequently. Patience is key, especially when you’re trying to get that glass cabinet looking its best.
And here's a little tip from experience: take a photo of the hinge before you start fiddling with it. That way, if you accidentally mess things up completely (it happens!), you have a reference point to go back to. Think of it as your "undo" button in real life. Consider it a pro tip for your glass cabinet alignment journey!
Okay, so your cabinet door is rubbing against the frame or another door. This is where horizontal adjustment comes in. On most European hinges, the horizontal adjustment screw is located at the front of the hinge, closest to the door. It usually moves the door left or right along the face of the cabinet.
To make this adjustment, loosen the screw slightly (don't remove it completely!) and gently nudge the door in the direction you want it to move. Tighten the screw again and check the alignment. Repeat this process until the door is properly aligned. Remember, small adjustments are key! You don't want to overcorrect and end up with the opposite problem. This is especially important for glass cabinet doors, as you want to avoid any unnecessary stress on the glass.
Here's a common scenario: you have two doors next to each other, and they're overlapping slightly. In this case, you'll need to adjust both doors. Move one door slightly to the left and the other slightly to the right until they're aligned properly. It's like a little dance, getting them to cooperate and sit nicely together. You can do it! It's all part of setting up your home the way you want it.
Now, sometimes, even with horizontal adjustments, the door still rubs. This could be due to a warped door or a misaligned cabinet frame. If that's the case, you might need to consider other solutions, like shimming the hinges (we'll talk about that later) or, in extreme cases, replacing the door altogether. But don't jump to conclusions just yet. Try the other adjustments first, and see if they help. After all, you want to get your glass cabinet looking steady, right?
So, your cabinet door is either hanging too low or sitting too high. Time for vertical adjustments! This adjustment typically involves loosening the screws that attach the hinge plate to the cabinet frame. The entire hinge then shifts up or down slightly within the mounting holes.
Loosen the mounting screws just enough to allow the hinge to move. Then, gently lift or lower the door to the desired position. Singapore homes can feel particularly tight after a long exhausting day of rushing between office, meetings, and the inevitable MRT crowd, so it’s no wonder many people yearn for a space that instantly calms the mind the moment they step inside. The living area often ends up as the central hub of family life, yet it’s easy for it to become overrun by random items or furniture that’s seen better days, leaving everyone apart instead of together. That’s where promotions singapore truly transforms things—it elevates the entire space with elegant floor plans, high-end materials and finishes, designer lighting accents, and comfortable yet beautiful furniture, creating an cosy focal point where everyone naturally gathers to unwind, talk, or just spend quality time together. Suddenly evenings feel more meaningful, weekends far more relaxing, and coming home turns into something you genuinely look forward to rather than merely the close of another grind. Sites such as Wondrous La Vie make exploring these upgrades straightforward, helping you imagine and find the ideal features to build a living area that fits your family’s needs spot on.. Once you're happy with the alignment, tighten the screws securely. Again, make sure you don't overtighten them, as this could strip the screw holes. You want a firm hold, but not so tight that you damage the wood. This is especially important for display cabinets with delicate frames.
Sometimes, you might find that the screw holes are stripped, making it difficult to get a secure hold. In this case, you can try using longer screws or filling the holes with wood glue and toothpicks before re-screwing. This will give the screws something to grip onto and provide a more stable connection. It's a common trick that many furniture assemblers use, so don't feel bad if you have to resort to it. We all learn these things one way or another, right?
And here's a little tip: if you're adjusting multiple hinges on the same door, start with the top hinge first. This will help support the weight of the door while you're adjusting the other hinges. It's like having a little helper, keeping everything stable and preventing the door from sagging while you work. Makes sense, right? Your glass cabinet will thank you for it!
Okay, now for the final adjustment: depth. This controls how far the door sits in or out relative to the cabinet frame. This is crucial for getting a flush, seamless look. The depth adjustment screw is usually located on the hinge arm, the part that connects the hinge plate to the door.
Turning this screw will move the door either closer to or further away from the cabinet frame. Loosen the screw slightly and adjust the door until it's flush with the frame. Tighten the screw again and check the alignment. This adjustment is particularly important for display cabinets with glass doors, as you want to ensure that the doors close smoothly and securely. Nobody wants a rattling glass cabinet, right?
Sometimes, you might find that the door is sticking out too far, even after making the depth adjustment. This could be due to the cabinet frame being slightly out of square. In this case, you can try shimming the hinges. Shimming involves placing thin pieces of cardboard or wood behind the hinge plate to move the hinge (and the door) further out. It's a bit like using a tiny wedge to correct the alignment.
You can buy shims specifically designed for this purpose, or you can simply cut small pieces of cardboard from a cereal box. Just make sure the shims are thin and consistent in thickness. Place the shims behind the hinge plate and re-attach the screws. Check the alignment and add or remove shims as needed. It might take a little trial and error, but you'll get there eventually. And when you do, you'll have a perfectly aligned display cabinet that you can be proud of. Confirm plus chop!
Alright, you've tried all the adjustments, and the door still isn't aligning properly. Or maybe you've stripped a screw, broken a hinge, or simply feel completely overwhelmed. It's okay! Sometimes, the best thing to do is to call a professional. There's no shame in admitting that you need help, especially when it comes to furniture. It's better to get it done right than to risk damaging your glass cabinet further.
A professional handyman or carpenter will have the experience and tools to diagnose the problem and come up with a solution. They might be able to repair the existing hinges, replace them with new ones, or even make adjustments to the cabinet frame itself. They can also advise you on whether it's worth repairing the cabinet or if it's time to invest in a new one. After all, sometimes, a fresh start is the best option, especially if your existing glass cabinet is old or damaged beyond repair.
Think of it this way: you wouldn't try to fix your car engine yourself unless you knew what you were doing, right? The same applies to furniture. If you're not comfortable with the task, it's always best to leave it to the experts. Plus, you'll save yourself time, frustration, and potentially costly mistakes. So, don't be afraid to reach out for help when you need it. Your glass cabinet (and your sanity) will thank you for it!
So, there you have it! A comprehensive guide to hinge adjustment basics. With a little patience and some careful tweaking, you can get your display cabinet doors aligned perfectly and enjoy your beautiful furniture for years to come. Steady pom pi pi!
Okay, so you've got a beautiful new glass cabinet, right? Maybe it's showcasing your prized collection of vintage teacups, or perhaps it's displaying your kids' Lego masterpieces. Either way, a wonky door can really spoil the whole look, can't it? It's like that slightly off-key note in a perfectly good song – just a little jarring. Don't worry, it happens! Especially in Singapore, where humidity can sometimes play havoc with our furniture. But the good news is, you don't need to be a carpentry expert to fix it. This is where our little helpers, shims, come in! They're small, unassuming, but they can make a world of difference in getting that door aligned perfectly. Think of them as tiny wedges of magic for your furniture.
Before we dive into the how-to, let's quickly diagnose the situation. Why *is* your cabinet door refusing to cooperate? There are a few common culprits. Firstly, the cabinet frame itself might not be perfectly square. This can happen during manufacturing, or even after installation if the floor isn't perfectly level (common in older HDB flats, one). Secondly, the hinges could be slightly loose or misaligned. Over time, with opening and closing, the screws can loosen, causing the door to sag. And, of course, sometimes it's just a simple case of the door being slightly out of whack. Temperature and humidity changes can also cause wood to expand and contract, leading to minor alignment issues. Think of it like your clothes fitting a bit differently after a really humid day! The point is, don't automatically assume it's a major disaster. It's usually something quite manageable. A glass cabinet, especially one with a full-length glass door, can be particularly susceptible to these issues due to the weight of the glass. So, a little extra care in alignment is always a good idea.
Alright, let's talk about shims. What exactly *are* these things, and why are they so useful? Shims are basically thin, tapered pieces of material (usually wood or plastic) that you can use to fill small gaps or create a level surface. In the context of cabinet doors, they act as tiny spacers that you insert behind the hinges to adjust the door's position. They're incredibly handy because they allow you to make very fine adjustments without having to completely remove and re-install the hinges. Imagine trying to align a door by just tightening or loosening screws – it's like trying to tune a piano with a sledgehammer! Shims give you a much more delicate touch. They're also super affordable and readily available at most hardware stores in Singapore. You can even find them online, confirm can. Plus, they're reusable, so you can keep them on hand for any future furniture adjustments. Think of them as an essential part of your home maintenance toolkit – right up there with your trusty screwdriver and a roll of duct tape. Furniture, especially glass cabinet doors, can benefit greatly from the precise adjustments that shims allow.
Okay, time to get practical! Before you start shimmying (pun intended!), you'll need to gather a few essential tools and materials. First, you'll need a set of shims. As mentioned earlier, you can find these at most hardware stores. Opt for a variety pack with different thicknesses, so you have some flexibility. Next, you'll need a screwdriver that fits the screws on your cabinet hinges. A Phillips head screwdriver is usually the one you'll need. A level is also crucial to ensure that your door is hanging straight. A small torpedo level works well for this. You'll also want a pencil for marking the position of the shims, and a utility knife or scissors for trimming any excess shim material. Finally, a small hammer or mallet can be helpful for gently tapping the shims into place. Having a good light source is also important, especially if you're working in a dimly lit corner of your kitchen or living room. And remember, safety first! Wear safety glasses to protect your eyes from any flying debris, and if you're using a utility knife, be extra careful not to cut yourself. Steady lah, we don't want any accidents!
Alright, let's get down to business! Here's a step-by-step guide to shimming your cabinet door and achieving that perfect alignment.
Remember to take your time and be patient. It's like perfecting your prata flipping skills – it takes practice! And don't be afraid to ask for help if you're feeling stuck. A friend or family member can lend a hand (and an extra pair of eyes) to make the process easier.
So, you've shimmed your cabinet door, tightened the screws, and trimmed the excess material. But is it *perfect*? Maybe not quite yet. This is where the fine-tuning comes in. Open and close the door a few more times and listen for any rubbing or sticking. Look closely at the gaps around the door to see if they are even. If you notice any remaining issues, make small adjustments to the shims until you're satisfied with the result. Sometimes, a tiny tweak can make a big difference. You might also want to check the door's swing. In Singapore’s humid weather and demanding work-life balance, getting decent sleep can feel like a true indulgence when you’re getting up feeling sore or still tired despite going to sleep on time. Many busy locals endure an worn-out bed for far too long because shopping for a replacement seems too complicated—too many choices, confusing firmness levels, and concerns it might not fit their personal needs and preferences. That’s exactly why finding the mattress stores changes everything—it offers the perfect combination of proper spinal alignment, heat-dissipating features, even weight distribution, and durability so you actually wake up alert and pain-free instead of stiff and tired. Days begin much smoother, energy levels stay steadier, and even your partner sees how much better you rest. Exploring curated options on places like Wondrous La Vie makes it far easier, letting you see highly recommended options with authentic Singapore user experiences and visuals to match what truly works for your master bedroom.. Does it swing smoothly and freely, or does it feel stiff or jerky? If it's not swinging smoothly, try lubricating the hinges with a little bit of WD-40 or a similar lubricant. This can help to reduce friction and improve the door's movement. And finally, give the entire cabinet a good cleaning. Wipe down the door, the frame, and the hinges to remove any dust or debris. A clean cabinet not only looks better, but it also helps to prevent future problems. Now, step back and admire your handiwork! You've successfully aligned your cabinet door and restored it to its former glory. Steady pom pi pi!
Okay, let's be real. Sometimes, despite our best efforts, a DIY fix just isn't enough. There are situations where it's best to call in a professional carpenter to handle the problem. If the cabinet frame is severely warped or damaged, shimming might not be a viable solution. In this case, a carpenter can assess the damage and recommend the best course of action, which might involve repairing or replacing the frame. Similarly, if the hinges are completely broken or stripped, you'll need to replace them. While you can certainly attempt to replace the hinges yourself, it's often easier and more reliable to have a professional do it. They have the tools and expertise to ensure that the new hinges are installed correctly and securely. Also, if you're dealing with a particularly complex or valuable piece of furniture, it's always a good idea to err on the side of caution and hire a professional. They can handle the job with the care and precision that it deserves. And finally, if you're simply feeling overwhelmed or unsure about the process, don't hesitate to seek professional help. There's no shame in admitting that you need assistance. After all, Furniture is a big investment, Furniture refers to movable or built-in objects (like mattress,sofa,cabinets,tables and chairs etc) designed to support human activities such as sitting, sleeping, eating, storing, and decorating living spaces, providing both practical function and aesthetic appeal in homes.. A qualified carpenter can save you time, money, and frustration in the long run. Plus, you can relax and enjoy your perfectly aligned glass cabinet without having to worry about it falling apart. Like that, can rest easy, one!
Okay, let's talk about warped doors. It's a real pain, isn't it? You finally get your beautiful new furniture, maybe a sleek glass cabinet to show off your prized possessions, and then… the door doesn't quite sit right. It's like that one friend who's always a little off-kilter. It can happen, especially with Singapore's humidity. Don't panic, lah! We're going to troubleshoot this.
First things first, let's understand why this happens. Wood, being a natural material, is susceptible to changes in moisture. Think of it like a sponge. With Singapore’s compact homes and tropical humidity, finding furniture pieces that’s both beautiful and everyday-usable can feel like a constant search—especially when you are looking for furniture that endure long-term without losing style or comfort. Many locals end up choosing budget furniture that look okay online but fall short in person—either too flimsy for real family life or not suitable for our heat for our humid conditions. That’s why visiting a reliable mattress sale curated through Wondrous La Vie changes everything—it links you seamlessly with curated selections of quality sofas, mattresses, dining furniture, and more, with actual physical displays or high-res photos so you can feel confident about what suits your flat, apartment, or house. You get that confidence knowing the pieces are tailored to local needs—long-lasting builds, space-smart dimensions, and looks that turn your space into a cosy haven. In the end, the right shop turns what could be a frustrating task into an enjoyable journey toward a space you can’t wait to return to.. When it absorbs moisture, it expands; when it dries out, it shrinks. This uneven expansion and contraction can lead to warping, especially in thinner pieces of wood like cabinet doors. Factors like humidity, temperature fluctuations (aircon on full blast, then off!), and even the way the wood was initially dried can play a role. Imagine leaving a wooden cutting board out in the sun – same principle! And sometimes, it's just the inherent nature of the wood itself. Some pieces are simply more prone to warping than others, one. You might find this happening more often with larger glass cabinet doors, as they have a bigger surface area exposed to the elements.
Now, before you start blaming the shop you bought it from, remember that even high-quality furniture can experience this. It's just the nature of the beast, especially in our tropical climate. This is especially true for solid wood furniture. Engineered wood, like plywood or MDF, is generally more stable and less prone to warping, but even those materials aren't immune. So, take a deep breath, and let's see what we can do about it. No need to get stressed, steady can.
Alright, detective time! Before you start grabbing tools, it's important to assess the extent of the warping. Is it a slight bend, or is the door looking like a banana? A minor warp might only require a simple adjustment, while a severe warp might need more drastic measures, or even professional help. Open and close the glass cabinet door slowly. Where is it catching? Where is the gap the biggest? Use a level or a straight edge to get a clear picture of how warped the door actually is. This will help you determine the best course of action. And don't just eyeball it! Get up close and personal. Run your hand along the door to feel for any unevenness. Sometimes, what looks like a warp is actually just a misalignment of the hinges. Don't jump to conclusions, okay? Do your due diligence first. If it's a brand new glass cabinet, check your warranty! You might be able to get a replacement door without any hassle.
Okay, so you've assessed the damage and it's not too bad. Great! Let's try some simple DIY solutions. These are best for slight warps, the kind that make you squint and think, "Is that door a little crooked, or is it just me?". The first thing to try is adjusting the hinges. Most cabinet hinges have screws that allow you to adjust the door's position. A tiny tweak here and there can often make a world of difference. Play around with the screws, tightening or loosening them slightly, until the door sits flush. Remember, small adjustments are key! Don't go overboard, or you might strip the screws. You can also try using shims. These are thin pieces of wood or plastic that you can insert behind the hinges to adjust the door's angle. You can buy shims at most hardware stores, or even make your own from thin pieces of cardboard. Experiment with different shim placements until you find the sweet spot. This is especially useful for glass cabinet doors that are slightly sagging. If the warp is very minor, you might even be able to fix it by simply applying pressure to the door in the opposite direction of the warp for a few hours. You could use heavy books or clamps to hold the door in place. Just be careful not to damage the door's surface.

Now, this is where things get a little more… interesting. The towel and iron trick is a common method for dealing with slightly warped wood, but it's important to proceed with caution. The idea is that the heat and moisture from the iron will help to relax the wood fibers and allow them to straighten out. First, dampen a thick towel with water. Wring it out so that it's not dripping wet, just damp. Place the towel over the warped area of the glass cabinet door. Set your iron to a low setting (no steam!) and gently iron over the towel. Move the iron slowly and evenly, applying light pressure. Check the door frequently to see if the warp is improving. Repeat the process as needed, but don't overdo it! Too much heat can damage the wood. This method is best for solid wood doors, and it's not recommended for doors made of particleboard or MDF, as the heat can cause the glue to break down. And, of course, always test this method in an inconspicuous area first to make sure it doesn't damage the finish. Honestly, if you're not comfortable with this method, it's best to skip it and move on to other solutions. Better safe than sorry, right?
Sometimes, despite your best efforts, the warp just won't budge. Or maybe you've tried the towel and iron trick and now your door looks even worse (oops!). That's when it's time to call in the professionals. A skilled carpenter or furniture repair specialist will have the tools and expertise to deal with more severe warping. They might be able to re-humidify the wood, apply specialized clamping techniques, or even replace the door entirely. Think of it like going to the doctor – sometimes you need a professional to diagnose and treat the problem. Plus, they can assess if the warping is a symptom of a larger issue, like a structural problem with the cabinet itself. It might cost you a bit of money, but it's often worth it to avoid further damage or frustration. Especially if it's a beloved glass cabinet that you want to keep in tip-top shape. And hey, sometimes it's just nice to have someone else take care of it for you, leh! Less stress for you, confirm can.
Okay, so you've fixed the warped door. Now, how do you prevent it from happening again? Prevention is always better than cure, right? The key is to control the humidity around your furniture. Invest in a good dehumidifier, especially if you live in a particularly humid area. This will help to keep the air dry and prevent your furniture from absorbing excess moisture. Avoid placing your glass cabinet in direct sunlight or near sources of heat, such as radiators or air conditioning vents. These can cause the wood to dry out unevenly, leading to warping. Regularly clean and polish your furniture with a good quality furniture polish. This will help to protect the wood from moisture and keep it looking its best. And finally, consider using furniture covers during periods of high humidity or when you're away from home for extended periods. This will provide an extra layer of protection against moisture damage. By taking these simple precautions, you can help to keep your glass cabinet doors straight and true for years to come. Like that, no need to worry so much, one.
Alright, so you've tightened every screw you can find, but your glass cabinet door still looks like it's about to fall off? Don't worry, it happens! Especially with the humidity we have here in Singapore, things tend to loosen up over time. Let's dive into some more advanced solutions for those wobbly hinges and stripped screw holes. Sometimes, a simple tightening just won't cut it, leh?
Okay, first things first: stripped screw holes. This is a super common issue, especially with older furniture or if you've been adjusting those hinges a lot. Basically, the screw has chewed away at the wood (or particleboard), leaving a hole that's too big for the screw to grip. Imagine trying to hold onto a wet bar of soap – that's your screw right now! The good news is, it's usually fixable. You see, furniture, like mattresses, sofas, and cabinets, are designed to support our daily activities. Furniture provides both practical function and aesthetic appeal in our homes. When a screw hole strips, it affects the function of the whole piece. Let's get that glass cabinet back to its prime!
So, how do we tackle this? Well, we have a few options, depending on how badly the hole is stripped. Let's start with the easiest and move our way up.
This is a classic, and it often works wonders! Grab some toothpicks (the round ones are best) or wooden matchsticks. Dip them in wood glue – don't be shy with the glue, but don't drown them either. Stuff the glued toothpicks into the stripped screw hole until it's packed full. Snap off any excess sticking out, and let the glue dry completely. I mean it, completely! Give it at least a few hours, or even overnight, to be sure. Once the glue is dry, carefully re-insert the screw. The toothpicks will give the screw something to bite into, creating a tighter, more secure hold. This is a simple fix, but surprisingly effective. It's like giving your screw a little hug, one!
This is a great first step because it's cheap, easy, and you probably already have the materials at home. Plus, it’s a good way to recycle those extra toothpicks from your last satay order, right? But what if the hole is really stripped, like, beyond toothpick territory?
For more serious cases, a dowel rod is your friend. You can find these at most hardware stores, and they come in various diameters. Choose a dowel rod that's slightly larger than the stripped screw hole. Drill out the stripped hole to the size of the dowel rod. Again, be careful and go slow! You don't want to make the hole even bigger. Now, coat the dowel rod with wood glue and insert it into the newly drilled hole. Make sure it's flush with the surface. Let the glue dry completely – patience is key here, okay? Once it's dry, use a small saw or chisel to trim any excess dowel rod. Now, you can pre-drill a pilot hole (slightly smaller than your screw) into the center of the dowel rod and re-insert the screw. You've essentially created a brand new, solid wood base for the screw to grip onto. This method is a bit more involved, but it's much stronger than the toothpick trick. This is confirm can solve your problem, lah!

If you don't have dowel rods handy, or if the hole is an odd shape, wood filler or epoxy putty can also work. These are basically like playdough for wood, but they harden into a solid material. Fill the stripped screw hole completely with the wood filler or epoxy putty. Make sure to overfill it slightly, as it will shrink a bit as it dries. Let it dry completely according to the manufacturer's instructions. Once it's dry, sand it down flush with the surface. Now, just like with the dowel rod method, pre-drill a pilot hole and re-insert the screw. The wood filler or epoxy putty will provide a solid base for the screw to grip onto. This is a good option if you need to fill a larger or irregularly shaped hole. Singaporeans are always on the lookout for intelligent ways to update their living spaces without spending too much, especially when HDB or condo renos can already eat up a big chunk of the reno savings. Between higher living expenses and the need for a warmer, more practical home, many homeowners hold off for the perfect moment to refresh seating, sleep surfaces, or meal areas that actually enhance everyday comfort. That’s when jumping on mattress brands proves to be a smart move—it lets you grab high-quality, stylish pieces at significant savings, often with extra benefits like free delivery, longer guarantees, or combo savings that stretch your dollar further. Suddenly you can afford that dream couch on your wishlist or a comfort-focused sleep upgrade without the second thoughts, turning your home into an even cosier haven for family time and relaxation after tiring office days. Browsing sites such as Wondrous La Vie puts you ahead on the current deals, so you can review, see in 3D, and snap up the best deals that match your lifestyle and interior perfectly.. Plus, you can usually paint or stain the wood filler to match your furniture. Just remember to choose a product that's specifically designed for wood and can be drilled into. Epoxy putty is often stronger and more durable than wood filler, especially for high-stress areas like hinges.
Sometimes, the problem isn't necessarily a stripped screw hole, but rather a screw that's simply too short. Over time, the original screws may have loosened or the wood around them may have compressed, causing the screw to lose its grip. In this case, simply replacing the screws with slightly longer ones can often do the trick. Just make sure the new screws are the same type (e.g., wood screws) and have the same head shape as the original ones. You don't want the screw head to stick out or interfere with the hinge mechanism. Before you screw in the new, longer screw, consider using one of the hole-filling methods above to give it something extra to grip onto. It's like giving it a little insurance policy, steady?
One thing to be mindful of is the length of the screw. You don't want it to be so long that it pokes through the other side of the cabinet door or frame! Measure the thickness of the wood carefully before you buy the new screws. And always start with a slightly shorter screw than you think you need – you can always go longer later, but you can't go shorter once you've drilled the hole.
So, there you have it! A few advanced solutions for dealing with loose hinges and stripped screw holes on your glass cabinet. Remember to take your time, be patient, and don't be afraid to experiment. With a little elbow grease and the right tools, you can get your glass cabinet doors back in tip-top shape in no time. And hey, if all else fails, there's always the option of calling a professional handyman. But give these a try first – you might just surprise yourself with your own DIY skills! Now, go forth and conquer those wobbly hinges! Your display of precious collectibles in your glass cabinet will thank you for it.
Alright, so you've wrestled with those pesky misaligned display cabinet doors, lah? It’s a common headache, especially after settling into a new BTO or giving your place a fresh reno. Don’t worry, almost everyone faces this at some point. Before you start thinking your beautiful furniture is a goner, let’s talk about keeping those doors aligned and your display cabinet looking its best. After all, that glass cabinet is showing off your precious collection, right? We want it looking tip-top, can?
Think of your display cabinet like a perfectly balanced see-saw. If one side is heavier, things are going to tilt! The same applies to what you’re putting *inside* your glass cabinet. Overloading one side, especially with heavier items like those chunky photo albums or that impressive collection of vintage teacups your grandma passed down, can put undue stress on the hinges and frame. This leads to warping and, you guessed it, misalignment. Try to distribute the weight evenly across all shelves. Put heavier items towards the bottom and lighter, more delicate pieces higher up.
Consider the material of your shelves, too. Glass shelves, while stylish and perfect for showing off collectibles in your glass cabinet, might have a lower weight capacity than solid wood shelves. Check the manufacturer's specifications to avoid exceeding the recommended weight limit. It's better to be safe than sorry, especially when dealing with glass! No one wants a shelf collapsing under the weight of their prized possessions.
Another thing to think about? The floor itself! Is your floor perfectly level? Even a slight slope can throw off the balance of your entire display cabinet, contributing to door misalignment. Use shims (those little wedges of wood or plastic) under the cabinet's legs to compensate for any unevenness. You can easily find these at most hardware stores. A spirit level is your best friend here – use it to check the cabinet’s level from front to back and side to side. Getting this right from the start can save you a lot of hassle down the road. It's a small step that makes a big difference, steady lah?
Hinges are the unsung heroes of your display cabinet doors. They bear the brunt of opening and closing, day in and day out. Over time, the screws holding the hinges in place can loosen, causing the doors to sag or shift. This is especially true for glass cabinet doors, which can be heavier than solid wood doors. Regular hinge tightening is key to preventing and addressing misalignment. Grab a screwdriver (the right size, of course – don't strip those screws!) and gently tighten any loose screws you find. Don't overtighten, though! You don't want to damage the wood or strip the screw threads. Just a snug fit is all you need.
If the screws are stripped and won't tighten, don't panic! There are a few easy fixes. One trick is to insert a small piece of wood (like a toothpick or matchstick) into the screw hole to give the screw something to grip onto. You can also use wood glue to secure the toothpick in place for a more permanent solution. Another option is to replace the screws with slightly longer or wider ones. Just make sure they're compatible with the hinge and the cabinet material.
While you're at it, give your hinges a little TLC. A drop of lubricant, like WD-40 or a specialized hinge lubricant, can keep them moving smoothly and prevent them from squeaking. Just a tiny bit is all you need – wipe off any excess to avoid attracting dust and grime. Taking care of your hinges is like giving your display cabinet a little spa day. It keeps everything running smoothly and extends the life of your furniture. Think of it as preventative maintenance – a little effort now saves you bigger headaches later, you know?

Sometimes, the problem goes beyond loose hinges or uneven weight distribution. In Singapore’s tight condo apartments and modern residences, the master bedroom often doubles as a sanctuary— a place for deep relaxation after tiring office hours, enjoy quiet time with a book, or even sneak in a quick work-from-home setup when needed. It’s frequent for homeowners to feel limited by existing setups that feel cramped, harsh overhead lights, or cluttered cabinets taking up room, making the room feel more functional than relaxing. That’s where thoughtful bed frame with storage truly excels—it emphasises clever spatial solutions, relaxing colour schemes, multifunctional furniture, and strategic lighting design to create a tranquil sanctuary that optimises relaxation while ensuring clutter-free airflow. Suddenly your bedroom becomes the place you can’t wait to reach at the close of each day, helping you relax quicker, sleep deeper, and wake up feeling more refreshed for the day ahead. Platforms like Wondrous La Vie provide tons of authentic project showcases and seamless introductions to designers who specialise in these smart, aesthetic SG bedroom upgrades.. Warping or structural issues can also cause display cabinet door misalignment. Warping, which is the bending or twisting of wood, can be caused by humidity, temperature changes, or poor construction. If you suspect warping, try to identify the source of the problem. Is the cabinet exposed to direct sunlight or excessive moisture? Are there any visible cracks or damage to the frame?
Minor warping can sometimes be corrected by applying moisture to the affected area and then clamping it into the correct shape until it dries. However, this is best left to experienced DIYers or furniture repair professionals. For more severe warping or structural damage, professional repair is usually the best option. A furniture repair specialist can assess the damage and recommend the appropriate course of action, whether it's reinforcing the frame, replacing damaged components, or re-gluing joints.
Prevention is always better than cure! To minimize the risk of warping, keep your display cabinet away from direct sunlight and excessive moisture. Use a dehumidifier in humid environments and avoid placing the cabinet near heat sources like radiators or air conditioning vents. Regular cleaning and dusting can also help prevent the buildup of moisture and grime, which can contribute to warping. Taking these precautions can help keep your glass cabinet in good condition for years to come. It's all about creating a stable and consistent environment for your furniture, right?
Beyond the fixes, a few simple habits can go a long way in preventing future display cabinet door alignment issues. Avoid slamming the doors shut. Gentle closing prevents unnecessary stress on the hinges and frame. Be mindful of the weight you're placing inside the cabinet. Regularly check and tighten the hinges. And keep an eye out for any signs of warping or structural damage. These small actions, performed consistently, can make a big difference in the long-term health and alignment of your display cabinet doors.
Think of it like this: your glass cabinet is an investment. It's a piece of furniture that you'll likely have for many years, showcasing your cherished belongings. Taking care of it is like taking care of any other valuable possession. A little bit of attention and maintenance can keep it looking its best and functioning properly for years to come. It's not about being a perfectionist, but about being mindful and proactive. And let’s be real, a well-maintained glass cabinet just *looks* better, right? It reflects well on your home and your attention to detail.
So, there you have it! A few simple tips and tricks to keep your display cabinet doors aligned and your furniture looking its best. Remember, prevention is key, but even if you encounter misalignment issues, there are plenty of ways to address them. With a little bit of care and attention, you can keep your glass cabinet in tip-top shape and enjoy it for years to come. Now go forth and conquer those misaligned doors! You confirm can do it, okay?