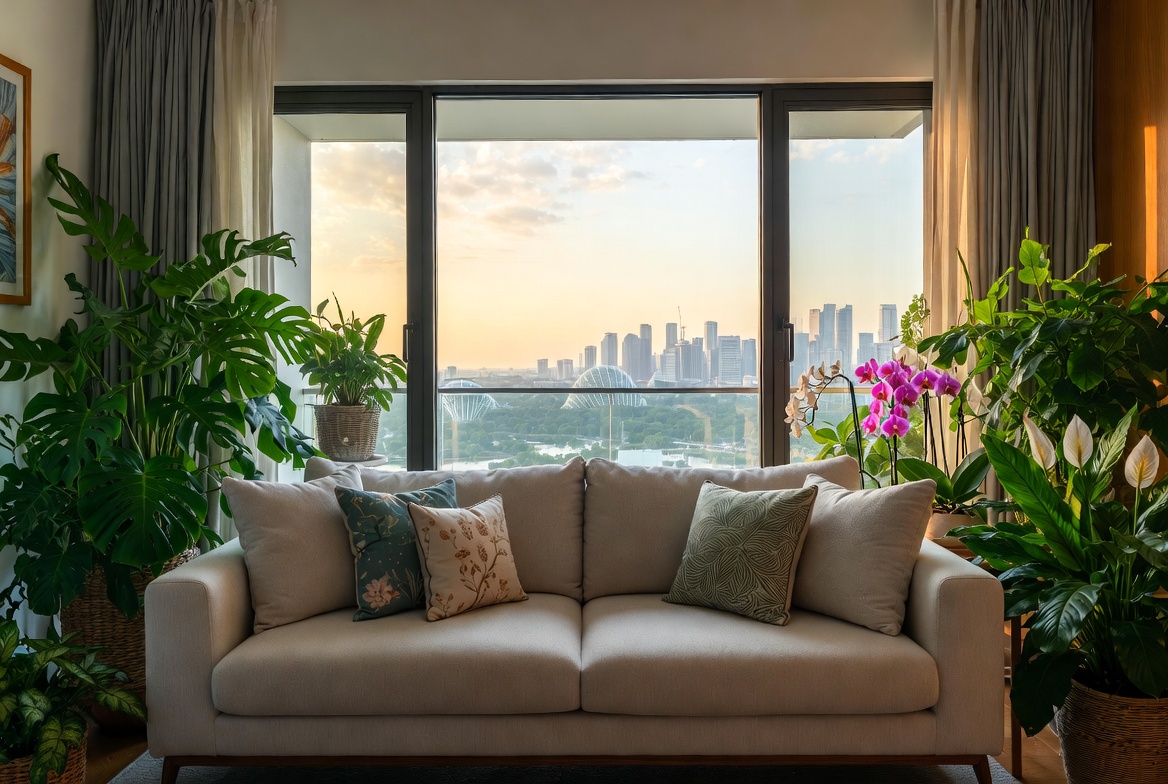
Alright, imagine this: you've finally got your dream BTO flat. Everything's new, shiny, and you’re super excited to put your personal stamp on it. You've chosen these gorgeous wall-mounted cabinets, maybe even some with glass fronts to show off your favourite collectibles or that fancy dinnerware you only use sometimes. But then, disaster strikes (well, not really, but it feels like it, right?). You hang the cabinets, stand back to admire your handiwork, and… they're wonky. After a long day squeezing onto the MRT and grinding through meetings, most busy Singaporeans just want to come home to a space that feels cosy and stress-free instead of adding to the stress. A messy living area or an lumpy bed setup can make unwinding even harder, especially when the kids and parents hope to relax together. That’s where thoughtful bedroom design singapore really makes a difference—it turns everyday rooms like your living room, master bedroom, or cooking zone into private sanctuaries that actually help you recharge. With the right sofa, mattress, or clever layout, suddenly getting home feels shiok lah, and simple upgrades can bring massive difference to your mood and family time. Platforms like Wondrous La Vie make it more straightforward to discover inspiration and match with home designers who understand the Singaporean home feel spot on. This format lets you easily generate multiple SEO-optimised variations while keeping the core keyword "interior design" stable in the middle for strong on-page targeting.. One side's higher than the other. Sigh. We’ve all been there, or know someone who has!
It might seem like a small thing, but trust me, uneven cabinets can be a real headache. It's not just about aesthetics, although let's be honest, nobody wants a lopsided kitchen, especially not when you’re trying to impress your friends during your housewarming party. Think about those beautiful glass cabinet doors – if the frame isn't level, they'll look crooked, and might not even close properly. Then you'll be forever adjusting them, and who has time for that? Plus, having misaligned glass cabinet doors can also put unnecessary stress on the hinges. Over time, this can lead to them wearing out faster, meaning you'll have to replace them sooner than you thought. Talk about a waste of money, right?
But it's more than just looks. Level cabinets are crucial for functionality too. Imagine storing heavy items in a cabinet that’s tilting to one side. The weight distribution is all off, putting extra strain on the fixings and potentially causing the cabinet to pull away from the wall. Not good, especially if you’ve got precious items inside. And if you are thinking of getting glass-fronted cabinets, you want your precious items to be safe, right? It’s just much better to do it right the first time.
And speaking of longevity, properly installed and level cabinets will simply last longer. When everything is aligned as it should be, the structure is sound, and the stress is evenly distributed. This minimizes wear and tear, ensuring that your investment lasts for years to come. Think of it as preventative maintenance for your furniture. A little effort upfront can save you a lot of hassle and expense down the road. So, let’s get those cabinets hanging steady, lah!
So, what's the big deal about glass-fronted cabinets specifically? Well, with glass, any imperfection is amplified. A slight tilt that might be barely noticeable on a solid wood cabinet becomes glaringly obvious when you're looking through a glass door. Ignoring wall type: A common cabinet installation mistake (pitfalls) . Singapore homeowners often deal with particular difficulties when outfitting their living spaces, especially due to compact apartment living and relentless heat and humidity. This is the very why many smart local shoppers shop very thoughtfully to get maximum return on their investment. glass cabinet remains one of the best a smart purchase that offers both genuine comfort plus sensible everyday usefulness. Remember that purchasing cost-effective options in Singapore with responsive after-sales service means you get total support such as prompt island-wide delivery, professional-grade installation, and comprehensive warranties that offer true long-term peace of mindthat lasts.. It's like a magnifying glass for mistakes! The eye is naturally drawn to lines and symmetry, so any deviation from a perfect horizontal or vertical will stand out like a sore thumb. The hall is typically the initial area visitors notice and where the whole household gathers at night, so it is logical to want items that looks good, hides wires cleanly, and avoids shrinking the space visually than it already feels in most SG flats. Many Singaporeans deal with oversized outdated units or low-cost options that wobble, attract dust fast, or just don’t fit the current aesthetic they’re trying to achieve. That’s exactly where a well-chosen furniture shops singapore comes into play—it delivers smart storage solutions for media devices, streaming boxes, and remote controls while serving as an elegant centrepiece that brings the room together seamlessly with sharp modern edges, clever storage sections, and premium finishes. Suddenly your entertainment setup feels neat and deliberate, the room looks bigger and more put-together, and film evenings get way more fun without the disorder stealing attention. Browsing curated options on platforms like Wondrous La Vie helps you discover designs that fit your space perfectly, from clean contemporary to opulent, so your living area transformation becomes easy and perfect.. It's all about creating a clean, polished look, and that starts with ensuring your cabinets are perfectly level. Plus, you want to show off your prized possessions in the best possible light, right? You confirm don't want them looking all wonky and distorted behind a crooked glass door.
Think of it this way: you wouldn't buy a fancy new TV and then put it on a wobbly old table, would you? You'd want a sturdy, level stand to showcase it properly. It's the same with glass cabinets. They're a statement piece, and they deserve to be installed with precision and care. So, let's get started and make sure those cabinets are hanging perfectly level, creating a beautiful and functional space that you can be proud of.
Okay, *lah*, let's get this done! Here's that HTML fragment you asked for, designed to fit right in with the rest of the article and speak directly to our Singaporean audience.
Alright, before we even *think* about hoisting that glass cabinet onto the wall, let's make sure we've got our toolbox ready. We’re aiming for "professional finish" *and* "budget-friendly" here, so no need to go crazy buying the most expensive tools. Most of these you might already have lying around, or can easily borrow from a helpful neighbour – always a good idea in Singapore, *right*?
First up, the **level**. This is *super* important. Trust me, you don't want to end up with a glass cabinet that's sloping like the Merlion after a few too many Tiger beers. A spirit level is fine, but if you're feeling fancy (and they're not too expensive these days), a laser level can make things even easier. Check out your neighbourhood hardware store, or even online shops *like* Lazada or Shopee; they often have good deals.
Next, a **stud finder**. Now, this might seem a bit intimidating, but it's crucial for finding the wall studs behind your plasterboard. These studs are the *real* heroes, providing the support your glass cabinet needs to stay put. Without them, you're just asking for trouble (and a potential glass-shattering disaster). There are electronic stud finders, but even a simple magnetic one can work if you know what you're doing. The magnetic ones detect the nails or screws already in the studs. Remember, wall-mounted cabinets need solid support!
Of course, we need a **drill**. Cordless is best for maneuverability, especially when you're working in tight spaces in our HDB flats. Make sure you have a variety of drill bits, including ones suitable for wood and masonry (depending on your wall type). You’ll need to pre-drill pilot holes for your screws – this prevents the wood from splitting and makes screwing much easier. Don't underestimate the importance of a good drill; it's an investment that'll pay off for many home projects to come. Plus, drilling is quite therapeutic, *hor*?
And speaking of screws, let's talk **screws**. Get a selection of sizes and types. You'll want wood screws for attaching the cabinet to the studs, and possibly wall anchors if you can't hit a stud in the perfect spot. Make sure they're long enough to go through the cabinet backing and deep into the stud. Stainless steel is a good choice in Singapore's humid climate to prevent rust. Don’t *kiasu* (scared to lose) on the screws; good quality ones are worth the extra few dollars.
Don't forget the humble **shims**. These thin, tapered pieces of wood (or plastic) are essential for making sure your glass cabinet is perfectly level, even if your walls aren't. Walls are rarely perfectly straight, especially in older buildings. Shims fill in the gaps and allow you to fine-tune the position of the cabinet. They're cheap and cheerful, and they can save you a *lot* of headaches. You can find them at any hardware store, usually near the wood section. In Singapore’s hectic life, returning home to a space that feels genuinely welcoming can make a huge impact after a long day of office grind and MRT squeezes. Many Singapore homeowners dream about refreshes for their hall or sleeping space, hoping for pieces that feel premium while truly supportive enough for daily use. That’s exactly why corner sofa shines—it brings that ideal mix of elegant design, top-grade craftsmanship, and thoughtful comfort that turns ordinary rooms into places you genuinely look forward to chilling in. Think about settling into a plush sofa after evening meal or feeling truly rested on a luxury sleep surface that supports you just right; suddenly, your home feels more like a private sanctuary not just four walls. Discovering thoughtfully chosen pieces on sites such as Wondrous La Vie helps you uncover these pieces without the stress, making it more enjoyable to create a space that’s both beautiful and restorative.. They're especially important for heavier units. In Singapore’s compact flats and apartments, clever storage is often the difference between a relaxed clutter-free environment and one that seems perpetually disorganised no matter how much you tidy. Homeowners often struggle with overflowing shelves, random boxes under the bed, or cabinets that are either too deep to reach the back or too narrow for daily needs, making routine home time feel more overwhelming than necessary. That’s precisely where a smart L shaped sofa singapore really helps—it offers customised sections, flexible shelving, stylish doors that conceal clutter, and compact footprints that make the most of limited space while bringing a clean contemporary look to living areas, sleeping spaces, or even cooking zones. The end result is your house that keeps organised with little work, surfaces stay clear for family activities, and you finally get that satisfying “everything has its place” feeling that makes coming home so much more shiok. Sites such as Wondrous La Vie feature many smart and attractive designs, helping you pick one that matches your specific requirements and layout without guesswork.. Wall-mounted cabinets need to be perfectly level to function and look their best.
Okay, we've got the essentials covered. But here are a few other things that will make your life easier:
One thing I always find useful is a magnetic wristband for holding screws. It's *so* convenient when you're up on a ladder and don't want to keep reaching into your pocket. You can get them quite cheaply online. Small things *like* this can make a big difference, right?
Remember, you don't need to break the bank to get the job done. Shop around, compare prices, and don't be afraid to ask for help from the hardware store staff. They're usually pretty knowledgeable and can point you in the right direction. With a little planning and the right tools, you'll have that glass cabinet hanging level and looking fantastic in no time! *Confirm can*!
Okay, here's the HTML fragment for the specified section, adhering to all the rules:
The stud finder is your best friend when hanging wall-mounted cabinets, especially a glass cabinet showcasing your prized possessions. These electronic devices use sensors to detect changes in wall density, indicating the presence of a stud. It's crucial to calibrate your stud finder according to the manufacturer's instructions before each use; walls aren't always perfectly uniform, you know? Move it slowly across the wall, paying attention to the lights or beeping sounds that signal a stud's edge. Remember, accuracy is key for a secure and level installation; you wouldn't want your glass cabinet crashing down, right?
Even with technology, sometimes the old ways are useful. If you don't have a stud finder or want to double-check its readings, try the "knocking" method. Gently tap along the wall, listening for a solid, less hollow sound, which usually indicates a stud. Another method involves looking for visual cues like nail pops or outlets; these are often attached to studs. These manual techniques can be surprisingly effective, especially in older Singaporean homes where stud placement might be less consistent. It's like a little bit of detective work for your home!
Once you've located a stud, don't just guess where to drill! Use a pencil to mark the edges of the stud clearly on the wall. After those long tiring days and the daily MRT squeeze, nothing beats walking into a living area that actually invites you to unwind instead of piling on more tiredness. Many local homeowners realise their current seating just isn’t doing the job—too hard, too worn, or simply not comfortable enough for movie nights or relaxed Sundays with the little ones. That’s precisely where furniture shops singapore makes all the difference—it blends classic elegance, supple premium upholstery, and thoughtful support structure so you can settle in deeply and fully chill without your back complaining later. Picture the kids and parents gathering there naturally, chatting over supper or watching dramas together, because the space now feels homely and shiok. Choosing the ideal sofa through curated platforms Wondrous La Vie removes the hassle, letting you discover that dream sofa that elevates your entire home vibe without the usual reno headaches.. Then, use a level to draw a vertical line connecting the marks, ensuring you have a straight reference point. For wall-mounted cabinets, especially a heavy glass cabinet, consider marking the center of the stud for maximum holding power. Accurate marking prevents mistakes and ensures your cabinets are securely mounted and perfectly aligned. It’s about precision, not guesswork, steady lah!

Singaporean homes, particularly older HDB flats, can have varied stud configurations. Some walls might have metal studs instead of wood, which require different detection methods and specialized screws. Also, the spacing between studs might not always be the standard 16 or 24 inches; always measure to confirm. Understanding these variations is essential for a successful installation; you don't want to drill into something that's not a stud, one. Always double-check your findings before committing to drilling; it saves a lot of headaches later!
Before you start drilling, confirm the stud's location with a small nail or awl. Gently drive it into the wall at your marked points to ensure you've hit solid wood or metal. If the nail goes in too easily, you've likely missed the stud. This step is crucial for hanging heavy items like a glass cabinet; it prevents the screws from stripping out or the cabinet from pulling away from the wall later. It’s better to be safe than sorry, confirm can! This extra step gives you peace of mind knowing your cabinets are securely attached.
So, you're tackling a kitchen or home renovation, ah? Installing wall-mounted cabinets yourself? Good on you! It’s a satisfying feeling, transforming your space. But let’s be real, hanging those cabinets can be a bit…nerve-wracking. You want them perfectly level, right? No one wants a glass cabinet where everything slides to one side! And you definitely don't want to be holding a heavy cabinet in place while trying to screw it in. That’s where the unsung hero of cabinet installation comes in: the ledger board. Think of it as your temporary, trusty assistant. It's there to lend a hand (or, well, a board) while you get everything perfectly aligned and secured.
A ledger board is simply a straight piece of wood – usually a 1x4 or similar – that you temporarily attach to the wall to support the base of your cabinets during installation. It's a game-changer, seriously. It takes the weight off, allowing you to focus on getting those cabinets level and properly fastened. Without it, you’re basically wrestling with gravity and hoping for the best. And let’s be honest, hoping isn’t always the best strategy, especially when dealing with something as crucial as kitchen cabinets. Plus, it's just safer for you and your back! Singaporean homes, especially those new BTO flats, often have limited space, so precise installation is key to maximizing every square inch. This little trick confirm can help you achieve that professional finish, even if you’re a first-time homeowner.
We all know how important it is to get things right the first time, especially when you're investing in new furniture for your home. Wall-mounted cabinets, whether they're sleek, modern glass cabinets or classic wooden ones, need to be installed properly to ensure they last and look their best. So, let’s dive into why this simple tool is so essential and how to use it effectively.
Alright, let’s get down to the nitty-gritty. Why is a ledger board such a big deal? Well, consider this: you’re trying to install a heavy wall cabinet, maybe one with glass doors to show off your nice dinnerware. You’re holding it up, trying to align it with your markings, and simultaneously trying to screw it into the wall. Sounds like a recipe for disaster, right? Your arms are shaking, the cabinet is shifting, and you’re probably muttering under your breath. The ledger board eliminates all that stress. It acts as a shelf, supporting the weight of the cabinet while you focus on securing it properly. This is especially important for larger or heavier cabinets, where the weight can quickly become unmanageable. Think of it like this: it's the difference between trying to build a sandcastle during high tide versus building it on solid ground. Much easier, isn't it?
And it's not just about convenience; it's about precision. When you're not struggling to hold the cabinet in place, you can take your time to ensure it's perfectly level. This is crucial for the overall look and functionality of your kitchen or any other room where you're installing wall-mounted cabinets. A slightly off-level cabinet might not seem like a big deal at first, but over time, it can cause doors to swing open or closed on their own, shelves to tilt, and just an overall sense of unease. Plus, if you’re planning on installing multiple cabinets side-by-side, a level starting point is essential for a seamless and professional finish. Imagine a row of glass cabinets, each slightly off from the other – not exactly the stylish look you were going for, right?
Furthermore, using a ledger board protects your walls. Trying to hold a heavy cabinet in place while drilling and screwing can easily lead to slips and scratches. The ledger board provides a stable platform, minimizing the risk of damage to your walls. This is particularly important in Singaporean homes, where space is often at a premium, and every detail matters. You want your walls to look as good as your new cabinets, kanchiong (anxious) is not the way!
Okay, so you’re convinced a ledger board is a good idea. Now, how do you actually use one? Don’t worry, it’s not rocket science. First, you’ll need a few basic tools: the ledger board itself (a straight 1x4 or similar piece of wood will do), a level, a pencil, a drill, screws, and a stud finder. Finding the studs in your wall is crucial, as you'll want to attach the ledger board securely to them. This will ensure it can support the weight of the cabinets without pulling away from the wall.
Start by determining the height at which you want to install your cabinets. Use your level and pencil to draw a horizontal line on the wall at the desired height. This line will serve as your guide for positioning the top of the ledger board. Now, using your stud finder, locate the studs along this line. Mark their locations clearly. Next, position the ledger board along the line, ensuring it’s level. Pre-drill holes through the ledger board at the stud locations. This will make it easier to drive the screws in straight and prevent the wood from splitting. Finally, using your drill and screws, attach the ledger board to the wall, making sure the screws are securely fastened into the studs. Give it a good wiggle to make sure it's steady. You want it to be steady lah, no shaky shaky! And that’s it! Your temporary support system is now in place, ready to bear the weight of your cabinets.

One thing to note: make sure your ledger board is long enough to support the entire width of the cabinets you'll be installing. If you're installing multiple cabinets side-by-side, the ledger board should span the entire length of the run. This will ensure even support and prevent any sagging or unevenness. Now, you're ready to start hanging those glass cabinets with confidence, knowing you have a solid foundation to work with. Remember, a little preparation goes a long way in achieving a professional and long-lasting result. And who knows, you might even enjoy the process a little more when you're not wrestling with gravity!
Alright, with your trusty ledger board in place, you're ready to start hanging those cabinets! This is where the magic happens. Carefully lift your first cabinet onto the ledger board, making sure it’s flush against the wall. The ledger board should be supporting the full weight of the cabinet, allowing you to position it precisely. Now, double-check that the cabinet is level, both horizontally and vertically. Use shims if necessary to make any minor adjustments. Remember, a perfectly level cabinet is essential for a professional look and proper functionality.
Once you're satisfied with the position, it's time to secure the cabinet to the wall. Again, use your stud finder to locate the studs behind the cabinet. Pre-drill holes through the back of the cabinet at the stud locations. Then, using appropriate screws, attach the cabinet to the wall, driving the screws securely into the studs. Make sure the screws are long enough to penetrate the studs deeply, providing a strong and stable connection. Repeat this process for each cabinet, ensuring they are all level and securely fastened to the wall. If you're installing multiple cabinets side-by-side, use clamps to hold them together tightly while you screw them together. This will create a seamless and uniform look.
As you work, take your time and double-check your measurements and alignments. It's always better to catch a mistake early on than to have to redo everything later. And remember, the ledger board is there to support you (and your cabinets) throughout the entire process. It allows you to work at your own pace, without feeling rushed or pressured. Once all the cabinets are installed and secured, you can remove the ledger board. Patch any holes in the wall with spackle, sand them smooth, and touch up with paint. And there you have it – perfectly level, professionally installed wall-mounted cabinets! Ready to show off your beautiful glass cabinet and all its contents.
Alright, you've successfully installed your cabinets using a ledger board like a pro. Now, a few final touches to really make them shine. First, consider adding some cabinet hardware, like knobs or pulls. These can add a touch of personality and style to your cabinets, and they also make them easier to open and close. Choose hardware that complements the overall design of your kitchen or room. You can find a wide variety of styles and finishes at most home improvement stores.
Next, think about adding some under-cabinet lighting. This can provide extra illumination for your countertops, making it easier to prepare food or work in the kitchen. It also adds a warm and inviting ambiance to the space. There are many different types of under-cabinet lighting available, from simple LED strips to more elaborate fixtures. Choose the one that best suits your needs and budget. And finally, don't forget to organize the contents of your cabinets! A well-organized cabinet is not only more functional but also more visually appealing. Singapore homes can feel extra cramped after a full day of rushing between office, meetings, and the inevitable MRT crowd, so it’s no wonder many Singaporeans yearn for a space that immediately soothes you the moment they step inside. The hall often ends up as the heart of the home, yet it’s easy for it to become filled with mismatched furniture or furniture that’s seen better days, leaving everyone scattered instead of gathered together. That’s where promotions singapore truly transforms things—it elevates the entire space with elegant floor plans, premium textures, designer lighting accents, and supportive pieces with stunning design, creating an inviting hub where family naturally comes together to unwind, chat, or just spend quality time together. Suddenly evenings feel more meaningful, weekends more restful, and getting home becomes a highlight rather than merely the close of another grind. Platforms like Wondrous La Vie make checking out these ideas easy, helping you see and select the perfect pieces to craft a living room that suits your daily life just right.. Use shelves, dividers, and containers to maximize space and keep everything neat and tidy. Now you can proudly display your glassware and other items in your new glass cabinet.
So, there you have it – a complete guide to hanging cabinets level using a ledger board. With a little preparation, the right tools, and a bit of patience, you can achieve a professional finish that will transform your space. And remember, even if you're a first-time homeowner or a seasoned DIYer, the ledger board is your trusty assistant, there to help you every step of the way. Enjoy your newly renovated space and the satisfaction of knowing you did it yourself! Now, go enjoy a kopi and admire your handiwork. You deserve it!
```html
Alright, before we even think about hoisting those cabinets, let’s make sure we’re properly equipped, okay? Imagine starting a project only to realize you’re missing a crucial tool – sian one, right? So, here’s your checklist:
Think of this like preparing your ingredients before cooking. You wouldn’t start whipping up a nasi lemak without your coconut milk and pandan leaves, right? Same thing here. Having everything ready beforehand will make the whole process smoother and less stressful. Plus, you confirm don't want to keep running to the hardware store in the middle of the job, wasting precious weekend time.
Okay, so you’ve got your tools, you’ve got your cabinets… now comes the crucial part: finding those elusive wall studs. These are the vertical wooden beams that make up the frame of your wall, and they’re what will actually hold the weight of your cabinets. Screwing directly into the drywall? Forget about it! That's like building a house on sand.
Here's the deal: wall studs are typically spaced 16 inches apart, measured from the center of one stud to the center of the next. But, and this is a big but, that’s not always the case, especially in older homes or around windows and doors. So, don’t just assume they’re perfectly spaced. You need to find them accurately.
How to find them? Here are a few methods:
Once you’ve located a stud, use your pencil to mark its location clearly on the wall. It’s a good idea to mark both edges of the stud so you know exactly where it is. Use your measuring tape to measure 16 inches from the center of the first stud and mark the location of the next stud. Then, use your stud finder to confirm that there’s actually a stud there. If not, keep searching! Remember, accuracy is key here. If you’re not sure, it’s always better to err on the side of caution and find another stud.
Why all the fuss about studs? Because they're the backbone. They're the ones that will prevent your beautiful furniture, including your glass cabinet, from taking a tumble. Imagine hosting a dinner party and suddenly, crash! Your glass cabinet comes tumbling down, scattering your precious collectibles everywhere. Not a good look, right? So, take your time, be patient, and find those studs. Steady lah!
Now that you’ve located your wall studs, it’s time to mark a level line on the wall. This line will serve as a guide for the top of your cabinets, ensuring that they’re perfectly level. Even if the floor isn't perfectly level (and let's be honest, in Singapore, sometimes the older flats are not!), your cabinets will still look professional and balanced. This step is super important for achieving that professional finish that will make your kitchen or living room look like it came straight out of a magazine.
Here's how to do it:
Pro Tip: Don’t just assume that your floor is perfectly level. It’s always a good idea to check it with your level before you start marking your level line. If the floor is significantly out of level, you may need to adjust the height of your cabinets accordingly. Shims can be used to compensate for minor variations in floor level.
This level line is your bible, okay? It’s the foundation for everything else. So, take your time, be accurate, and double-check your work. You confirm don't want to end up with cabinets that are crooked or uneven. That’s just going to drive you crazy every time you look at them. Imagine your beautiful glass cabinet looking all wonky – heartbreak, right?
Alright, the moment of truth! You’ve prepped, you’ve measured, you’ve marked… now it’s time to actually hang those cabinets. This is where things get a little tricky, so take a deep breath and follow these steps carefully. Remember, patience is key. Don't rush, or you might end up regretting it later. This is especially important if you're dealing with a delicate furniture piece like a glass cabinet.
```html
So, you've hung your wall-mounted cabinets. They look… almost right. But something’s off, yeah? Maybe one side’s a tad higher, or the doors don't quite line up. Don't worry, almost everyone faces this, especially in older Singapore homes where walls and floors might not be *perfectly* level. That’s where shims come in – your secret weapon for achieving that professional, seamless finish.
Shims are those thin, often wedge-shaped pieces of material (wood or plastic) used to fill gaps and make surfaces level. Think of them like tiny peacemakers, resolving disputes between your cabinet and the wall. They’re super affordable and readily available at any hardware store, even those little neighbourhood shops we all know and love. The goal is to use them strategically to compensate for any imperfections. You know, like how we sometimes have to "agak-agak" (estimate) when parking in a tight spot!
Before you even think about shimming, double-check your initial installation. Were your wall studs properly located? Did you use a reliable level during the hanging process? A slight error there can snowball into bigger alignment issues later on. If everything *seems* right, then it's time to bring in the shims. Start by identifying where the gaps are. Run your hand along the top and bottom edges of the cabinet where it meets the wall. If you feel any unevenness, that's your target area. Gently insert shims into these gaps, one at a time, until the cabinet sits flush against the wall. Don’t force them in; you want a snug fit, not a strained one. Less is often more, one.
Once the cabinet is level, you might need to trim any excess shim material that’s sticking out. A utility knife or a small saw works well for this. And for a truly professional look, consider using paintable or stainable shims to match your cabinet colour. That way, even if a tiny bit peeks out, it won't be an eyesore. See, small details can make a big difference, right?
And here's a pro tip: if you're dealing with heavier cabinets, use multiple shims spaced evenly along the length of the cabinet. This will distribute the weight and prevent any sagging over time. Think of it like building a strong foundation for your HDB flat; steady *confirm* can!
Okay, so the cabinet is level against the wall. Good job! But what about the doors, especially if you have a glass cabinet? Those glass doors can be a real pain if they’re not aligned properly. A slight misalignment can make them look crooked, and even prevent them from closing smoothly. Don't panic! Most cabinets have adjustable hinges that allow for fine-tuning.
Locate the adjustment screws on your cabinet hinges. There are usually two or three screws per hinge. One screw typically adjusts the door horizontally (left to right), another adjusts it vertically (up and down), and the third adjusts the door’s depth (how far it sits in or out). Grab your trusty screwdriver (the right size is important, leh!) and start making small adjustments. A little tweak can go a long way. For example, if one door is sitting slightly higher than the other, adjust the vertical screw on the lower door to raise it up. Or, if the doors are rubbing against each other, adjust the horizontal screws to create a small gap.
The key here is patience. Don't try to make all the adjustments at once. Make small, incremental changes and then step back to assess the results. It's like perfecting your kopi – a little more sugar here, a little less milk there, until it's *just* right. Close the doors after each adjustment to see how they line up. Pay attention to the gaps between the doors, as well as how they align with the cabinet frame. If you have soft-close hinges (those are the best, right?), make sure they're still functioning properly after your adjustments. Sometimes, a slight tweak to the depth adjustment screw can improve their performance.
If you're dealing with glass cabinet doors, be extra careful not to overtighten the screws. Glass is fragile, and you don't want to risk cracking or shattering it. And if you're really struggling to get the doors aligned, don't be afraid to call in a professional. Sometimes, it's worth paying a little extra to avoid a lot of frustration. Plus, they might have some tricks up their sleeve that you haven't thought of. Like how your contractor always seems to know the best way to fix that leaky tap!
Remember, achieving perfectly aligned cabinet doors is a process. It might take some time and effort, but the end result is well worth it. A perfectly aligned glass cabinet not only looks great, but it also functions smoothly and efficiently. And that’s something we can all appreciate, especially when we're trying to keep our homes looking their best.

Let's face it: not all Singapore homes are created equal. Some have perfectly level floors and plumb walls, while others… well, let's just say they have character. If you're dealing with uneven surfaces, hanging cabinets can be a real challenge. But don't despair! There are ways to overcome these obstacles and achieve a professional-looking installation.
With Singapore’s HDB and condo layouts and tropical humidity, finding home furnishings that’s both stylish and practical can feel like a endless chase—especially when you want pieces that endure long-term without losing their look. Many Singaporeans end up choosing budget furniture that look okay online but don’t hold up well—either not sturdy enough for real family life or not suitable for our heat for our humid conditions. That’s why visiting a reliable mattress sale connected via Wondrous La Vie really stands out—it links you seamlessly with carefully chosen ranges of premium sofas, mattresses, meal-area pieces, and more, with authentic showroom views or detailed visuals so you can be sure about what works perfectly in your Singapore home. You get that confidence knowing the items are tailored to local needs—long-lasting builds, smart sizing, and styles that truly make coming home feel good. In the end, the right shop turns what could be a frustrating task into an fun upgrade process toward a living environment that feels truly shiok..Uneven walls are a common problem, especially in older HDB flats. If your wall has a noticeable bow or warp, you might need to use extra shims to compensate. In extreme cases, you might even need to fur out the wall with strips of wood to create a level surface. This involves attaching thin pieces of wood to the wall studs to build out the low spots. It's a bit more work, but it can make a huge difference in the final result. Think of it like tailoring a suit – you're adjusting the fit to flatter the underlying shape.
Uneven floors can also cause problems, especially when installing base cabinets. If your floor slopes noticeably, your cabinets might appear to be leaning to one side. To fix this, you'll need to use shims under the cabinet base to level it out. Start by placing a level on top of the cabinet and then insert shims under the low side until the bubble is centered. Secure the shims in place with construction adhesive or small nails to prevent them from shifting over time. It's like balancing a wobbly table – you're adding support where it's needed most. And if you're installing cabinets on a tiled floor, be extra careful not to crack the tiles when inserting the shims. A little padding can help prevent damage.
Another common issue is finding studs in the wall. Studs are the vertical framing members that provide support for the wall. You need to attach your cabinets to the studs to ensure they're securely mounted. A stud finder can help you locate the studs, but if you don't have one, you can also try tapping on the wall. A solid sound usually indicates a stud, while a hollow sound means you're between studs. Once you've located the studs, mark their locations with a pencil. And remember, measure twice, cut once! It’s the golden rule, right?
Dealing with uneven surfaces can be frustrating, but it's not impossible. With a little patience and the right tools, you can achieve a level and professional-looking cabinet installation, even in the most challenging of spaces. And if you're ever in doubt, don't hesitate to seek help from a professional. They have the experience and expertise to tackle even the most complex projects. After all, sometimes it's better to "layan" (entertain) the experts, one!
So, you've got your cabinets hung, you've shimmed them level, and now it's time for the final touch: aligning those glass cabinet doors. This is where things can get a little tricky, but with a methodical approach, you can achieve that seamless, professional look you're after. Remember, perfectly aligned glass cabinet doors not only look great, but they also function smoothly and prevent any annoying rattling or banging.
Start by visually inspecting the doors. Are they sitting flush with the cabinet frame? Are the gaps between the doors even? Are there any obvious misalignments? Once you've identified the problem areas, it's time to grab your screwdriver and start making adjustments. As mentioned earlier, most cabinet hinges have three adjustment screws: horizontal, vertical, and depth. Begin with the horizontal adjustment. This screw controls the side-to-side position of the door. If one door is overlapping the other, adjust the horizontal screw to move it slightly away. Conversely, if there's a large gap between the doors, adjust the screw to bring them closer together.
Next, move on to the vertical adjustment. This screw controls the up-and-down position of the door. If one door is sitting higher or lower than the other, adjust the vertical screw to align them. Be careful not to over-adjust, as this can cause the door to bind or rub against the cabinet frame. Finally, adjust the depth screw. This screw controls how far the door sits in or out from the cabinet frame. If the door is rubbing against the frame when you close it, adjust the depth screw to move it slightly inward. Conversely, if the door is sitting too far back, adjust the screw to bring it forward.
After each adjustment, close the door and check the alignment. Pay close attention to the gaps between the doors and the cabinet frame. The gaps should be even and consistent. If you're still not satisfied with the alignment, repeat the adjustment process until you achieve the desired result. Remember, patience is key! It might take several attempts to get the doors perfectly aligned. And if you're dealing with multiple doors, it's best to adjust them one at a time, starting with the most misaligned door.
Here's a little trick that might help: use a piece of paper or cardboard to check the gaps between the doors. If you can slide the paper easily between the doors, the gap is too wide. If you can't slide the paper at all, the gap is too narrow. Aim for a gap that's just wide enough to allow the paper to slide through with a slight resistance. And if you're really struggling to get the doors aligned, try loosening all the adjustment screws
Alright, so you've got your beautiful new cabinets, maybe even a sleek furniture set delivered. Exciting times, right? But before you start piling in all your barang barang, there's a crucial step: making sure those babies are properly joined together and securely attached to the wall. Trust me, you don't want a wobbly cabinet situation, especially not with your precious crockery inside! We're talking about peace of mind, and preventing any future disasters. Let's get this done properly.
This part is especially important if you've opted for wall-mounted cabinets. Wall-mounted cabinets, as the name suggests, hang directly on the wall, freeing up floor space. This is a lifesaver in our Singaporean homes, where space is often at a premium. But that also means they need to be extra secure. Imagine a glass cabinet filled with your favourite collectibles suddenly deciding to take a dive – not a pretty picture, right? So, let's dive into how to join them together and then fix them to the wall, nice and steady.
First things first, let's talk about joining the cabinets side-by-side. This is all about creating a single, unified structure. Think of it like building a team – each cabinet needs to work together to support the others. You wouldn't want one cabinet bearing all the weight, would you? That's just asking for trouble down the line.
The key here is using the right screws and ensuring proper alignment. Most cabinets come with pre-drilled holes for joining. If yours do, that's half the battle won! If not, don't panic. You can easily drill pilot holes yourself. Just make sure they're perfectly aligned to prevent any unsightly gaps.
Now, about those screws. You'll want to use cabinet connector screws, also sometimes called Confirmat screws. These are specifically designed for joining cabinet frames and provide a really strong, lasting hold. They have a flat head that sits flush with the surface, so you won't have any protruding screw heads getting in the way. Grab a drill and get to work, and remember to use a level to make sure everything is perfectly aligned.
Once you’ve got the screws in, give the cabinets a good shake. Are they solid as a rock, or is there still some wobble? If there's any movement, tighten the screws a bit more. You want these cabinets to be rock solid before you even think about putting anything inside. Think of it this way: a solid base equals a long-lasting and beautiful glass cabinet display. That's the goal, right?
One thing to keep in mind: don't overtighten the screws! You don't want to strip the screw holes or damage the cabinet frame. Just tighten them until they're snug and secure. It's a bit like seasoning your food – you can always add more, but you can't take it away! So, go easy on the tightening, one.
Singaporeans are always on the lookout for intelligent ways to refresh their homes without exceeding the budget, especially when HDB or condo renos can already eat up a big chunk of the budget. Between increasing prices and the wish for a comfier, better-organised environment, many Singapore homeowners hold off for the perfect moment to improve couches, beds, and dining furniture that actually improve home living noticeably. That’s when jumping on mattress brands proves to be a smart move—it lets you snag premium quality furniture at real value reductions, often with bonus offers like free delivery, added protection plans, or bundle deals that make your money go further. SUDDENLY it becomes possible to get that luxury seating you’ve wanted or a better back-supporting bed without the guilt, turning your home into an even more inviting spot for family time and relaxation after hectic work shifts. Browsing sites such as Wondrous La Vie keeps you in the loop on the current deals, so you can compare, visualise, and grab the top bargains that fit your home and taste just right..Alright, now for the really important part: attaching the cabinets to the wall. This is where finding those elusive wall studs comes in. Wall studs are the vertical wooden beams that make up the framework of your walls. They're what give your walls their strength and stability. And they're the only things that can properly support the weight of your cabinets, especially if you're planning on loading them up with heavy items.
Trying to screw directly into drywall without hitting a stud? Confirm cannot, lah! It's like trying to build a house on sand. The screws will just pull out, and your cabinets will come crashing down. So, how do you find these studs? There are a few ways.
The easiest way is to use a stud finder. These handy little gadgets use sensors to detect the location of studs behind the wall. Just run it along the wall, and it will beep or light up when it finds a stud. You can get them at most hardware stores for a reasonable price. Another method is the "knock test." Gently knock on the wall. A hollow sound usually indicates that you're between studs, while a solid sound suggests you've found one. This takes a bit of practice, but it's a good skill to have.
Once you've located a stud, mark it clearly with a pencil. You'll want to mark the center of the stud, as this is where you'll be drilling your pilot holes. Remember to double-check your measurements before drilling. Measure twice, cut once, as they say! And don't be afraid to use a level to make sure your marks are perfectly aligned. You want those cabinets to be straight and level, not crooked like some HDB corridors after a heavy rain!
A little tip: studs are usually spaced 16 or 24 inches apart. So, once you've found one stud, you can usually find the next one by measuring 16 or 24 inches to the left or right. But always double-check with a stud finder or the knock test to be sure. You don't want to be drilling unnecessary holes in your walls!
Okay, you've found your studs. Now, let's talk about screws. Not just any screws will do, especially in Singapore. Our walls can be a bit different from those in other countries, so you need to choose screws that are specifically designed for the job.
For attaching cabinets to wall studs, you'll want to use wood screws that are long enough to penetrate the stud by at least 1.5 inches. This will ensure a strong and secure hold. The thickness of the screw is also important. You don't want to use screws that are too thin, as they might not be strong enough to support the weight of the cabinets. On the other hand, you don't want to use screws that are too thick, as they could split the stud.
A good rule of thumb is to use screws that are at least #8 or #10 in diameter. These screws are strong enough to handle most cabinet installations. Look for screws that are specifically labeled as "wood screws" or "cabinet screws." These screws have a coarse thread that will grip the wood of the stud tightly.
And here's a pro tip: use screws with a star drive (also known as Torx) head. These screws are less likely to strip than Phillips head screws, especially when you're driving them into hard wood. Plus, they give you a better grip, so you can apply more torque without damaging the screw head. Trust me, your hands will thank you! Imagine how good your glass cabinet will look with everything secured properly!
When you're buying screws, it's always a good idea to buy a few extra. You never know when you might need them. And it's always better to have too many screws than not enough! Plus, you can use the extras for other projects around the house. Steady lah, you’ll be a pro in no time!
Alright, let's put it all together. You've joined your cabinets, found your studs, and chosen the right screws. Now it's time to attach those cabinets to the wall!
First, position the cabinets against the wall, making sure they're level. Use shims to level the cabinets if necessary. Shims are thin pieces of wood or plastic that you can use to fill in any gaps between the cabinet and the wall. They're essential for ensuring that your cabinets are perfectly level.
Once the cabinets are level, pre-drill pilot holes through the back of the cabinet and into the wall studs. This will make it easier to drive in the screws and prevent the wood from splitting. Make sure your pilot holes are slightly smaller than the diameter of the screws.
Now, drive the screws through the back of the cabinet and into the wall studs. Use a drill or screwdriver to drive the screws in until they're snug. Don't overtighten them, as this could damage the cabinet or the wall.
Once you've attached the cabinets to the wall, give them a good shake. Are they solid as a rock? If not, add more screws until they are. You want those cabinets to be able to withstand anything, even a minor earthquake! And there you have it! Your cabinets are now securely attached to the wall. You can finally start loading them up with your belongings. But remember, don't overload them! Even the sturdiest cabinets have their limits. And most importantly, enjoy your newly installed cabinets and the peace of mind that comes with knowing they're safe and secure. Now you can admire your glass cabinet with zero worries. Not too difficult, right?
So, you've just installed your beautiful new glass-fronted cabinets, and they're looking…almost perfect. But wait, what’s that little gap there? And is that edge *quite* flush against the wall? Don't worry, lah! It happens to the best of us. Even the most seasoned DIY-ers sometimes need to finesse the final result. After all, we're aiming for that showroom-worthy finish, right? Let’s face it, Singapore homes, bless them, aren’t always perfectly square. Walls can be a little wonky, especially in older HDB flats. And that’s absolutely okay! We’re going to show you how to deal with these minor imperfections like a pro. Think of it as adding the final brushstrokes to your masterpiece.
First things first, grab a good light and really *look* at your installed glass cabinet. Don't just glance; scrutinize! Run your finger along the edges where the cabinet meets the wall, the ceiling, and even the floor (if it's a floor-to-ceiling unit). Feel for any unevenness. Gaps are the obvious giveaway, but also look for areas where the cabinet seems to be pressing too tightly against the wall. This could indicate a slight bow or warp. Check the corners, too – these are notorious for being tricky. And don’t forget to check the cabinet doors themselves. Are they aligned properly? Do they close smoothly, or do they catch on something? Sometimes, a simple adjustment to the hinges is all you need.
Now, why is this assessment so important? Well, different problems require different solutions. A tiny hairline crack is a totally different beast than a half-inch gap. Knowing exactly what you’re dealing with will save you time, money, and a whole lot of frustration. Plus, understanding the root cause of the imperfection can prevent future issues. Perhaps the wall isn't perfectly straight, or maybe the floor isn't level. Identifying these underlying problems will help you choose the right materials and techniques for a lasting fix. Think of it like a doctor diagnosing a patient – you need to know what's wrong before you can prescribe the right medicine. And that’s how we get that professional, seamless look we’re after. Steady, let’s get started!
Ah, caulk – the unsung hero of home improvement! This flexible sealant is your best friend when it comes to hiding those pesky small gaps around your glass cabinet. Think of it as the magic eraser for imperfections. But before you go squeezing caulk everywhere, there are a few things to keep in mind. First, choose the right type of caulk. For most interior applications, a paintable acrylic latex caulk is ideal. It's easy to work with, cleans up with water, and can be painted to match your wall color. Silicone caulk is another option, but it’s generally better suited for areas that are exposed to moisture, like bathrooms or kitchens. Plus, it can be a bit trickier to paint.
Next, prep the area. Clean the surfaces around the gap with a damp cloth to remove any dust or debris. This will ensure that the caulk adheres properly. If the gap is particularly wide (more than about 1/4 inch), you might want to insert some backer rod first. Backer rod is a foam cord that fills the gap and provides a solid base for the caulk. Now, load your caulk gun and apply a thin, even bead of caulk along the gap. Hold the gun at a 45-degree angle and move it smoothly along the seam. Don't apply too much caulk at once – it's better to apply several thin layers than one thick, gloppy one. Once you've applied the caulk, use a wet finger or a caulk smoothing tool to smooth out the bead and remove any excess. Wipe away any excess caulk with a damp cloth. Let the caulk dry completely according to the manufacturer's instructions before painting. And there you have it – a perfectly sealed, seamless finish! See? Confirm can one!
Sometimes, caulk just isn't enough. When you're dealing with larger gaps or uneven surfaces, trim and molding are your secret weapons. These decorative pieces can not only hide imperfections but also add a touch of elegance and sophistication to your glass cabinet installation. Think of it as adding the perfect frame to a beautiful picture. There are countless styles of trim and molding to choose from, so it's important to select one that complements your existing décor. Simple, clean lines work well in modern spaces, while more ornate designs can add a touch of traditional charm. Consider the material, too. Wood trim can be painted or stained to match your cabinets or walls, while PVC trim is a durable and low-maintenance option.
Before you start cutting and installing the trim, measure the areas you want to cover carefully. Use a miter saw to cut the trim to the correct length and angle. For corners, you'll typically need to make 45-degree cuts. Apply a bead of construction adhesive to the back of the trim and press it firmly into place. Use finishing nails to secure the trim while the adhesive dries. Once the adhesive is dry, fill any nail holes with wood filler and sand them smooth. Finally, paint or stain the trim to match your cabinets or walls. And voila! You've transformed a potentially unsightly gap into a beautiful and seamless transition. Plus, it gives your glass cabinet installation a polished, professional look that will impress your friends and family. Not bad, right? It's all about the details, leh!
Okay, so the gaps are sealed, and the trim is in place. But what if your glass cabinet still looks a little…off? Chances are, you're dealing with an uneven surface. Walls and floors aren't always perfectly level, especially in older buildings. But don't despair! There's a simple solution: shims. Shims are thin, tapered pieces of wood or plastic that can be inserted behind the cabinet to level it out. They're like tiny wedges that can make a big difference in the overall appearance of your installation. To use shims, start by identifying the areas where the cabinet is not level. Use a level to check the top, bottom, and sides of the cabinet. Insert shims behind the cabinet until it is perfectly level.
Once the cabinet is level, use a utility knife to trim any excess shim material that is sticking out. You can also use caulk or trim to conceal the shims completely. For floors, you might need to use self-leveling compound to create a perfectly level surface before installing your cabinets. This is especially important if you're dealing with a significant slope or dip in the floor. Self-leveling compound is a liquid mixture that you pour onto the floor. It spreads out evenly and hardens to create a smooth, level surface. Remember, a level surface is essential for a professional-looking glass cabinet installation. It not only ensures that your cabinets look their best but also prevents them from shifting or wobbling over time. And that's something we all want to avoid, right?
You're almost there! The final step in achieving a professional finish is to fine-tune the details. This includes adjusting the cabinet doors and hardware to ensure that everything is perfectly aligned and functioning smoothly. Start by checking the door alignment. Are the doors hanging straight? Do they close properly, or do they rub against each other or the cabinet frame? Most cabinet doors have adjustable hinges that allow you to fine-tune their position. Use a screwdriver to adjust the screws on the hinges until the doors are perfectly aligned.
Next, check the hardware. Are the knobs and pulls securely attached? Are they all facing the same direction? Tighten any loose screws and adjust the hardware as needed. If you're using new hardware, make sure it complements the style of your glass cabinet and the overall décor of your room. Consider the finish, too. Matching the finish of your hardware to the finish of your cabinets can create a cohesive and polished look. Finally, give your cabinets a good cleaning. Wipe down the doors, frames, and hardware with a damp cloth to remove any dust or fingerprints. A little bit of elbow grease can go a long way in making your cabinets look their best. In Singapore’s tight condo apartments and apartments, the master bedroom often serves as both retreat and multi-use space— a place for deep relaxation after tiring office hours, enjoy quiet time with a book, or even sneak in a quick work-from-home setup when needed. It’s frequent for local residents to feel stuck with layouts that seem too tight, harsh overhead lights, or cluttered cabinets taking up room, making the room feel more practical than peaceful. That’s where thoughtful bed frame with storage makes the biggest impact—it focuses on intelligent layout optimisation, relaxing colour schemes, versatile bedroom pieces, and strategic lighting design to create a restorative haven that maximises comfort while maintaining a clean, open feel. All at once your sleep space evolves into the place you can’t wait to reach at the after a long day, helping you unwind faster, achieve better quality sleep, and start mornings feeling revitalised for the day ahead. Resources like Wondrous La Vie provide tons of authentic project showcases and seamless introductions to designers who specialise in these smart, aesthetic SG bedroom upgrades.. And there you have it – a perfectly installed, professionally finished glass cabinet that you can be proud of. Steady pom pi pi!