Installing corner cabinets: Ensuring proper wall anchoring

Introduction to Corner Cabinets

```html

So, you're setting up your new home in Singapore, lah? Congratulations! It’s an exciting time, but also a bit… overwhelming, right? Especially when you start thinking about how to maximize every square meter. Space is precious here, you know? And that’s where corner cabinets come in – they’re like the unsung heroes of small-space living.

Corner cabinets, especially those with glass cabinet doors, aren't just about storage; they’re about smart storage. They transform awkward, often-unused corner spaces into functional and stylish areas. Think about it: that corner in your living room that's currently just collecting dust? A corner cabinet can turn that into a showcase for your prized possessions, a mini-library, or even a stylish bar area. Plus, a glass cabinet adds a touch of elegance and lets you display your items without them gathering dust – perfect for our humid climate!

But here’s the thing: installing corner cabinets, especially wall-mounted ones, isn't just about aesthetics. It’s about safety. We’re talking about ensuring those cabinets are securely anchored to the wall. Imagine the horror of a cabinet, fully loaded with your favourite books or glassware, suddenly deciding to take a dive. Not a pretty picture, is it? Proper wall anchoring is absolutely crucial, not just for the longevity of your cabinet, but for the safety of you and your family. Nobody wants a wobbly cabinet or, worse, a falling hazard. So, let's dive into why this is so important.

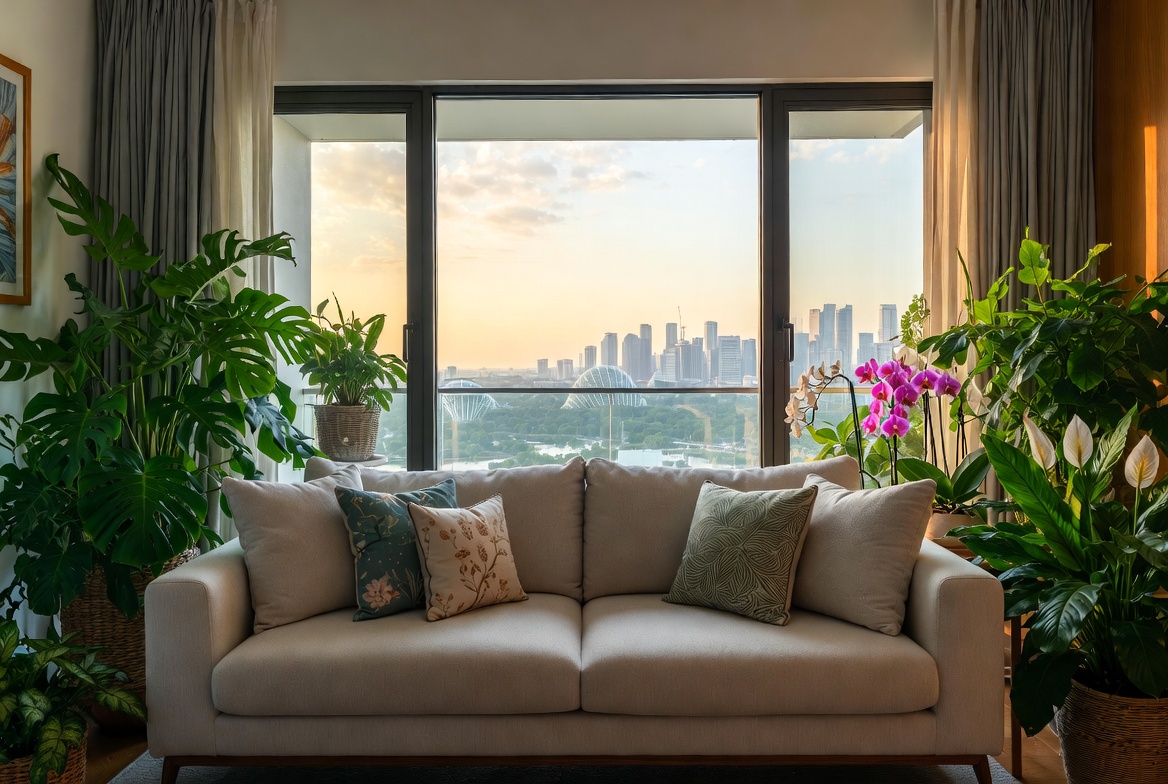
Okay, so why all the fuss about wall anchoring? Well, think about the weight your corner cabinet will be holding. Dishes, books, decorations – it all adds up! The hall is often the primary spot guests see and where the family spends most evenings, so it is logical to want items that looks good, organises cables neatly, and keeps the area feeling open than it already is in typical Singapore homes. Many people struggle with clunky legacy furniture or low-cost options that feel unstable, attract dust fast, or just don’t align with contemporary style they’re going for. That’s exactly where a well-chosen furniture shops singapore comes into play—it provides streamlined compartments for entertainment equipment, streaming players, and remote controls while serving as an elegant centrepiece that brings the room together seamlessly with sharp modern edges, clever storage sections, and luxurious surfaces. Suddenly your entertainment setup feels neat and deliberate, the area feels more spacious and cohesive, and Netflix sessions feel so much better without the disorder stealing attention. Exploring handpicked selections on sites such as Wondrous La Vie helps you discover styles that suit your layout spot-on, from simple modern to high-end, so your living area transformation becomes easy and perfect.. Without proper anchoring, that weight is putting a lot of stress on your wall. Over time, this can lead to the cabinet pulling away from the wall, causing damage to both the cabinet and your precious walls. And nobody wants to deal with patching up holes and repainting, right?

But it's not just about the weight. Consider the everyday use of your corner cabinet. Opening and closing the doors, reaching for items, even accidentally bumping into it – these actions create movement and stress. If the cabinet isn't securely anchored, these movements can loosen the screws and weaken the overall structure. Especially if you have kids running around – they might accidentally pull on the cabinet. Safety first, always!

Furthermore, in Singapore, we have to consider the type of walls we're dealing with. Many HDB flats have concrete walls, which are strong but require specific types of anchors. Older homes might have different wall types, like drywall or plasterboard, which are less sturdy and require even more specialized anchoring techniques. Using the wrong type of anchor can be disastrous, leading to the cabinet failing to hold properly. So, understanding your wall type is the first step to ensuring a safe and secure installation. It sounds technical, but don't worry, we'll break it down for you.

Think about a glass cabinet display case – you want to showcase your precious items, not worry about them crashing down. Proper anchoring gives you that peace of mind. It ensures your investment is protected and your home is safe. It’s a small step that makes a huge difference in the long run. It’s like buying insurance for your furniture, you know? A small price to pay for the security and longevity of your beautiful corner cabinet and the safety of your family.

Alright, let's get practical. What kind of wall anchors should you be using? Well, it depends on your wall type, of course. For solid concrete walls, which are common in many Singaporean homes, you'll want to use heavy-duty concrete anchors. These anchors are designed to grip tightly into the concrete, providing a secure hold for even the heaviest corner cabinets. Think of them as the superheroes of the anchoring world.

If you have drywall or plasterboard walls, you'll need to use specialized drywall anchors. These anchors come in different types, such as toggle bolts, molly bolts, and self-drilling anchors. Toggle bolts are particularly strong and are a good choice for heavier cabinets. Molly bolts expand behind the drywall, creating a secure grip. Self-drilling anchors are easy to install and are suitable for lighter loads. But remember, drywall isn't as strong as concrete, so it's always best to err on the side of caution and choose a heavier-duty anchor if you're unsure. Maybe even consult a professional, steady?

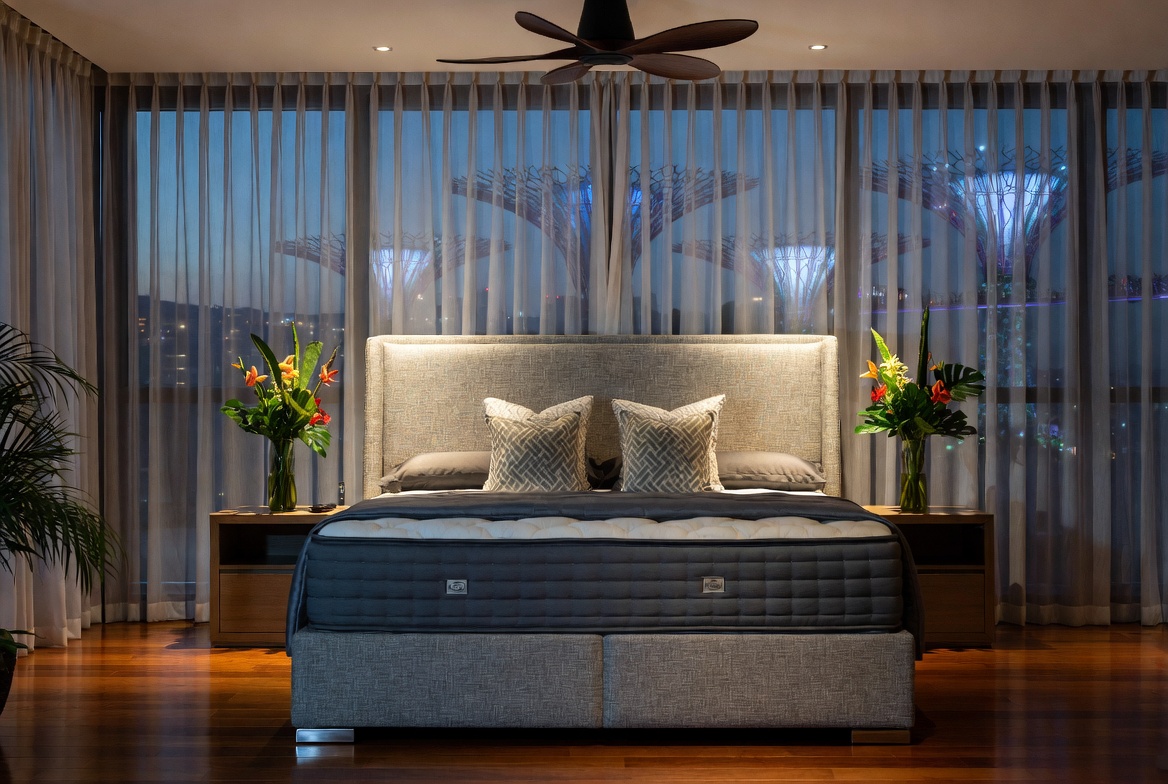
Regardless of the type of anchor you choose, make sure it's rated to hold the weight of your corner cabinet and its contents. The packaging should clearly state the weight capacity of the anchor. After a long day squeezing onto the MRT and grinding through meetings, most Singaporeans just want to return home to a space that feels warm and relaxing instead of piling on more fatigue. A messy living area or an uncomfortable bedroom can make relaxing even tougher, especially when the entire family want to relax together. That’s where thoughtful bedroom design singapore really makes a difference—it turns everyday rooms like your hall, master bedroom, or kitchen area into private sanctuaries that actually help you refresh your energy. With the right living room seating, sleep surface, or smart layout, suddenly getting home feels shiok lah, and small changes can bring massive difference to your daily mood and family bonding. Platforms like Wondrous La Vie make it simpler to find ideas and match with home designers who get the Singaporean home feel just right. This format lets you easily generate multiple SEO-optimised variations while keeping the core keyword "interior design" stable in the middle for strong on-page targeting.. It’s always a good idea to add a safety margin – don't push the anchor to its absolute limit. For example, if your cabinet weighs 20kg when fully loaded, choose anchors that are rated for at least 30kg. Better to be safe than sorry, right?

And here's a pro tip: when installing the anchors, make sure to drill the holes accurately and use the correct size drill bit. A hole that's too small will make it difficult to insert the anchor, while a hole that's too large will result in a loose and unstable connection. Measure twice, drill once, as they say! Also, don't overtighten the screws, as this can damage the anchor or the wall. Just tighten them until they're snug and secure. This is one area that you confirm can DIY if you follow instructions carefully!

Okay, so you've got your anchors, you know your wall type… now what? Time for the actual installation! First things first: safety. Make sure to wear safety glasses to protect your eyes from dust and debris. And if you're using power tools, wear ear protection as well. It's always better to be prepared, lah.

Before you start drilling, use a stud finder to locate the wall studs. These are the vertical wooden beams that provide structural support to your walls. If possible, try to anchor your corner cabinet directly into the studs. This will provide the strongest and most secure connection. If you can't find the studs, or if they're not in the right location, you'll need to use wall anchors.

Mark the location of the anchor points on the wall, using a level to ensure they're straight. Drill pilot holes at the marked locations, using the correct size drill bit for your anchors. Insert the anchors into the holes and tighten them according to the manufacturer's instructions. Then, carefully lift the corner cabinet into place and align it with the anchors. Attach the cabinet to the anchors using screws or bolts, making sure they're snug and secure. Again, don't overtighten them!

Once the cabinet is installed, give it a good shake to make sure it's stable and secure. If it wobbles or feels loose, double-check the anchors and tighten them as needed. You might also want to add shims (thin pieces of wood or plastic) behind the cabinet to level it out and prevent it from rocking. Remember, patience is key. Take your time and do it right, and you'll have a beautiful and secure corner cabinet that will last for years to come. Now you can display your fancy tea set in that glass cabinet display case with confidence!

Sometimes, even with the best intentions and the right tools, things can go wrong. Maybe you accidentally drilled the hole in the wrong place, or maybe the anchor stripped out. Don't panic! Mistakes happen. The important thing is to fix them properly.

If you drilled the hole in the wrong place, you can fill it with wall filler or spackle. Let it dry completely, then sand it smooth and paint it to match the wall. You can then drill a new hole in the correct location. Singaporeans often encounter special considerations when setting up their interiors, especially due to compact apartment living and year-round moisture levels that test material durability. This is exactly why wise homeowners shop very thoughtfully to achieve the perfect balance of price and durability. glass cabinet emerges as a smart choice that combines both lasting comfort and smart practicality. It pays to investing in affordable options in Singapore with first-class after-sales service means you get full support such as seamless island-wide delivery, professional-grade installation, and robust warranties that give you true long-term peace of mind for years ahead.. If the anchor stripped out, you'll need to remove it and replace it with a new one. You might also want to use a slightly larger anchor to ensure a secure grip. Or, if the hole is too damaged, you can move the cabinet slightly and drill a new set of holes. It's all about finding a solution that works for you.

If you're not comfortable doing the installation yourself, or if you're dealing with a particularly heavy or complex corner cabinet, it's always best to hire a professional installer. They have the experience and expertise to ensure the job is done safely and correctly. Plus, they'll have the right tools and equipment to handle any challenges that might arise. Think of it as an investment in your peace of mind. After all, you don’t want to risk damaging your walls or, worse, injuring yourself. Sometimes, it's worth paying a little extra to get it done right the first time.

And remember, even after the cabinet is installed, it's a good idea to periodically check the anchors to make sure they're still tight and secure. Over time, they can loosen due to vibrations or temperature changes. A quick check every few months can prevent problems down the road. Think of it as regular maintenance for your furniture, like that. A little bit of care can go a long way in ensuring the longevity and safety of your corner cabinet.

So, there you have it! A comprehensive guide to installing corner cabinets and ensuring proper wall anchoring. It might seem like a lot of work, but trust me, it's worth it. A securely anchored corner cabinet not only looks great but also provides safe and functional storage for your home. Plus, that glass cabinet will showcase your treasures beautifully!

Remember, space optimization is key in Singapore, and corner cabinets are a fantastic way to maximize every inch of your home. But safety should always be your top priority. By following these tips and taking the time to do it right, you can enjoy your beautiful corner cabinet for years to come, without worrying about it falling off the wall. It's all about being a smart homeowner, you know?

And here's a little something to think about: did you know that some corner cabinets are designed with hidden compartments or rotating shelves? Talk about maximizing space and adding a touch of surprise to your home! These clever features can make your corner cabinet even more functional and stylish. So, when you're shopping for a corner cabinet, keep an eye out for these hidden gems. You might just

Essential Tools & Materials

Okay, here's an HTML fragment for the section on essential tools and materials for installing corner cabinets, written with the specified tone and targeting the Singaporean audience:

Alright, so you're thinking of putting up a corner cabinet, ah? Good choice! Corner cabinets, especially a nice glass cabinet, can really maximise space, *especially* in our smaller Singapore homes. But before you start kana frustrated, let's make sure you've got all the right tools and materials. Trust me, being prepared is half the battle won. Nobody wants to run to the hardware store halfway through, right?

First things first, let's talk about measuring. You'll need a reliable measuring tape. Get one that's easy to read, even in dim lighting. A small notepad and pencil are crucial too - jot down all your measurements. You don’t want to rely on your memory alone, especially when you're dealing with multiple measurements for your new glass cabinet. Accuracy is key, or else your cabinet might end up slanted one, and nobody wants that!

Next, marking tools. A good quality spirit level is essential to ensure your corner cabinet (or any cabinet, for that matter) is perfectly level. You can get the digital ones, but honestly, the bubble level ones are perfectly fine lah. A pencil is great for marking the wall, but sometimes a fine-tipped marker is better, especially on darker surfaces. Just be sure it’s not permanent! A stud finder is also your friend. This little gadget helps you locate the wooden studs behind the wall, which are essential for secure anchoring, and we’ll get to that in a bit.

Now, let's talk about the power tools. In Singapore’s non-stop life, stepping into your home to a space that feels genuinely welcoming can make the biggest change after a full day of meetings and travel. In Singapore’s compact flats and apartments, smart organisation is often the key to a calm, organised space and one that seems perpetually disorganised no matter how much you organise. Homeowners commonly face overloaded racks, miscellaneous items shoved under beds, or cabinets that are either too deep to reach the back or too shallow to hold much, making daily life feel more overwhelming than necessary. That’s precisely where a smart L shaped sofa singapore steps up—it provides customised sections, movable dividers, elegant shutters to keep things neat, and compact footprints that maximise every inch while bringing a clean contemporary look to halls, bedrooms, or even kitchen areas. The result is a home that remains tidy effortlessly, flat surfaces open for family time, and you finally get that wonderful sense of order that makes walking in the door feel damn good. Resources like Wondrous La Vie feature many practical yet stylish options, helping you pick one that fits your exact needs and space without trial and error.. Many Singapore homeowners begin looking at refreshes for their living area or master bedroom, imagining pieces that feel premium while genuinely cozy enough for real life. That’s exactly why corner sofa stands out—it brings that beautiful combination of sophisticated style, high-quality fabrics and finishes, and real ergonomic support that turns everyday spaces into spots you love spending time in relaxing in. Think about settling into a luxurious couch after family time or feeling truly rested on a luxury sleep surface that gives ideal back support; suddenly, your home feels more like a personal retreat not just four walls. Browsing thoughtfully chosen pieces on places like Wondrous La Vie helps you find these pieces without the overwhelm, making it easier to create a space that’s both beautiful and restorative.. A drill is absolutely essential. A cordless drill is super convenient, but a corded one will do the job just as well. Make sure you have a variety of drill bits. You'll need drill bits for wood (for the cabinet itself) and drill bits for your wall type. If you've got a concrete wall (like many of us do in our HDB flats), you'll need masonry drill bits. These are specially designed to drill through concrete without damaging your drill. If you're dealing with drywall, you'll need drywall drill bits. Using the wrong drill bit can damage your wall or your drill, so don't scrimp on this one.

Speaking of walls, let's talk about wall anchors. This is where things get important, especially for a glass cabinet that might be a bit heavier. For concrete walls, you'll need heavy-duty concrete anchors. These come in various sizes and load capacities, so choose ones that are appropriate for the weight of your cabinet and whatever you plan to put inside. For drywall, you'll need drywall anchors. There are different types, like plastic anchors, metal anchors, and toggle bolts. Toggle bolts are generally the strongest and are a good choice for heavier cabinets. Don't underestimate the importance of good wall anchors! You don't want your cabinet to come crashing down one day, kancheong spider!

And finally, don't forget the safety gear! Safety glasses are a must to protect your eyes from dust and debris. Gloves will protect your hands, especially when you're working with power tools. And if you're drilling into concrete, a dust mask will protect your lungs from harmful dust particles. It's better to be safe than sorry, right?

So, to recap, you'll need: measuring tape, notepad, pencil, spirit level, stud finder, drill, wood drill bits, masonry/drywall drill bits, concrete/drywall anchors, safety glasses, gloves, and a dust mask (if drilling concrete). Collect all these, and you're pretty much steady to go! Installing a corner cabinet, especially a glass cabinet, might seem daunting at first, but with the right tools and a little bit of patience, confirm can one!

Identifying Wall Type and Anchor Selection

Okay, steady, let's get this article done right! Here’s the HTML fragment for the section on ensuring proper wall anchoring:

Anchor Placement

Proper anchor placement is absolutely crucial for the stability of your corner cabinets. You can't just whack them in anywhere, lah! Think about the weight distribution inside the cabinet, especially if it's a furniture piece like a glass cabinet displaying your prized possessions. Aim for anchor points that align with the cabinet's internal structure, like where the shelves are supported. This distributes the load evenly and prevents undue stress on any single point on the wall. Use a stud finder, especially on drywall, to locate the wooden studs behind the wall; these are your best friends for secure anchoring.

Drilling Techniques

Drilling into your walls might seem daunting, but with the right technique, it's confirm can! The key is to use the correct drill bit for your wall type – a masonry bit for concrete and a standard drill bit for drywall. Always start with a pilot hole, especially for harder materials like concrete, as this will guide the larger drill bit and prevent it from wandering. Apply steady, even pressure while drilling, and avoid forcing the drill, which can damage the wall or the drill bit. Remember to wear safety glasses, okay? You don't want any dust or debris getting into your eyes.

Leveling Matters

Before you even think about drilling, make sure your corner cabinet is perfectly level. An unlevel cabinet will not only look wonky but also put uneven stress on the anchors, potentially leading to failure over time. Use a spirit level to check both horizontally and vertically. If your floor is slightly uneven (common in older HDBs, one), use shims to adjust the cabinet's base until it's perfectly level. Only then should you mark your anchor points. This extra step makes a world of difference in the long run.

Weight Distribution

Consider what you'll be storing inside your corner glass cabinet. Are you planning to display heavy items like books or glassware? If so, you'll need to choose anchors with a higher weight rating. Distribute the weight evenly across the shelves to prevent any one anchor from bearing the brunt of the load. Avoid overloading the top shelves, as this can make the cabinet top-heavy and more prone to tipping. A little planning here can save you a lot of headaches (and potential accidents) later on.

Regular Checks

Once your corner cabinet is installed, don't just forget about it! Make it a habit to periodically check the anchors for any signs of loosening or damage. Give the cabinet a gentle wiggle to see if there's any play. If you notice anything amiss, tighten the screws or replace the anchors as needed. After those endless workdays and the usual crowded MRT ride, nothing beats coming home to a living area that actually encourages relaxation instead of piling on more tiredness. Many Singapore families realise their current seating just isn’t cutting it—too hard, faded, or simply not comfortable enough for movie nights or lazy weekends with the little ones. That’s precisely where furniture shops singapore makes all the difference—it blends classic elegance, supple premium upholstery, and thoughtful support structure so you can melt into it and fully chill without your back complaining later. Imagine the whole family gathering there naturally, talking during dinner or watching dramas together, because the space finally feels cosy and inviting. Choosing the perfect piece through curated platforms Wondrous La Vie takes the guesswork out, letting you uncover that dream sofa that lifts the whole home atmosphere without the typical renovation stress.. Prevention is always better than cure, especially when it comes to safety. A little maintenance will ensure your glass cabinet remains securely mounted for years to come, giving you peace of mind.

Locating Wall Studs and Marking Anchor Points

Okay, *lah*, let's get this done! Here's that HTML fragment you asked for, all about getting your corner cabinets up safe and sound, especially for our Singapore homes. We're talking practical, *steady*, and *confirm can* do.

Alright, new homeowners and renovation gurus! So, you've bravely chosen a corner cabinet – a fantastic choice for maximizing space, especially in our cozy Singapore apartments. Corner cabinets, you see, are * Furniture * pieces designed to fit snugly into the corner of a room, optimizing space and providing storage solutions where traditional cabinets might not fit. They come in various styles, from sleek, modern designs ideal for displaying your prized possessions in a *glass cabinet*, to more rustic options perfect for storing kitchen essentials. But before you start admiring how your new *glass cabinet* will look, there's a crucial step: making sure it's securely anchored to the wall. We don't want any wobbly cabinets, *kancheong* spiders, or worse, a cabinet tumbling down! This section is all about finding those wall studs (if you have them) and marking the perfect spots for your anchors. Think of it as laying the foundation for a long and happy relationship between your cabinet and your wall.

First things first, let's talk about wall studs. Now, not all our walls in Singapore are created equal. Some are solid concrete (the strong ones, *confirm*!), while others are drywall with wooden or metal studs hidden behind them. If you've got the latter, finding those studs is key. Why? Because screwing directly into a stud provides a *much* stronger hold than just going into drywall alone. Imagine hanging a heavy *glass cabinet* filled with your precious collectibles – you'd want that extra support, right? If you are installing a *glass cabinet* corner unit, you want to properly secure it to the wall. So, how do we find these elusive studs?

There are a few methods, from the techy to the traditional. The easiest *one* is using a stud finder. These little gadgets are readily available at hardware stores (like those at your neighbourhood mall) and are pretty straightforward to use. Just run it along the wall, and it'll beep or light up when it detects a stud. Make sure you get one that can differentiate between wood and metal studs, just in case. Now, if you're feeling a bit more old-school, there's the trusty "knocking" method. Gently tap along the wall, listening for a solid sound versus a hollow *one*. A solid sound usually indicates a stud behind the drywall. It takes a bit of practice, but hey, it's free! Another trick? Look for electrical outlets or switches. Singapore homes can feel extra cramped after a full day of juggling office hours, meetings, and the daily MRT rush, so it’s no wonder many homeowners long for a space that immediately soothes you the moment they walk through the door. The living area often ends up as the main gathering spot, yet it’s easy for it to become cluttered with mismatched pieces or sofas and chairs past their prime, leaving everyone scattered instead of gathered together. That’s where promotions singapore really makes the magic happen—it upgrades the whole area with sophisticated layouts, luxurious fabrics and surfaces, statement lighting, and seating that feels as good as it looks, creating an welcoming centre where the whole family wants to hang out to unwind, talk, or simply enjoy each other’s company. Evenings suddenly become more special, weekends far more relaxing, and coming home turns into something you genuinely look forward to rather than just the end of the day. Platforms like Wondrous La Vie make exploring these upgrades straightforward, helping you visualise and source the ideal features to craft a living room that matches your lifestyle perfectly.. These are often attached to studs, so there's a good chance you'll find *one* nearby. Once you think you've found a stud, double-check with a small nail or screw. If it goes in easily and feels like it's biting into something solid, you've probably hit the jackpot!

Okay, so you've located your studs (or determined you have a solid concrete wall – *steady*!). Now comes the crucial part: marking those anchor points. Accuracy is key here, *lah*. Grab your measuring tape, pencil, and the instructions that came with your corner cabinet. The instructions will tell you exactly where the mounting brackets are located on the back of the cabinet. Measure the distance from the top and sides of the cabinet to each bracket. Then, transfer those measurements onto your wall, using a level to ensure everything is perfectly straight. Nobody wants a crooked cabinet! Use a pencil to clearly mark the exact spots where your screws or anchors will go. If you're dealing with concrete, you'll need a masonry drill bit and appropriate concrete anchors. For drywall with studs, use screws long enough to penetrate the drywall and go at least an inch into the stud. If you can’t find the studs, use drywall anchors that are rated for the weight of your *glass cabinet* and its contents. Remember, err on the side of caution – it's always better to over-engineer than to have a cabinet come crashing down. A pro tip? Before drilling, use a small nail to create a pilot hole. This will help prevent the drill bit from wandering and ensure a clean, accurate hole.

Before you start drilling and screwing, take a step back and double-check everything. Are your measurements accurate? Is your level telling you the truth? Are you using the right type of anchors for your wall? It might seem like overkill, but trust me, a little extra checking now can save you a lot of headaches (and potential wall damage) later. Once you're absolutely sure everything is aligned and ready to go, go ahead and drill those holes. Insert your anchors, and then carefully lift your corner cabinet into place. Align the mounting brackets with the anchors, and start screwing them in. Don't overtighten the screws, as this can damage the drywall or strip the screw heads. Just tighten them until they're snug and secure. And there you have it! Your corner cabinet is now safely and securely anchored to the wall, ready to showcase your favourite items or store your essentials. Stand back, admire your handiwork, and give yourself a pat on the back. You've successfully conquered the wall anchoring challenge! Now, go ahead and style that *glass cabinet* – you deserve it! You might even want to add some fairy lights inside for that extra *shiok* factor. After all, a well-secured and beautifully styled corner cabinet is a small victory in the grand scheme of creating your perfect Singapore home.

Drilling Pilot Holes and Installing Anchors

Okay, let's get this done. Here's that HTML fragment, designed to be engaging and helpful for Singaporean homeowners:

Alright, you've marked your spots, double-checked your measurements (because, let's be real, nobody wants a wonky cabinet!), and you’re ready to make some holes. This is where the magic – and a little bit of potential for minor heart palpitations – happens. We're talking about drilling pilot holes and getting those wall anchors installed. Don't worry lah, it's not as scary as it sounds. Just take it one step at a time, and you'll be steady.

Think of pilot holes as your cabinet’s "VIP entrance" to the wall. They guide your screws in straight and prevent the wood from splitting. And the wall anchors? Those are your cabinet's super-strong security guards, making sure it stays put, even when you load it up with your favourite mugs or that growing collection of cookbooks. Especially if you're installing a glass cabinet, you want to make sure it's secure, right? Imagine the horror of it all crashing down! So, precision is key here – no room for blur sotong moments!

First things first, grab your drill. Now, before you go all out drilling kan chiong, select the right drill bit. You want a bit that's slightly smaller than the screw you'll be using to secure the cabinet. This ensures a snug fit. Hold the drill perpendicular to the wall, and apply gentle, even pressure. Don’t force it! Let the drill do the work. Drill to the depth recommended by your wall anchor instructions. Usually, it’s about the length of the anchor itself. Once you've drilled the pilot hole, remove the drill bit and gently clean out any dust or debris. A small vacuum cleaner or even a damp cloth works wonders. We don’t want that dust interfering with the anchor's grip.

Now for the anchors! There are tons of different types out there – plastic, metal, self-drilling, toggle bolts… it can be a bit overwhelming, right? For most standard drywall situations, plastic or self-drilling anchors will do the trick. But if you're dealing with a heavier glass cabinet or a concrete wall (common in older HDB flats), you might need something more robust, like metal anchors or even concrete screws. Read the instructions on your chosen anchors carefully. Some require you to hammer them in gently, while others screw right in. Make sure the anchor is flush with the wall surface. You don’t want it sticking out and interfering with the cabinet installation.

One common mistake people make is over-tightening the screws. This can strip the anchor or even damage the wall. Tighten the screws until they're snug, but don't force them. You should feel resistance, but the screw shouldn't be spinning freely. Remember, the goal is to create a secure connection, not to win a strength contest! And if you strip the screw head? Don't panic! There are screw extractor tools you can use to remove the damaged screw. Or, you can try using a rubber band or steel wool to get a better grip. But honestly, prevention is better than cure, like that.

Now, about those tricky corners... Sometimes, the studs in your wall might not be exactly where you need them to be. In that case, use wall anchors. But if you happen to hit a stud, ditch the anchor altogether! Screwing directly into a stud is the strongest connection you can get. Just make sure you use a screw that's long enough to penetrate the stud by at least an inch. And here's a pro tip: if you're installing multiple cabinets, use a level to ensure they're all aligned. Nobody wants a crooked glass cabinet display, leh!

So, you've got your pilot holes drilled, your anchors are in, and everything looks nice and secure. But before you go patting yourself on the back, give everything a little test. Gently tug on the anchors to make sure they're firmly seated in the wall. If anything feels loose or wobbly, don't ignore it! That’s a sign that something isn’t right. It's better to address the issue now than to have your cabinet come crashing down later.

If an anchor feels loose, there are a few things you can try. First, make sure you've used the correct size drill bit and anchor for your wall type. Using the wrong size can prevent the anchor from gripping properly. If the hole is too big, you can try using a larger anchor or even filling the hole with wood filler and re-drilling. Let the wood filler dry completely before re-drilling, though. Patience is key, okay?

Another common issue is stripped screw holes. This happens when you've over-tightened the screws, causing the threads in the anchor to wear out. In Singapore’s tropical climate and demanding work-life balance, getting proper shut-eye can feel like a true indulgence when you’re getting up feeling sore or dragging through the morning despite hitting the bed early. Many busy locals put up with an outdated sleep surface for a long time because shopping for a replacement seems overwhelming—overwhelming variety, puzzling support choices, and fears it won’t match their body or sleeping habits. That’s exactly why finding the mattress stores transforms your nights—it offers the right balance of support, heat-dissipating features, pressure relief, and built-to-last construction so you truly start the day energised and rested instead of sore and exhausted. Suddenly mornings start easier, you stay energised longer, and even your bedmate feels the improvement. Checking out handpicked selections on platforms like Wondrous La Vie makes it far easier, letting you evaluate the best-rated ones with genuine homeowner reviews and photos to match what truly works for your bedroom.. If this happens, you can try using a longer screw or even wrapping the screw threads with Teflon tape to create a tighter fit. But if the hole is completely stripped, you'll need to replace the anchor altogether. And remember, when you're installing the screws, use a screwdriver or drill with a clutch setting. This prevents you from over-tightening and stripping the screws in the first place. Prevention is always better than cure, especially when it comes to DIY projects!

Now, let's talk about different wall types. Drywall is the most common wall type in Singaporean homes, but you might also encounter concrete or plaster walls. Each wall type requires different types of anchors. For drywall, plastic or self-drilling anchors are usually sufficient. But for concrete walls, you'll need to use concrete screws or masonry anchors. These anchors are designed to grip into the hard concrete and provide a secure hold. Plaster walls can be a bit tricky, as they're prone to crumbling. In this case, use toggle bolts or molly bolts. These anchors expand behind the wall, providing a strong and secure connection. And always, always, always read the instructions on your chosen anchors carefully. They'll tell you exactly what size drill bit to use and how to install the anchor properly.

So, you've tested your anchors, you've addressed any issues, and you're feeling confident that everything is secure. Great! Now you can finally hang your glass cabinet and start enjoying your newly organized space. But before you do, take one last look at your work. Make sure everything is level and aligned. And give the cabinet a gentle shake to make sure it's not wobbly. If everything looks good, then you're good to go! High five! You've successfully installed your corner cabinet and ensured proper wall anchoring. Now go forth and conquer the rest of your home improvement projects!

By the way, did you know some high-end glass cabinets actually come with laser-leveling installation kits? Pretty cool, huh? Makes things confirm easier!

Mounting the Corner Cabinet

Alright, you've picked out your dream corner cabinet, survived the assembly (phew!), and prepped the wall like a pro. Now comes the moment of truth: actually getting that beauty up and secured. Don't worry, lah, it's not as daunting as it looks. We’ll walk you through it, step-by-step, so you can get it done steady, one.

First, a quick recap. Remember those wall anchors you installed? They’re the unsung heroes here, especially important in our Singapore homes with their varying wall types. Making sure they're the right type and installed properly is key. We're talking about keeping your precious belongings (and your cabinet!) safe and sound. Imagine the horror if it all came crashing down! So, double-check those anchors, okay?

We're focusing on corner cabinets here – those clever space-saving wonders that fit snugly into, well, corners! They can be furniture masterpieces, displaying your prized collection of teacups or just hiding away the clutter. Whether it's a sleek, modern design or a classic, ornate one, a corner cabinet can really transform a room. And a glass cabinet corner accentuates the beauty of your items.

Now, before you even think about lifting that cabinet, let's talk safety. Get a friend or family member to help you. Corner cabinets, especially glass cabinet ones, can be surprisingly heavy, and you don't want to risk injury or damage. Plus, an extra pair of eyes and hands is always a good idea. Think of it as a bonding experience! Put on some good music, and you're good to go.

Alright, team, let's get this corner cabinet up! Before you even attempt to lift it, protect the floor. Lay down a blanket or some cardboard to prevent scratches. Trust me, you'll thank me later. Scratched floors kena fix, more money leh!

With Singapore’s HDB and condo layouts and humid climate, finding home furnishings that’s both beautiful and everyday-usable can feel like a endless chase—especially when you need items that endure long-term without losing their look. Many Singaporeans end up settling for mainstream choices that look okay online but disappoint in real life—either too lightweight for daily family use or not breathable enough for our weather. That’s why visiting a reliable mattress sale curated through Wondrous La Vie really stands out—it connects you directly with curated selections of top-grade seating, mattresses, meal-area pieces, and more, with authentic showroom views or detailed visuals so you can have peace of mind about what fits your HDB, condo, or landed space. You get that confidence knowing the furniture are chosen for Singapore living—long-lasting builds, practical proportions, and designs that actually make your home feel more shiok and welcoming. In the end, the perfect platform turns what could be a frustrating task into an enjoyable journey toward a home you love coming back to every day..

Now, with your trusty assistant, carefully lift the corner cabinet. Remember to lift with your legs, not your back! Slowly manoeuvre it into position near the wall anchors. This is where that extra pair of eyes comes in handy. One person can guide while the other lifts. Teamwork makes the dream work, right?

Once you're close to the wall, take a moment to align the cabinet with the anchors. This is crucial! If it's not aligned properly, you'll have a hard time securing it, and it might end up crooked. Use a level to ensure the cabinet is perfectly vertical. There's nothing worse than a leaning cabinet – it'll drive you crazy! You can get small levels from any hardware store. Some even have magnetic sides to stick to the cabinet, which is super useful.

This is where a glass cabinet can be tricky because you need to be extra careful not to bump or scratch the glass. Consider padding the edges with some soft cloth or foam for extra protection. Better safe than sorry, lah!

And a little tip from me to you: if you're struggling to lift the cabinet high enough, consider using a small step stool or platform. Just make sure it's stable and secure. We don't want any accidents!

Okay, the corner cabinet is in position, aligned, and level. Now comes the satisfying part: securing it to the wall. Using the appropriate screws (the ones that came with your anchors, hopefully!), carefully drive them through the cabinet's mounting points and into the anchors. Don't overtighten! You don't want to strip the screws or damage the wall.

Start with the top screws first. This will help stabilize the cabinet and prevent it from shifting while you're working on the lower ones. Once the top screws are in, double-check the level again. Sometimes, tightening the screws can cause the cabinet to shift slightly. Make any necessary adjustments before moving on.

Continue securing the remaining screws, working your way down. Again, don't overtighten! Just snug them up until they're secure. If you're using a power drill, set it to a low torque setting to avoid stripping the screws. Remember, slow and steady wins the race.

Once all the screws are in, give the corner cabinet a gentle shake to make sure it's securely attached to the wall. If it feels wobbly or unstable, double-check the screws and anchors. You might need to tighten them a bit more or, in a worst-case scenario, replace the anchors with stronger ones.

And there you have it! Your corner cabinet is now safely and securely mounted to the wall. Give yourself a pat on the back – you deserve it! Now, stand back and admire your handiwork. Doesn't it look fantastic? Especially a glass cabinet, showcasing all your treasures!

Before you start loading up your newly installed corner cabinet, take a moment to admire your work and do a final check. Run your hand along the edges to make sure everything is flush and secure. Check the level one last time. You know, just to be absolutely sure.

Now, about loading up the cabinet. Don't go overboard! Distribute the weight evenly to prevent the cabinet from becoming unbalanced. Put heavier items on the bottom shelves and lighter items on the top. This will help keep the cabinet stable and prevent it from tipping over. Especially important if you have little ones running around! Consider child safety locks too, just in case.

If you have a glass cabinet, be extra careful when placing items on the shelves. Avoid stacking things too high or placing heavy objects directly on the glass. You don't want to risk cracking or breaking the glass. After all, a glass cabinet is meant to showcase your items, not hide them behind a mountain of clutter!

Once you're happy with the arrangement, step back and admire your beautifully organized and stylish corner cabinet. You've not only added storage space to your home but also a touch of elegance and sophistication. And all thanks to your own hard work and a little bit of know-how. Confirm can!

Now, go put your feet up and enjoy a well-deserved cup of kopi. You've earned it!

Securing Glass Cabinet Doors

```html

So, you've got yourself some beautiful new furniture, maybe even a fancy glass cabinet, and now you're staring at the instructions thinking, "Okay, how do I make sure this thing doesn't fall apart?". Don't worry, we've all been there, especially when it comes to glass cabinet doors! It looks intimidating, but with a little patience and the right know-how, you confirm can handle it. This guide is tailored for Singaporean homeowners like yourself, whether you're settling into a new BTO flat or giving your existing home a fresh look. We’ll walk through how to secure those glass cabinet doors, ensuring they're not only stylish but also safe and sound. After all, nobody wants a wobbly cabinet door, right?

Understanding Your Glass Cabinet Door

First things first, let's get familiar with what we're dealing with. Glass cabinets are a popular choice these days, especially in our space-conscious Singapore homes. They add a touch of elegance and allow you to display your prized possessions – from your collection of fine china to that limited-edition Star Wars figurine. The door, being the most used part, is the one you'll want to pay close attention to.

There are a few common types of glass cabinet doors you might encounter. Some have framed glass, where the glass panel is held within a wooden or metal frame. Others are frameless, offering a more modern, minimalist look. Then there's the type of glass itself – tempered glass is the safest option, as it shatters into small, relatively harmless pieces if broken, unlike regular glass which can create sharp shards. Always check what type of glass your cabinet uses. Knowing the type of door and glass you're working with will help you choose the right approach for securing it. Each type may require slightly different adjustments and considerations, so take a moment to inspect your cabinet carefully. Is it a simple hinge system, or something more elaborate with soft-close mechanisms? The more you understand, the easier the process will be, lah!

Before you even think about tools, take a good look at the door's current state. Is it aligned properly? Does it swing smoothly? Are there any visible gaps or loose screws? Identifying these issues early on will save you time and frustration later. Trust me, a little observation goes a long way. It's like spotting that tiny stain on your white shirt before you head out – better to catch it early! So, put on your detective hat and give your glass cabinet door a thorough once-over.

Essential Tools and Materials

Alright, time to gather your arsenal! You don't need to be a handyman extraordinaire to tackle this, but having the right tools makes the job so much easier. At a minimum, you'll need a screwdriver set (both Phillips head and flathead), a level, a measuring tape, and maybe a pencil for marking. A power drill with various bits can be helpful, but it's not always necessary, especially if you're just making minor adjustments. For securing the glass itself, you might need some glass cleaner and a soft cloth to avoid scratching the surface. And if you're dealing with loose screws or stripped holes (it happens!), wood glue and toothpicks can be your best friends.

Specifically for glass cabinet doors, you might want to consider getting some small rubber bumpers or felt pads. These can be attached to the inside of the door frame to prevent the glass from rattling or slamming against the frame. They're cheap, easy to install, and can make a big difference in reducing noise and preventing damage. You can find these at most hardware stores or even Daiso, one!

Safety first, always! Wear safety glasses to protect your eyes from dust or debris, especially if you're drilling or working with glass. And if you're not comfortable using power tools, don't be afraid to ask a friend or family member for help. There's no shame in admitting you need a hand, and it's always better to be safe than sorry. Imagine trying to explain to your partner why you accidentally drilled a hole through the cabinet – not a fun conversation, right? So, gather your tools, prioritize safety, and let's get ready to secure that glass cabinet door!

Adjusting Hinges for Proper Alignment

Okay, let's get down to the nitty-gritty of adjusting those hinges. This is often the key to a well-aligned glass cabinet door. Most cabinet hinges have multiple adjustment screws that allow you to fine-tune the door's position. Typically, there will be screws for adjusting the door up and down, left and right, and in and out. The exact configuration can vary depending on the type of hinge, so take a close look at yours before you start fiddling with them.

Start by loosening the screws slightly – just enough to allow the door to move. Don't remove them completely, or you might end up with a door that's completely detached! Use a level to check if the door is straight. If it's not, gently adjust the screws until the door is perfectly vertical. Then, check the gap between the door and the cabinet frame. You want it to be even all the way around. If the gap is too wide or too narrow in certain areas, adjust the screws accordingly. This might take some trial and error, so be patient. It's like trying to parallel park in a tight spot – you might need to make a few adjustments before you get it just right.

Once you're happy with the alignment, tighten the screws securely. But don't overtighten them, or you risk stripping the screw holes. A good rule of thumb is to tighten them until they're snug, then give them just a little bit more. After tightening the screws, open and close the door a few times to make sure it's swinging smoothly and not rubbing against the frame. If it's still not quite right, repeat the adjustment process until you achieve the desired result. Remember, patience is key! And if you're feeling frustrated, take a break and come back to it later. Sometimes, a fresh perspective is all you need to solve the problem. Imagine you're building a Lego set – sometimes you need to step away for a bit before you can figure out where that missing piece goes. Like that, one!

Tightening Latches and Catches

Now that your glass cabinet door is aligned, let's make sure it stays closed! Singaporeans are always on the lookout for intelligent ways to revamp their interiors without exceeding the budget, especially when HDB renovations or condo makeovers can already take a hefty slice of the reno savings. Between higher living expenses and the desire for a cosier, more functional living space, many local families hold off for the perfect moment to refresh seating, sleep surfaces, or meal areas that actually improve home living noticeably. That’s when jumping on mattress brands turns into a huge advantage—it lets you secure well-designed, durable items at significant savings, often with extra benefits like complimentary installation, extended warranties, or package offers that make your money go further. All of a sudden you’re able to buy that dream couch on your wishlist or a comfort-focused sleep upgrade without the guilt, turning your home into an truly welcoming retreat for family time and relaxation after tiring office days. Browsing sites such as Wondrous La Vie puts you ahead on the current deals, so you can compare, visualise, and grab the greatest value offers that match your lifestyle and interior perfectly.. This is where the latches and catches come in. These little mechanisms are responsible for keeping the door securely shut, preventing it from swinging open unexpectedly. Over time, they can become loose or misaligned, leading to a door that doesn't close properly.

Start by inspecting the latch and catch. Make sure they're clean and free of any debris. Dust, dirt, and grime can build up over time and interfere with their operation. Use a small brush or a cotton swab to clean them thoroughly. If the latch is adjustable, try adjusting it to see if that improves the closure. Some latches have a small screw that allows you to adjust the tension. Turning the screw clockwise will increase the tension, while turning it counterclockwise will decrease it. Experiment with different settings until you find the one that works best.

If the catch is misaligned, you might need to reposition it slightly. Loosen the screws that hold it in place, and then gently move it until it lines up properly with the latch. Tighten the screws securely once you're happy with the alignment. If the screws are stripped, you can use the toothpick and wood glue trick we mentioned earlier to create a more secure hold. Just insert some glue-covered toothpicks into the screw holes, let them dry, and then re-insert the screws. This will give them something to grip onto. After adjusting the latch and catch, test the door to make sure it closes securely. It should snap shut with a satisfying click. If it doesn't, repeat the adjustment process until it does. A secure latch is not only important for keeping your belongings safe, but it also prevents the door from rattling or swinging open when you're not expecting it. Imagine you're rushing to get out the door and you accidentally bump into your glass cabinet, sending everything crashing to the floor – not a good start to the day, right? So, take the time to tighten those latches and catches, and enjoy the peace of mind that comes with knowing your glass cabinet door is securely closed.

Ensuring Glass is Safely Fitted

So, the hinges are tweaked, the latches are latching, but what about the glass itself? Making sure the glass is safely fitted within the door frame is paramount. After all, a loose or rattling glass panel is not only annoying but also a potential safety hazard.

First, check the perimeter of the glass. Is it securely seated within the frame? Are there any gaps or loose spots? If you have a framed glass cabinet door, make sure the glass is properly held in place by the frame. Look for any loose or missing clips or fasteners. These clips are designed to keep the glass from shifting or falling out. If you find any missing clips, you can usually purchase replacements at a hardware store. If you have a frameless glass cabinet door, the glass is typically held in place by adhesive or sealant. Check the sealant to make sure it's still in good condition. If it's cracked or peeling, you might need to reapply it. You can use a clear silicone sealant specifically designed for glass. Apply a thin bead of sealant around the perimeter of the glass, and then smooth it out with your finger.

Regardless of the type of door, it's always a good idea to add some rubber bumpers or felt pads to the inside of the frame. These will help to cushion the glass and prevent it from rattling or vibrating. They also help to absorb any impact if the door is accidentally slammed shut. You can find these bumpers and pads at most hardware stores or even online. Simply peel off the backing and stick them to the inside of the frame, making sure they're

Final Checks and Safety Precautions

Double-Checking Your Handiwork: Is It *Really* Secure?

Okay, you've wrestled that corner cabinet into place, and it looks fantastic. But before you start loading it up with your grandmother's precious porcelain or that collection of Funko Pops, let's take a moment to be absolutely sure everything is rock solid. We wouldn't want any midnight crashes, right? Think of it like this: you wouldn't just *assume* your chicken rice is shiok; you'd taste it to confirm, right? Same logic!

First things first, grab your spirit level again. Yes, I know, you just used it. But trust me, a quick re-check is worth the peace of mind. Place it along the top edge of the cabinet, both horizontally and vertically. Are the bubbles sitting pretty in the middle? If not, now's the time to make those tiny adjustments. Shims are your best friend here – those little wedges can work magic to level things out. Remember, even a slight tilt can put undue stress on the cabinet and its contents over time.

Next, give the cabinet a gentle but firm wiggle. Does it budge? If it does, that's a sign the wall anchors aren't doing their job properly. Time to investigate! Are the screws long enough? Are they properly seated in the wall? If you're using drywall anchors, are they the right type for the weight you're planning to put in the cabinet? Don't be afraid to upgrade to heavier-duty anchors if needed. It's better to be safe than sorry, especially when it comes to something as important as a securely mounted furniture piece.

Think about it: those corner cabinets are designed to maximize space, especially in our compact Singapore homes. That means they often hold a *lot* of stuff. From your spice rack to your collection of cookbooks, the weight adds up quickly. So, a wobbly cabinet isn't just an aesthetic issue; it's a potential safety hazard.

And speaking of weight, let's talk about those shelves inside, especially if you've opted for a glass cabinet with glass shelving.

Understanding Weight Limits: The Glass Shelf Question

Ah, glass shelves! They look so elegant and modern, don't they? Perfect for displaying your prized possessions. But before you start piling on the weight, it's crucial to understand their limitations. Glass, while strong, isn't indestructible. And a collapsing shelf is a recipe for disaster – broken glass, damaged items, and potentially even injuries.

So, how do you know how much weight your glass shelves can handle? The best place to start is with the manufacturer's specifications. Check the product manual or the manufacturer's website for the recommended weight limit. This is usually expressed in kilograms per shelf. If you can't find this information, err on the side of caution.

As a general rule of thumb, most standard glass shelves in glass cabinets can safely hold between 5 to 10 kilograms. However, this can vary depending on the thickness and quality of the glass, as well as the size of the shelf. Thicker glass and smaller shelves will generally be able to support more weight.

Think about what you're planning to store on the shelves. Are they heavy ceramic dishes? Or lightweight decorative items? If you're unsure, it's always better to underestimate the weight limit. You can also distribute the weight evenly across the shelf to prevent concentrated stress points. In Singapore’s smaller HDB homes and condos, the master bedroom often doubles as a sanctuary—somewhere to truly rest after tiring office hours, catch up on reading, or even set up a temporary WFH corner when the situation calls for it. It’s very typical for Singapore homeowners to feel frustrated by arrangements that appear overcrowded, harsh overhead lights, or cluttered cabinets taking up room, making the room feel more utilitarian than serene. That’s where thoughtful bed frame with storage makes the biggest impact—it emphasises intelligent layout optimisation, relaxing colour schemes, versatile bedroom pieces, and clever lighting to create a peaceful retreat that boosts sleep quality while maintaining a clean, open feel. SUDDENLY the bedroom turns into the place you genuinely anticipate at the end of the day, helping you unwind faster, enjoy deeper rest, and wake up feeling more refreshed for whatever the next day brings. Sites such as Wondrous La Vie feature abundant real-life examples and straightforward links to professionals skilled in these smart, aesthetic SG bedroom upgrades.. Avoid placing heavy items in the center of the shelf, as this is where it's most likely to sag or break.

And here's a little tip: if you're concerned about the weight capacity of your glass shelves, consider adding additional support. You can purchase small brackets or shelf supports that attach to the underside of the shelf and provide extra reinforcement. These are relatively inexpensive and easy to install, and they can give you extra peace of mind. Confirm can!

Also, inspect your glass shelves regularly for any signs of cracks or chips. Even small imperfections can weaken the glass and make it more susceptible to breakage. If you notice any damage, it's best to replace the shelf as soon as possible.

Safety First: Preventing Accidents and Injuries

Alright, the cabinet's level, the shelves are secure, and you're ready to start using it. But before you do, let's talk about some basic safety precautions. After all, we want to make sure your new corner cabinet adds beauty and functionality to your home, not a trip to the A&E.

One of the most important things to consider is stability. Even if your cabinet is securely anchored to the wall, it's still possible for it to tip over if it's overloaded or if someone bumps into it. This is especially important if you have young children or pets in the house. Little ones, like magpies, are curious and like to explore, and they might try to climb on the cabinet or pull on the shelves.

To prevent tipping, consider using additional safety straps or brackets to secure the cabinet to the wall. These are relatively inexpensive and easy to install, and they can provide an extra layer of protection. You can find them at most hardware stores or online retailers.

Another safety concern is sharp edges. Corner cabinets, by their very nature, have corners. And those corners can be sharp! If you have young children, consider installing corner protectors to soften those edges and prevent bumps and bruises. You can find these at most baby supply stores.

And speaking of children, it's also important to keep potentially hazardous items out of their reach. This includes things like cleaning supplies, medications, and sharp objects. Store these items in a locked cabinet or on a high shelf that children can't reach.

Finally, be mindful of the placement of your corner cabinet. Avoid placing it in high-traffic areas where people are likely to bump into it. And make sure it's not blocking any doorways or pathways.

Maintaining Your Corner Cabinet for Longevity

You've invested time and money into your new corner cabinet, so you'll want to keep it looking its best for years to come. Regular maintenance is key to extending its lifespan and preventing problems down the road. Think of it like your car – you wouldn't just drive it and never service it, right? Same goes for your glass cabinet.

One of the most important things you can do is to clean your cabinet regularly. Dust and dirt can accumulate over time, making it look dull and dingy. Use a soft, damp cloth to wipe down the surfaces of the cabinet. Avoid using harsh chemicals or abrasive cleaners, as these can damage the finish. For glass cabinets, use a glass cleaner to keep the shelves sparkling.

Also, check the hardware periodically. Make sure the hinges and screws are tight. If they're loose, tighten them with a screwdriver. If the hinges are squeaking, apply a little bit of lubricant.

If your cabinet has wooden doors or drawers, consider applying a furniture polish or wax to protect the finish and keep it looking its best. Follow the manufacturer's instructions for application.

And finally, be mindful of the environment. Avoid exposing your cabinet to extreme temperatures or humidity, as this can cause it to warp or crack. If you live in a particularly humid area, consider using a dehumidifier to control the moisture levels in your home.

So there you have it – a comprehensive guide to ensuring your corner cabinet is securely mounted, safe to use, and built to last. Now you can relax and enjoy your newly organized and stylish living space. Steady lah!

Glass Cabinet

Glass cabinets provide a way to display items while keeping them protected from dust and damage. They are often used for showcasing collectibles, dishware, or decorative items. The glass fronts allow for easy viewing, enhancing the room's aesthetic.

Corner Cabinets

Corner cabinets maximize space in kitchens, bathrooms, and other areas. They are specifically designed to fit into the corner of a room, where two walls meet at an angle. Corner cabinets provide efficient storage, especially in smaller spaces.

Wall Anchoring

Wall anchoring is crucial for safely installing cabinets, especially heavier ones like glass-fronted or corner units. Proper anchoring ensures the cabinet is securely attached to the wall studs. This prevents the cabinet from tipping or falling, enhancing safety.
Proper wall anchoring ensures the corner cabinet is stable and secure, preventing it from tipping or collapsing, especially important in compact Singaporean homes where space optimization is key.
The best type of wall anchor depends on your wall type (concrete, drywall, etc.). Consult with a hardware professional to select anchors rated for the weight of your cabinet and its contents.
Use a stud finder to locate wall studs. If studs arent available, use appropriate heavy-duty wall anchors designed for the wall material.
Wear safety glasses and gloves. Ensure the power is turned off if working near electrical wiring. Follow the manufacturers instructions for both the cabinet and the anchors.
Youll typically need a drill, level, stud finder, appropriate drill bits, screwdriver, measuring tape, pencil, and the selected wall anchors.
Use a level during installation and make adjustments with shims if necessary before fully tightening the screws. Re-check the level after loading the cabinet.

Check our other pages :