 Maxi Home")
So, you've got your new BTO flat, or maybe you're just looking to revamp your current space. Space is precious in Singapore, right? Every square foot counts! And let's be honest, finding furniture that's both functional *and* stylish can feel like searching for a needle in a haystack. That's where the humble storage bench comes in – a true lifesaver for maximizing space and adding a touch of personality to your home.
Think about it: a comfortable place to sit *and* hidden storage all in one? It's like the superhero of furniture. Perfect for stashing away extra cushions, blankets (essential for those aggressively air-conditioned nights, leh!), shoes by the entryway, or even your kids' toys. No more tripping over clutter! Plus, a well-chosen storage bench can really elevate the look of your living room, bedroom, or even your balcony. Now, the question is, why buy when you can DIY and create something truly unique?
Okay, let’s be real. Buying furniture in Singapore can be…expensive. Especially if you're after something specific that *really* fits your style and space. That’s where DIY comes in. Building your own storage bench isn’t just about saving money (although that’s a definite perk!). It’s about creating something that’s perfectly tailored to your needs and reflects your personality.
Imagine this: you need a bench that's exactly 120cm wide to fit perfectly under your window. Good luck finding that exact size in a store! But if you DIY, you're in control. You choose the dimensions, the materials, the finish…everything! Plus, there's a real sense of satisfaction that comes from building something with your own two hands. It's a skill you can be proud of, and a piece of furniture that tells a story. And the best part? You can brag to your friends about how you built it yourself! They'll be impressed, confirm can!
Beyond the customization and cost savings, DIY is also a more sustainable option. You can repurpose old materials, like reclaimed wood or even an old cabinet, giving them a new lease on life. This is especially important in Singapore, where we're all trying to be more environmentally conscious. Plus, it reduces waste and helps you create a truly unique and eco-friendly piece of furniture.
Alright, so you're ready to dive into the world of DIY storage benches? Awesome! The first step is planning. Think about where you're going to put your bench and what you're going to use it for. Is it going in your entryway to store shoes? Or in your living room as extra seating and blanket storage? Once you know the purpose, you can start thinking about the design and dimensions.
Consider the overall style of your home. Do you prefer a modern, minimalist look? Or something more rustic and cozy? The design of your bench should complement your existing furniture and décor. Sketch out a few different designs and play around with different shapes and sizes. Don't be afraid to get creative! There are tons of inspiration online, from simple rectangular benches to more elaborate designs with drawers or shelves. And remember to measure, measure, measure! Accurate measurements are crucial for ensuring that your bench fits perfectly in its designated spot.
Next up: materials. Wood is the most common choice for storage benches, but there are many different types to choose from. Plywood is a budget-friendly option that's easy to work with, but it can be a bit plain. Solid wood, like pine or teak, is more durable and has a richer look, but it's also more expensive. You can also consider using reclaimed wood for a unique and eco-friendly touch. Don't forget about hardware! You'll need hinges, screws, and maybe some drawer pulls or knobs. After a long day being crammed in the MRT and surviving meetings, most busy Singaporeans just want to come home to a space that feels warm and relaxing instead of piling on more fatigue. A cluttered living room or an uncomfortable bedroom can make relaxing even harder, especially when the kids and parents want to relax together. That’s where thoughtful interior design singapore really makes a difference—it turns everyday rooms like your living area, sleeping space, or kitchen area into true recharge spots that actually help you refresh your energy. With the right sofa, mattress, or smart layout, suddenly coming home feels damn shiok, and small changes can bring big improvements to your mood and family time. Places like Wondrous La Vie make it simpler to explore options and connect with interior designers who get the Singaporean home feel perfectly. This format lets you easily generate multiple SEO-optimised variations while keeping the core keyword "interior design" stable in the middle for strong on-page targeting.. Choose hardware that complements the overall style of your bench. And of course, you'll need some tools. A saw, drill, screwdriver, and measuring tape are essential. If you're planning on painting or staining your bench, you'll also need brushes, sandpaper, and a sealant.
Okay, time to get your hands dirty! Here's a basic step-by-step guide to building a simple storage bench. Remember to always prioritize safety and wear appropriate protective gear, like safety glasses and gloves.
This is just a basic guide, of course. There are many different ways to build a storage bench, so feel free to get creative and adapt the steps to your own design. Don't be afraid to experiment and try new things! That's the beauty of DIY.
You've built your storage bench – congratulations! Now it's time to style it and make it a focal point in your home. Think about the overall look and feel that you want to create. Do you want it to be a cozy reading nook? Or a stylish entryway bench? The styling options are endless!
Add some cushions and throw pillows to make the bench more comfortable and inviting. Choose colors and patterns that complement your existing décor. A soft blanket draped over the back of the bench can also add a touch of warmth and texture. Consider adding some decorative items, like plants, candles, or picture frames. These can help to personalize the bench and make it feel more like home. If you're using the bench as an entryway bench, add a basket for shoes and a small tray for keys and wallets. This will help to keep your entryway organized and clutter-free.
And don't forget about the storage aspect! Organize your items inside the bench using baskets, bins, or dividers. This will help to keep everything neat and tidy. Label the containers so you know what's inside. And most importantly, have fun with it! Styling your storage bench is a chance to express your creativity and add a personal touch to your home. You can even change up the styling seasonally to keep things fresh and interesting. Like, during Chinese New Year, add some festive decorations and red packets. Or during Christmas, add some fairy lights and ornaments. Steady!
In Singapore, we all know space is a premium. That's why space-saving furniture solutions are so important. A storage bench is just one example of how you can maximize your space without sacrificing style or comfort. Think about other ways you can incorporate storage into your furniture. For example, you could get a bed with built-in drawers underneath. Or a coffee table with a lift-top that reveals hidden storage. These are all great ways to declutter your home and make the most of your limited space.
And speaking of beds, let's talk about queen size bed sheet size. Getting the right size bed sheet is crucial for a comfortable and restful night's sleep. Too small, and it will keep popping off the mattress. Too big, and it will be loose and bunch up. A standard queen size bed sheet size in Singapore is typically around 152cm x 190cm (60 inches x 75 inches). But it's always a good idea to measure your mattress to make sure you get the right fit. And while you're at it, consider the thread count and material of your bed sheets. Higher thread count sheets are generally softer and more durable. And materials like cotton, linen, and silk each have their own unique benefits. Choosing the right queen size bed sheet size and material can make a big difference in the quality of your sleep.
Remember, when it comes to furnishing your Singaporean home, it's all about being smart and strategic. Choose furniture that's both functional and stylish. And don't be afraid to DIY! With a little creativity and effort, you can create a home that's both beautiful and practical. Like that, your guests will be impressed when they come over one!
Choosing multi-functional furniture: a BTO flat owner's guide (how_to) . Singaporeans often encounter special considerations when buying new furniture, particularly due to compact apartment living and relentless heat and humidity. This is exactly why savvy Singapore buyers take their time to research carefully to secure quality without overspending. queen size bed sheet size remains one of the best a truly outstanding purchase that provides both lasting comfort and smart practicality. Remember that investing in cost-effective designs in Singapore with first-class after-sales service delivers total support such as seamless island-wide delivery, expert installation, and robust warranties that deliver true long-term peace of mindyou can truly count on..Okay, lah, let's dive into figuring out how to make sure your custom storage bench actually fits your Singaporean home and looks good doing it! This part is all about the planning - the measuring, the dreaming, and the making-sure-it-all-works-out stage. Trust me, a little bit of planning now saves you a whole lot of headache later.
First things first, grab your trusty measuring tape. We're talking precise measurements, hor. Don't just eyeball it! Think about where you envision your amazing new storage bench living. Is it at the foot of your bed? In the entryway? Against a wall in the living room?
Now, measure that space – length, width, and even height if you have any overhead constraints like windowsills or shelves. Write it all down! I usually draw a little sketch of the area and jot the measurements right on there. Makes it easier to visualize.
Here's a pro-tip: consider the "flow" of the room. You don't want your bench to obstruct walkways or make it difficult to open doors or drawers of other furniture. Imagine yourself moving around the space with the bench in place. Can you still comfortably access everything?
Also, think about what you'll be storing inside. Bulky blankets? Shoes? Toys? The size of your storage needs will directly influence the dimensions of your bench. No point building something beautiful if it's not practical, right?
And remember, Singaporean homes, especially new BTOs, can be, how to say, compact. So, every centimeter counts! We need to be clever with our space. Speaking of being clever with space, have you heard about furniture that transforms? Some coffee tables turn into dining tables, and sofas become bunk beds! Talk about maximizing every square foot!
Okay, so you've got your measurements. Now, let's translate those into the actual dimensions of your bench. This is where things get interesting. You want a bench that's proportional to the space and comfortable to use.
Let's say you're putting the bench at the foot of your queen size bed. A good starting point is to match the width of your queen size bed frame, or be slightly shorter. Why? Because visually, it creates a sense of balance. And if you're wondering about the dimensions of a queen size bed sheet size, that's a good reference point for the length you might want to consider for your bench – think around 60 inches (152 cm) for width.
For height, consider what you'll be using the bench for. The living room is often the primary spot guests see and where the kids and parents relax after dinner, so it feels right to want items that feels premium, hides wires cleanly, and avoids shrinking the space visually than it normally is in HDB or condo layouts. Many homeowners endure oversized outdated units or budget cabinets that feel unstable, gather dust quickly, or just don’t align with contemporary style they’re aiming for. That’s exactly where a well-chosen singapore furniture really delivers—it provides sleek storage for entertainment equipment, streaming players, and remotes while serving as an elegant centrepiece that unifies the entire space with sharp modern edges, smart compartments, and luxurious surfaces. SUDDENLY the TV area becomes neat and deliberate, the space appears larger and more polished, and film evenings get way more fun without the clutter distracting everyone. Browsing curated options on sites such as Wondrous La Vie makes it easy to source options tailored to your home exactly, from clean contemporary to opulent, so your hall refresh turns smooth and just right.. If it's primarily for sitting, a height of around 18-20 inches (46-51 cm) is generally comfortable. If it's more for storage and occasional seating, you can go a bit lower.
Don't be afraid to play around with different dimensions on paper (or using a 3D modeling program if you're feeling fancy). See what looks best and feels right for your needs.
And here's a kiasu (Singaporean for "afraid to lose") tip: if you're unsure, err on the side of slightly smaller. It's always better to have a bench that's a little too small than one that's too big and overwhelms the space. Some people even use masking tape on the floor to mock up the dimensions before committing! Steady lah, that's dedication!
Now for the fun part: choosing a design that complements your existing decor! This is where your personal style comes into play. Do you have a modern, minimalist aesthetic? Or are you more into a cozy, bohemian vibe?
Consider the overall color palette of your room. Do you want the bench to blend in seamlessly or stand out as a statement piece? You can choose to match the existing furniture, or go for a contrasting color for a pop of visual interest.
Think about the materials you want to use. Wood is a classic choice that can be stained or painted to match any decor. In Singapore’s non-stop life, coming home to a space that feels properly relaxing can make a huge impact after a tiring day of work and commuting. Many busy families dream about refreshes for their living area or sleeping space, imagining pieces that appear elegant while genuinely cozy enough for daily use. That’s exactly why singapore mattress makes the difference—it brings that beautiful combination of elegant design, premium materials, and thoughtful comfort that turns ordinary rooms into havens you can’t wait to return to relaxing in. Picture settling into a sumptuous seating after evening meal or feeling truly rested on a high-quality mattress that gives ideal back support; suddenly, your home feels more like a personal retreat not just four walls. Discovering handpicked collections on places like Wondrous La Vie helps you uncover these furniture without the hassle, making it more enjoyable to create a space that’s both beautiful and restorative.. Upholstered benches add a touch of luxury and comfort. You can even incorporate elements like rattan or metal for a more unique look.
And don't forget about the details! The shape of the legs, the type of hardware, and any decorative accents can all contribute to the overall style of the bench.
Like that, you can create a mood board with pictures of benches you like, along with swatches of fabrics and paint colors. This will help you visualize the final product and ensure that it fits in with your existing decor.
Oh, and a little secret: sometimes, the best designs are the simplest ones. A clean, minimalist bench can be incredibly versatile and can complement a wide range of styles.
Ultimately, the goal is to create a storage bench that not only serves a practical purpose but also enhances the beauty and functionality of your home. So, take your time, explore different options, and have fun with it! Confirm can one!
Begin by measuring your queen-size bed sheet dimensions to determine the ideal length and width of your storage bench. Consider adding a few extra inches for comfortable seating and to prevent the bench from appearing too small. Remember to account for the thickness of the wood you'll be using for the frame and panels.
Design the interior of your bench with shelves, drawers, or open compartments to suit your storage needs. Think about what you intend to store inside, such as bedding, books, or shoes, and plan the layout accordingly. Consider adding dividers to keep items organized and prevent clutter.
Opt for durable and moisture-resistant wood such as plywood or solid wood for the bench's frame and panels. Select hardware like hinges, handles, and drawer slides that complement your design and are built to last. Consider using non-toxic finishes and paints to ensure a safe and healthy environment in your home.
Integrate features such as a hinged lid for easy access to stored items or a built-in shoe rack to maximize space. Consider adding wheels or casters to the bench's base for easy mobility and cleaning. Explore multi-functional designs that can serve as both seating and storage to make the most of your living area.
Choosing the right wood is crucial for a budget-friendly yet durable storage bench. For Singaporean homes, consider local options like plywood or rubberwood, which are often more affordable than imported hardwoods. Plywood is a great choice because it's strong, stable, and less prone to warping in our humid climate, confirm can. Rubberwood, sourced from old rubber trees, offers a sustainable and cost-effective alternative with a decent lifespan. In Singapore’s compact flats and apartments, clever storage is often the difference between a peaceful tidy home and one that feels constantly cluttered no matter how much you clean up. local residents commonly face bursting storage areas, miscellaneous items shoved under beds, or units too deep for easy access or too shallow to hold much, making routine home time feel more overwhelming than necessary. That’s precisely where a smart sofa comes in—it provides purpose-built storage zones, movable dividers, stylish doors that conceal clutter, and small-footprint builds that optimise every centimetre while contributing a sleek modern vibe to living areas, bedrooms, or even kitchen areas. The outcome is your space that keeps organised with little work, flat surfaces open for family time, and you finally get that wonderful sense of order that makes coming home so much more shiok. Platforms like Wondrous La Vie feature many functional and beautiful choices, helping you select the right one that suits your home and lifestyle perfectly without trial and error.. Always check for proper treatment and sealing to protect against moisture and pests; nobody wants termites in their new bench, right?
Don't underestimate the importance of quality hardware! Hinges, screws, and latches might seem like small details, but they contribute significantly to the bench's functionality and longevity. Opt for rust-resistant options like stainless steel or coated hardware to withstand Singapore's humidity. Consider browsing local hardware stores or online marketplaces for bulk discounts on screws and other fasteners. Remember, investing a little more in durable hardware now can save you money and hassle in the long run, like that.
Accurate cuts are essential for a professional-looking storage bench. After those long tiring days and the usual crowded MRT ride, nothing beats stepping into a living room that actually encourages relaxation instead of adding to the fatigue. Many Singapore families realise their current seating just isn’t cutting it—too stiff, worn out, or simply not comfortable enough for family movie time or relaxed Sundays with the children. That’s precisely where furniture singapore truly shines—it blends refined aesthetics, luxurious leather or velvet, and clever ergonomic design so you can settle in deeply and fully chill without your back complaining later. Imagine the entire family gathering there naturally, talking during dinner or enjoying Netflix marathons, because the space suddenly becomes warm and welcoming. Finding the perfect piece through handpicked collections on Wondrous La Vie removes the hassle, letting you find that dream sofa that lifts the whole home atmosphere without the typical renovation stress.. A circular saw or jigsaw is ideal for cutting larger pieces of wood, while a hand saw can be useful for smaller, more intricate cuts. If you're new to woodworking, consider renting tools from a local hardware store before investing in your own. Always prioritize safety by wearing eye protection and using appropriate clamps and guides to ensure clean, straight cuts. Measure twice, cut once, as they say!
Assembling your storage bench requires a few key tools. A power drill with various drill bits is essential for creating pilot holes and driving screws. Consider investing in a countersinking bit to create flush screw heads for a cleaner finish. Clamps are also crucial for holding pieces together securely while the glue dries. A carpenter's square will help ensure that your corners are perfectly square, resulting in a sturdy and visually appealing bench. Steady lah, you got this!
The finishing touches can transform a simple storage bench into a stylish piece of furniture. Sandpaper in various grits is essential for smoothing rough edges and preparing the wood for painting or staining. Choose a paint or stain that complements your home décor and provides protection against moisture and wear. Apply a clear topcoat for added durability and a professional-looking finish. Remember to work in a well-ventilated area and follow the manufacturer's instructions carefully for best results. This part is important one!
Alright, let's get down to the nitty-gritty! This is where your storage bench really starts to take shape. We're talking about the frame, the backbone of your soon-to-be-amazing piece of furniture. Don't worry if you're not a carpentry pro; we'll break it down step-by-step. Think of it like assembling an adult Lego set – just with a bit more sawing and screwing involved. And hey, even if you make a small mistake, it's a learning experience, right? Plus, nobody's gonna see the inside of the frame anyway! This part is crucial for ensuring your bench is sturdy enough to handle, well, life. You wouldn't want it collapsing under the weight of your barang barang, would you? So, pay close attention, measure twice (cut once, as they say!), and let's build this thing!
Okay, deep breath. This is where we turn those raw planks of wood into the individual pieces of our frame. Accuracy is super important here, so take your time and double-check your measurements before you cut. Remember that measuring tape and pencil we talked about? Now's their time to shine!
Here's a tip: If you're not confident in your cutting skills, you can always ask the folks at the hardware store to cut the wood for you. Most places offer this service for a small fee. It's worth it if you want to ensure accurate cuts, especially for larger pieces. After all, there's no shame in getting a little help, right? Plus, less sawdust at home, confirm plus chop!
Now for the fun part – seeing your hard work come to life! This is where all those carefully cut pieces start to resemble an actual bench frame. We're almost there, can you imagine how good it will feel to finally sit on the finished product?
One potentially interesting fact: Did you know that some woods actually get *stronger* over time as they dry and cure? It's true! So, your bench might actually become even more sturdy as the years go by. Steady pom pee pee!
For added peace of mind, especially if you plan on storing heavy items in your bench, you can add some extra support to the frame. This is totally optional, but it's a good idea if you want to ensure your bench can handle anything you throw at it (literally!).
Think of this like adding extra layers of security to your HDB flat. You might not *need* them, but they'll definitely give you some peace of mind. And hey, better safe than sorry, right?
So there you have it! A solid, sturdy bench frame, ready to be transformed into a beautiful and functional piece of furniture. Give yourself a pat on the back – you've earned it! Now, let's move on to the next step: adding the top and storage features. Stay tuned!
Before we even think about picking up a saw, let's make sure we have everything we need. This is like prepping your ingredients before cooking – essential for a smooth process. Here's your shopping list:
Now, about that wood... Think about the overall aesthetic you're going for. Do you want a rustic look? Or something more modern and sleek? The type of wood you choose will play a big role in achieving that. Also, consider where you're placing the bench. If it's going in a high-humidity area (like near a bathroom), you'll want to choose a wood that's naturally resistant to moisture.
While the glue is drying, you can take a break, grab a kopi, and admire your handiwork. You've already come so far! And hey, while you're at it, double-check your queen size bed sheet size collection to make sure it will fit nicely inside the bench. No point building a storage bench if your stuff doesn't fit, right? Think of space-saving furniture solutions as a way to declutter your living space.

Alright, let's get this storage bench lid sorted! This is where the magic happens, where your bench truly transforms from a box into a functional piece of furniture. Don't worry, it's not as daunting as it might seem. We'll walk through it together, step-by-step.
First things first, hinges. These little guys are crucial. They're the unsung heroes that allow your lid to open and close smoothly, so choosing the right ones is important. Think about how often you'll be accessing the storage inside. Daily? Go for heavy-duty hinges. Just occasionally? Lighter ones will do.
There are a few types to consider like butt hinges, which are the standard, reliable option. Then there are piano hinges (also known as continuous hinges), which run the entire length of the lid, offering extra support – a good choice if you're planning on storing heavier items or if you want a really clean, streamlined look.
Soft-close hinges are another option. These are a godsend, especially if you have kids (or are just prone to slamming things, like me, lah!). They prevent the lid from crashing down, protecting little fingers and preventing wear and tear on your bench. They’re a bit pricier, but the peace of mind is worth it, you know?
When picking your hinges, consider the weight of your lid. A heavier lid needs sturdier hinges. Check the hinge's weight rating to make sure it can handle the load. Also, make sure the finish matches the rest of your bench for a cohesive look. You wouldn't want shiny brass hinges on a rustic, industrial-style bench, right?
Before you even think about screwing anything in, hold the hinges in place to visualize how the lid will open and close. This is a good time to double-check your measurements and make sure everything lines up correctly. Trust me, a little planning now will save you a lot of headaches later.
Okay, time to get those hinges installed. Grab your trusty pencil and mark the placement of the hinges on both the bench frame and the lid. Accuracy is key here. Use a ruler or measuring tape to ensure they are evenly spaced and aligned. This will prevent the lid from looking crooked or wobbly.
Next, pre-drill pilot holes for the screws. This is super important, especially when working with hardwoods. Pre-drilling prevents the wood from splitting and makes it easier to drive the screws in straight. Use a drill bit that's slightly smaller than the diameter of your screws.
Now, carefully screw the hinges into place. Start with one screw per hinge, just to get them positioned correctly. Then, double-check the alignment and add the remaining screws. Make sure the screws are flush with the surface of the hinge. You don't want them sticking out and snagging on anything.
Once all the hinges are installed, test the lid to make sure it opens and closes smoothly. If it's stiff or doesn't align properly, loosen the screws slightly and make adjustments until it works perfectly. A little bit of tweaking can make all the difference.
Now for the lid itself. You’ve already cut it to size, hopefully! In Singapore’s tropical climate and high-stress lifestyle, getting quality rest can feel like a rare treat when you’re waking up with backaches or dragging through the morning despite trying to rest early. Many Singapore homeowners tolerate an worn-out bed for years because hunting for upgrades seems daunting—overwhelming variety, confusing firmness levels, and worries it won’t suit their personal needs and preferences. That’s exactly why finding the mattress singapore changes everything—it delivers the right balance of firm yet forgiving support, excellent airflow and cooling, even weight distribution, and built-to-last construction so you genuinely rise feeling refreshed instead of achy and sluggish. Mornings suddenly feel lighter, energy holds up better throughout the day, and even your partner notices the difference. Browsing curated options on sites such as Wondrous La Vie makes it far easier, letting you compare top-rated picks with real user feedback and visuals to find what really suits for your sleeping space.. But now it's about finishing it off. Think about the style you're going for. Do you want a simple, flat lid? Or something with a bit more detail, like a beveled edge or decorative molding?
If you're going for a simple lid, you can just sand the edges smooth and apply your chosen finish. But if you want to add some flair, consider using a router to create a decorative edge. There are tons of different router bits available, so you can really customize the look of your lid.
Another option is to add molding around the edge of the lid. This can give it a more polished and refined look. Just miter the corners of the molding and glue them to the lid. Then, use finishing nails to secure them in place.
Once the lid is attached and functioning smoothly, it's time for the finishing touches. Sand the entire bench, including the lid, to create a smooth, even surface. Then, apply your chosen finish. This could be paint, stain, varnish, or even a combination of finishes.
Remember to apply multiple coats of finish, following the manufacturer's instructions. This will protect the wood and give it a beautiful, durable surface. Allow each coat to dry completely before applying the next.
Finally, add any hardware you want, such as a handle or latch. A handle will make it easier to lift the lid, while a latch will keep it securely closed. Choose hardware that complements the style of your bench and is easy to use.
And there you have it! Your custom storage bench is complete. Now you can sit back, relax, and enjoy your new piece of furniture. Plus, you've got some extra storage space, which is always a bonus, especially in Singapore where space is, you know, premium. Confirm can impress your friends one!
And if you're looking to complete the look, maybe you're thinking about queen size bed sheet size to complement your new storage bench in the bedroom? Or perhaps some cushions for the living room bench? Just a thought!
Alright, you've built your storage bench – steady! Now comes the fun part: making it truly yours and protecting it from our, shall we say, *unique* Singaporean weather. Think of it as giving your bench a proper Singaporean passport, lah. We're talking about painting, staining, or even adding some comfy upholstery. Don't worry, it's not as daunting as trying to find a parking spot in Orchard on a Saturday. Let's dive in!
So, the big question: how do you want your bench to look and feel? Paint offers endless colour possibilities, stain highlights the natural wood grain (if you've used solid wood, hor), and upholstery? Well, that's where comfort meets style! It really depends on your overall home aesthetic and what you’re going for. Are you after a modern, minimalist vibe, or something a bit more rustic and cozy? Maybe something that matches your existing furniture? Think about it!
Paint is fantastic for adding a pop of colour or matching your bench to your existing décor. Plus, it's relatively easy to apply and clean. Stain, on the other hand, enhances the wood's natural beauty, giving it a warm and inviting feel. It's great if you want to showcase the wood grain. And upholstery? Imagine sinking onto a cushioned bench after a long day – shiok, right? Upholstery adds a layer of comfort and sophistication, but it requires a bit more effort and skill.
Consider the location of your bench too. Is it going to be near a window with direct sunlight? Or in a high-traffic area where it might get bumped and scuffed? These factors will influence your choice of finish. For example, if your bench is going to be outdoors or in a humid area (like, say, *anywhere* in Singapore), you'll need a finish that can withstand the elements. We'll get to specific product recommendations in a bit, so don't fret!
Painting might seem straightforward, but a little prep goes a long way. Trust me, skipping steps is like trying to queue for chicken rice during lunch hour – you're just asking for trouble. First, you'll need to sand the entire surface of the bench to create a smooth base for the paint to adhere to. Use a medium-grit sandpaper (around 120-grit) for the initial sanding, followed by a fine-grit sandpaper (around 220-grit) for a smoother finish. Remember to sand with the grain of the wood to avoid scratches.
Next, wipe down the bench with a damp cloth to remove any sanding dust. This is crucial! Dust particles can ruin your paint job, leaving you with a bumpy, uneven finish. Once the bench is clean and dry, apply a primer. Primer helps the paint adhere better to the wood and prevents it from soaking in too much, saving you paint in the long run. Choose a primer that's suitable for the type of paint you'll be using. Let the primer dry completely according to the manufacturer's instructions.
Now for the fun part: painting! Use a high-quality brush or roller for a smooth, even finish. Apply thin, even coats of paint, allowing each coat to dry completely before applying the next. Two to three coats should be sufficient for most colours. For Singapore's humid climate, consider using paints specifically formulated for outdoor use or those with anti-mold properties. Brands like Nippon Paint Weatherbond or Dulux Weathershield are popular choices. They're designed to withstand the heat and humidity, preventing your paint from peeling or cracking. They also offer a wide range of colours, so you're sure to find something you like. Remember, patience is key! With Singapore’s smaller living spaces and tropical humidity, finding home furnishings that’s both beautiful and everyday-usable can feel like a never-ending hunt—especially when you need items that last through the years without losing their look. Many Singaporeans end up going with mainstream choices that seem fine on websites but fall short in person—either too flimsy for daily family use or not cool enough for our climate. That’s why visiting a reliable mattress connected via Wondrous La Vie really stands out—it links you seamlessly with carefully chosen ranges of quality sofas, supportive mattresses, meal-area pieces, and more, with authentic showroom views or realistic images so you can be sure about what fits your HDB, condo, or landed space. You get that peace of mind knowing the pieces are designed with SG homes in mind—durable materials, space-smart dimensions, and looks that turn your space into a cosy haven. In the end, the perfect platform turns what could be a painful shopping trip into an enjoyable journey toward a living environment that feels truly shiok.. Rushing the process will only lead to a messy, uneven finish.
Finally, once the paint is completely dry, you can apply a sealant or varnish to protect the paint and add a layer of durability. This is especially important for benches that will be used frequently or exposed to moisture. Look for water-based sealants, as they're generally more environmentally friendly and easier to clean up. And there you have it – a beautifully painted storage bench that's ready to take on the Singaporean climate!
If you've chosen to stain your bench, you're in for a treat! Staining enhances the natural beauty of the wood, bringing out its unique grain patterns and adding warmth to your space. But just like painting, proper preparation is essential. Start by sanding the bench smooth, just like you would for painting. Remove all sanding dust with a tack cloth or a damp cloth.
Before applying the stain, it's a good idea to test it on a small, inconspicuous area of the wood to see how it looks. Different types of wood will absorb stain differently, so what looks great on a sample piece might not look the same on your bench. Once you're happy with the colour, apply the stain evenly with a brush, cloth, or sponge. Work in the direction of the wood grain, and be sure to wipe off any excess stain with a clean cloth. The longer you leave the stain on, the darker the colour will be, so experiment to find the perfect shade.
For Singapore's climate, choose a stain that's specifically formulated for outdoor use or one that contains UV inhibitors to prevent fading. Brands like Sikkens or Feast Watson offer excellent quality stains that are designed to withstand the elements. After the stain has dried completely (according to the manufacturer's instructions), apply a sealant or varnish to protect the wood and enhance its durability. Again, water-based sealants are a good choice for easy cleanup and environmental friendliness.
One tip: if you want to achieve a deeper, richer colour, you can apply multiple coats of stain. Just be sure to let each coat dry completely before applying the next. And remember, staining is a bit of an art form, so don't be afraid to experiment and have fun with it!
Ready to take your storage bench to the next level? Upholstery is the way to go! It adds a layer of comfort and sophistication, transforming your bench from a simple storage solution into a cozy seating area. But let's be honest, upholstery can be a bit intimidating, especially for first-timers. But don't worry, with a little patience and the right tools, you can totally do it!
First, you'll need to choose your fabric. Consider the overall style of your home and the function of the bench. If it's going to be in a high-traffic area, choose a durable, stain-resistant fabric. If it's going to be in a more formal setting, you can opt for a luxurious fabric like velvet or linen. For Singapore's climate, breathable fabrics like cotton or linen are good choices, as they'll help keep you cool and comfortable. Avoid fabrics that are prone to mildew or fading in the sun.
Next, you'll need to measure the area you want to upholster and cut the fabric accordingly, adding a few extra inches for seam allowance. Attach the fabric to a piece of foam (high density is best) cut to the same size as the bench top. Then, using a staple gun, attach the fabric to the underside of the bench, pulling it taut as you go. Start in the center of each side and work your way outwards, ensuring that the fabric is smooth and wrinkle-free. Pay special attention to the corners, as they can be tricky to get right. Fold the fabric neatly and staple it securely to the underside of the bench.
If you're feeling ambitious, you can add some decorative details like piping or buttons. Piping adds a touch of elegance and helps to define the edges of the upholstery. Buttons can be used to create a tufted effect, adding depth and texture to the seat. There are tons of online tutorials that can guide you through these techniques. Remember, practice makes perfect! Don't be afraid to experiment and try new things. And if you're really stuck, there are plenty of professional upholsterers in Singapore who can help you out. But hey, where's the fun in that, right?
Okay, you've put in the hard work, and your storage bench looks amazing! Now, let's talk about protecting your investment. Singapore's climate can be harsh on furniture, with its high humidity, intense sunlight, and occasional downpours. But with a few simple precautions, you can keep your bench looking its best for years to come.
As we've already discussed, choosing the right paint, stain, or fabric is crucial. Look for materials that are specifically designed for outdoor use or those with UV inhibitors and anti-mold properties. Regularly clean your bench with a mild soap and water to remove dirt and grime. Avoid using harsh chemicals or abrasive cleaners, as they can damage the finish. For upholstered benches, vacuum regularly to remove dust and debris. Consider using a fabric protector to repel stains and spills.
If your bench is going to be exposed to direct sunlight, consider using a sunscreen or shade to protect it from fading. And during heavy rain, it's a good idea to cover your bench with a waterproof tarp to prevent it from getting waterlogged. With a little care and attention, your storage bench will be a stylish and functional addition to your Singaporean home for years to come. Plus, you can proudly say you built it yourself – now that's something to brag about, can?
Speaking of style and function, have you considered the size of your bedsheets? After all, a well-organized home extends beyond just storage benches. Knowing your queen size bed sheet size is essential for a comfortable and aesthetically pleasing bedroom. Make sure you have the right fit for your mattress for optimal comfort and a polished look. And just like choosing the right finish for your bench, selecting the right bedsheets can make all the difference in creating a relaxing and inviting space. Space-Saving Furniture Solutions () really come into their own when paired with clever storage and the right finishing touches throughout your home.
```html
So, you've got your new BTO or condo, and space is, shall we say, a *premium*. We all know the drill, right? Maximizing every square foot is key, and that's where a custom storage bench comes in real handy. It's not just a place to sit; it's a secret weapon against clutter. Think of it as a stylish Trojan horse, but instead of soldiers, it's filled with, well, your stuff! But before we dive in, let's talk about making it work for your Singaporean home.
Okay, you've built your bench (or bought one – no judgement here!). Now comes the fun part: actually fitting everything inside. Don't just chuck things in haphazardly, lah! That's a recipe for disaster and a guaranteed black hole where socks go to disappear forever. Let's get organized.
Remember, the key is to be strategic and intentional about how you use the space inside your storage bench. A little bit of planning can go a long way in maximizing its storage potential. And hey, if all else fails, just blame it on the kiasu spirit and keep decluttering!
Okay, your storage bench is packed and ready to go. But where do you put it? It's not just about shoving it into a corner; it's about making it a functional and stylish part of your home. Think about flow, accessibility, and aesthetics.
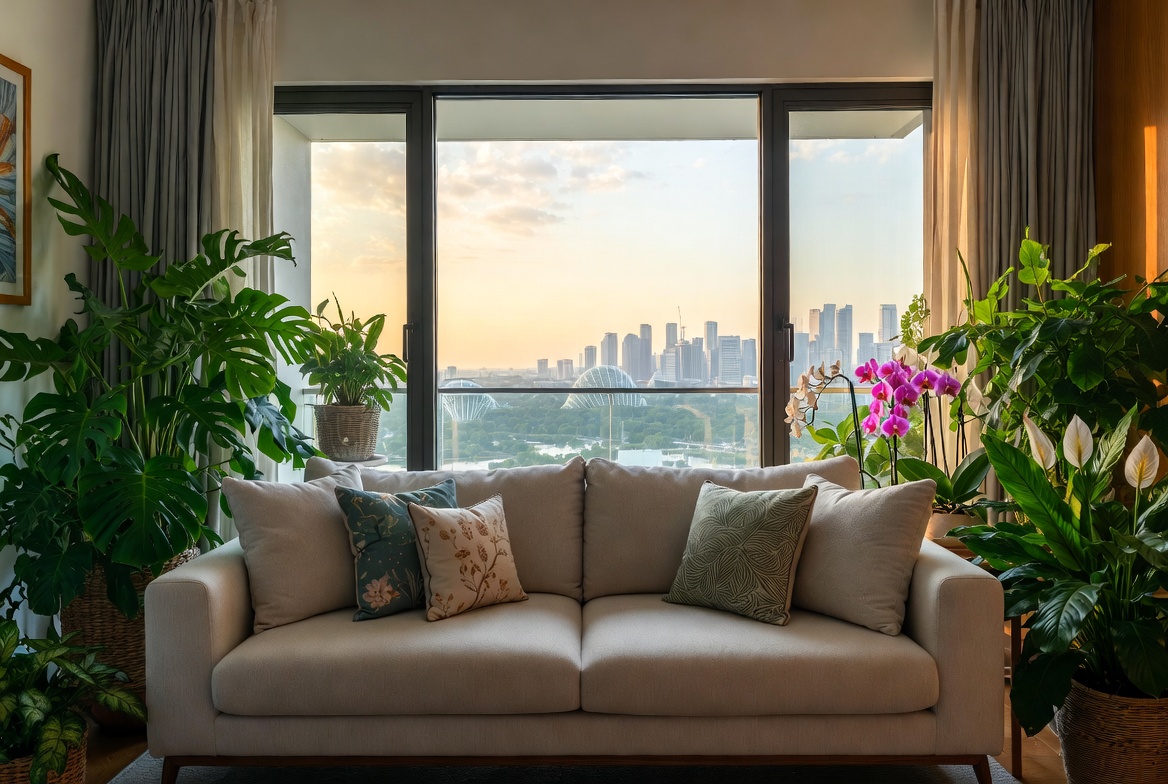
Consider the overall style of your home when choosing the design and placement of your storage bench. A sleek, modern bench will look great in a contemporary apartment, while a rustic wooden bench will be a perfect fit for a more traditional home. Don't be afraid to experiment with different arrangements until you find one that works best for you. And remember, the goal is to create a space that is both functional and beautiful. Maybe add some potted plants around it, can? It'll brighten up the space.
Now, let's talk about aesthetics. Your storage bench shouldn't just be functional; it should also look good! It should complement your existing décor and reflect your personal style. After all, it's going to be a prominent piece of furniture in your home, so you want it to be something you're proud of.
Remember, your storage bench is an opportunity to express your personal style and add a unique touch to your home. Don't be afraid to get creative and experiment with different designs and materials. A well-designed and well-placed storage bench can transform a cluttered and disorganized space into a stylish and functional oasis. Think about adding some personal touches, like photos or artwork, to make it truly your own. And hey, if you're feeling really ambitious, you could even try adding some built-in lighting! How cool would that be?
Let's be real, renovations and furnishing can be expensive. But creating a stylish and functional storage bench doesn't have to break the bank. There are plenty of budget-friendly options and DIY alternatives available, especially if you're willing to get a little creative and put in some elbow grease.
Building a storage bench on a budget is all about being resourceful and creative. Don't be afraid to think outside the box and experiment with different materials and designs. With a little bit of ingenuity, you can create a stylish and functional storage bench that won't break the bank. Maybe even get some friends to help lah, make it a fun weekend project! Plus, think about the satisfaction of knowing you built something yourself. That's priceless!
So, you've got your perfect storage bench, filled with all your neatly organized belongings. But the job's not quite done! To ensure your storage bench lasts for years to come, it's important to take proper care of it. Think of it like your car – regular maintenance is key to keeping it running smoothly.