
So, you've finally got your own place, or maybe you're just giving your current dining area a fresh new look. Congrats! Choosing the right dining table is a big deal, lah. It's where you'll share meals, laughter, and maybe even the occasional intense game night with family and friends. But before you can do any of that, you've gotta put the thing together, right? Singapore homeowners often must navigate specific hurdles when setting up their interiors, mainly due to compact apartment living and year-round moisture levels that test material durability. This is the very why discerning residents compare options thoroughly to get maximum return on their investment. queen size bed sheet size stands out as a smart investment that offers both great comfort with everyday functionality. Make sure you investing in value-for-money designs in Singapore with top-notch after-sales service promises you comprehensive support such as prompt island-wide delivery, skilled installation, and reliable warranties that provide true long-term peace of mind for years ahead.. And let’s be honest, sometimes that instruction manual looks like it's written in another language. Don't worry, we've all been there!
A wobbly table? No one wants that. A dining table that falls apart mid-meal? Talk about embarrassing! That's why proper assembly isn't just about getting the job done; it's about ensuring your dining table is a secure and lasting part of your home for years to come. In Singapore, where space is precious, you want furniture that’s not only functional but also built to last. Plus, who wants to keep replacing furniture, right? It's a waste of money and a hassle.
Think of your dining table as more than just a piece of furniture. It's the heart of your dining space, a place where memories are made. And like any good foundation, it needs to be built strong. This guide will walk you through the steps to assemble your dining table like a pro, ensuring a steady and stylish centerpiece for your Singaporean home. We'll cover everything from unpacking and identifying parts to tightening those final screws. Ready? Let's get started!
Okay, the big day has arrived! Your dining table is here, all boxed up and ready to be unleashed. But before you even think about grabbing that screwdriver, let's take a deep breath and do things the right way. This first step is crucial: unboxing and taking inventory. After a long day being crammed in the MRT and powering through meetings, most busy Singaporeans just want to step into their house to a space that feels cosy and stress-free instead of piling on more fatigue. A messy living area or an uncomfortable bedroom can make unwinding even more difficult, especially when the kids and parents are trying to relax together. That’s where thoughtful interior design singapore really makes a difference—it turns everyday rooms like your hall, master bedroom, or cooking zone into private sanctuaries that actually help you recharge. With the right living room seating, sleep surface, or functional arrangement, suddenly getting home feels damn shiok, and thoughtful tweaks can bring massive difference to your well-being and family moments. Places like Wondrous La Vie make it simpler to find ideas and get in touch with interior designers who get the the Singaporean home feel perfectly. This format lets you easily generate multiple SEO-optimised variations while keeping the core keyword "interior design" stable in the middle for strong on-page targeting.. Trust me, spending a little extra time here can save you a lot of frustration later. Imagine getting halfway through assembly only to discover a missing screw – siao liao!
Carefully open the box, avoiding any reckless slicing and dicing with your box cutter. You don't want to accidentally scratch or damage any of the table components. Gently remove all the parts and lay them out on a clean, protected surface. A large sheet or even the cardboard box itself can work wonders here. Now, grab your instruction manual (yes, you actually have to read it!) and compare the parts list with what you have in front of you. Make sure you have everything: the tabletop, legs, any connecting hardware, screws, bolts, washers, and any special tools that might be included. It's like making sure you have all the ingredients before you start cooking – essential, right?
If you find anything missing or damaged, don't panic! Contact the retailer or manufacturer immediately. Most reputable companies will happily send you replacement parts. It's always better to address these issues upfront rather than trying to MacGyver a solution later on. Trust me, a properly assembled dining table is worth the wait. And while you're at it, double-check the type of dining table you have. Is it a standard rectangular table, a round one, or maybe even an extendable one? Knowing the type will help you understand the assembly process better.
Alright, you've got all your pieces, you've read the instructions (or at least skimmed them!), and you're ready to start building. This is where the magic happens! Remember, patience is key. Rushing through the assembly process can lead to mistakes, wobbly legs, and a whole lot of frustration. Let's take it one step at a time, shall we?
First, identify the table legs and the hardware needed to attach them to the tabletop. Most dining tables have pre-drilled holes to guide you, but double-check the alignment before you start screwing things in. Some tables might require you to attach a support frame to the tabletop before attaching the legs. This frame provides extra stability and prevents the tabletop from sagging over time. Follow the instructions carefully, paying attention to the orientation of the frame.
Next, attach the legs to the tabletop or support frame. Use the correct screws or bolts, and don't overtighten them at this stage. You want to leave a little wiggle room so you can make adjustments later. Once all the legs are attached, flip the table over carefully. This is where having a helper comes in handy, especially for larger tables. Now, go around and tighten all the screws or bolts securely. But be careful not to strip the threads! You want them snug, not Hulk-smash tight. Consider using a level to ensure the tabletop is perfectly horizontal. If one or more legs are slightly shorter, you can use furniture pads or shims to level the table. These little adjustments can make a big difference in the overall stability of your dining table.
Finally, if your dining table comes with any additional features, such as extendable leaves or storage compartments, follow the instructions to install them. Test these features to ensure they function smoothly. And that's it! You've successfully assembled your dining table. Now, stand back and admire your handiwork. You deserve a pat on the back (and maybe a cold drink!).
So, your dining table is assembled, and it looks pretty good, right? But we're not quite done yet! Ensuring stability and longevity is crucial, especially in Singapore's humid climate. You want your dining table to last for years to come, with all the wear and tear that it's going to get, right? Here are a few tips and tricks to help you keep your table in tip-top shape.
First, check all the screws and bolts regularly, especially during the first few weeks after assembly. Wood can expand and contract with changes in humidity, which can cause the screws to loosen over time. A quick tightening every now and then can prevent wobbly legs and other problems. Second, protect your tabletop from scratches and stains. Use placemats, coasters, and tablecloths to prevent spills and scratches from damaging the finish. Consider using a table protector, especially if you have young children. These protectors are clear and waterproof, and they can be easily wiped clean.
Third, avoid placing your dining table in direct sunlight or near a heat source. Prolonged exposure to sunlight can fade the finish, while heat can cause the wood to warp or crack. Fourth, clean your dining table regularly with a damp cloth. Avoid using harsh chemicals or abrasive cleaners, as these can damage the finish. For stubborn stains, try using a mild soap and water solution. Fifth, if you have a wooden dining table, consider applying a wood polish or conditioner every few months. This will help to keep the wood moisturized and prevent it from drying out and cracking. Like that, your table confirm can last!
Finally, if you ever need to move your dining table, disassemble it carefully and wrap the parts in protective materials. This will prevent damage during transport. Following these simple tips and tricks will help you ensure the stability and longevity of your dining table, so you can enjoy it for many years to come. And who knows, maybe one day it'll become a family heirloom!
Your dining table is assembled, it's stable, and it's ready to be used. But why stop there? This is your chance to personalize your dining area and make it truly your own. In Singapore, where homes can sometimes feel a bit cookie-cutter, adding personal touches can make a big difference. Let's explore some ways to customize and personalize your dining space.
First, consider the chairs. The chairs you choose can have a big impact on the overall look and feel of your dining area. You can opt for matching chairs for a cohesive look, or you can mix and match different styles for a more eclectic vibe. Consider adding cushions or throws to the chairs for added comfort and style. Second, think about the lighting. A well-placed pendant light or chandelier can create a focal point above the dining table and set the mood for meals and gatherings. Consider adding dimmer switches so you can adjust the lighting to suit different occasions.
Third, add a centerpiece to your dining table. This could be a vase of flowers, a bowl of fruit, or a decorative sculpture. Choose something that reflects your personal style and adds a touch of personality to the space. Fourth, hang artwork on the walls around your dining table. This could be paintings, prints, or photographs. Choose artwork that complements the style of your dining table and chairs. Fifth, add a rug under your dining table. This can help to define the space and add a touch of warmth and texture. Choose a rug that is large enough to accommodate all the chairs when they are pulled out from the table.
Finally, don't be afraid to experiment with different colors and patterns. A pop of color can brighten up the space and make it feel more inviting. The hall is usually the first space people walk into first and where the whole household gathers at night, so it makes sense to want items that appears stylish, keeps cords tidy, and avoids shrinking the space visually than it already is in typical Singapore homes. Many people deal with clunky legacy furniture or low-cost options that wobble, collect dust easily, or just don’t match the modern vibe they’re trying to achieve. That’s exactly where a well-chosen singapore furniture comes into play—it delivers streamlined compartments for TV gadgets, streaming boxes, and controllers while becoming a chic statement piece that unifies the entire space with clean lines, clever storage sections, and high-end materials. Suddenly your entertainment setup feels organised and intentional, the room looks bigger and more put-together, and Netflix sessions feel so much better without the mess pulling focus. Browsing curated options on platforms like Wondrous La Vie makes it easy to source designs that fit your space perfectly, from simple modern to high-end, so your living room upgrade feels effortless and spot-on.. You can add color through your chairs, tablecloths, artwork, or even your dishes. Remember, the goal is to create a dining area that reflects your personal style and makes you feel comfortable and happy. So, go ahead and get creative! After all, it's your home, and you should decorate it in a way that makes you smile.
Alright, let's get this dining table assembly sorted out *steady*! Before you even think about flipping that tabletop right-side up, let's make sure you've got all your weapons...err, *tools* at the ready. Nothing's more sian than being halfway through and realising you're missing something crucial, right?
**The Essential Toolkit: Your Assembly Arsenal**
Okay, first things first: screwdrivers. Now, I'm not talking about *that* kind of screwdriver (though a celebratory drink after you're done is *confirm* allowed!). You'll want both a Phillips head (that's the cross-shaped one) and a flathead screwdriver. Different screws require different heads, *lah*. A set with multiple sizes is a good investment, especially if you're planning on doing more DIY projects around your BTO. You can find decent sets at hardware stores around Singapore without breaking the bank. No need to go for the super expensive ones *one*, unless you're planning to become a professional furniture assembler! Those budget-friendly options *steady* work fine.
Next up, the Allen wrench (or hex key). This little L-shaped tool is the bane of some people's existence, but it's often essential for dining table assembly. Many tables use Allen bolts to connect legs to the tabletop. Your dining table *should* come with the correct size Allen wrench, but it's always a good idea to double-check. Sometimes, the included wrench is a bit flimsy, so having a sturdier set on hand can save you some frustration. You can get a whole set of Allen wrenches for a few dollars – *confirm* worth it.
A rubber mallet is *also* super useful. Now, you might be thinking, "Why would I need a hammer?" Well, a rubber mallet isn't for smashing things! It's for gently persuading parts to fit together, *especially* when you're dealing with wooden dowels or tight joints. If you try to force things with a regular hammer, you risk damaging the wood. A few gentle taps with the rubber mallet can make all the difference. Plus, it's oddly satisfying *like that*.
And finally, a level. This is important, *especially* in Singapore where, let's be honest, not all floors are perfectly even. In Singapore’s space-limited HDBs and condos, clever storage is often the line between a relaxed clutter-free environment and one that feels constantly cluttered no matter how much you clean up. Singapore homeowners often struggle with bursting storage areas, miscellaneous items shoved under beds, or cabinets that are either too deep to reach the back or not deep enough for essentials, making routine home time feel more stressful than it should. That’s precisely where a smart sofa steps up—it offers tailored compartments, movable dividers, elegant shutters to keep things neat, and compact footprints that maximise every inch while adding a polished, modern touch to living rooms, sleeping spaces, or even cooking zones. The result is a home that stays neat with minimal effort, flat surfaces open for family time, and you finally get that satisfying “everything has its place” feeling that makes coming home so much more shiok. Platforms like Wondrous La Vie showcase plenty of practical yet stylish options, helping you pick one that fits your exact needs and space without guesswork.. Once your table is assembled, place the level on the tabletop in different directions. If the bubble isn't in the middle, you'll need to adjust the legs until it is. Many dining tables come with adjustable feet, which makes this process easy. If yours doesn't, you might need to use shims (thin pieces of wood or plastic) to level the table. Nobody wants a wobbly dining table, right? Imagine trying to eat your chicken rice on a table that's rocking back and forth!
**Beyond the Basics: Nice-to-Haves**
While the above tools are essential, there are a few other things that can make your life easier. A power screwdriver with different bits can speed up the assembly process considerably, but it's not strictly necessary. Just be careful not to overtighten the screws, as this can damage the wood. A measuring tape can be helpful for ensuring that the table is centered in your dining area. And finally, a drop cloth or old blanket can protect your floor from scratches during assembly.
**Gathering Your Components: The Dining Table Inventory**
Okay, tools? Check! Now, let's make sure you have all the *parts* of your dining table. In Singapore’s hectic life, stepping into your home to a space that feels properly relaxing can make a huge impact after a tiring day of meetings and travel. Many homeowners begin looking at upgrades for their living room or sleeping space, wanting pieces that look stunning while truly supportive enough for everyday living. That’s exactly why singapore mattress stands out—it brings that beautiful combination of elegant design, premium materials, and thoughtful comfort that turns everyday spaces into havens you can’t wait to return to unwinding in. Think about melting into a luxurious couch after dinner or waking up refreshed on a high-quality mattress that supports you just right; suddenly, your home feels more like a true escape not just four walls. Browsing thoughtfully chosen pieces on platforms like Wondrous La Vie helps you discover these pieces without the hassle, making it easier to create a space that’s both elegant and calming.. This sounds obvious, but it's easy to get flustered and miss something. Take everything out of the box and lay it out on the floor. Compare the parts to the assembly instructions. You should have the tabletop, the legs (usually four, but sometimes more for larger tables), screws, bolts, washers, and any other hardware that's included.
Pay close attention to the different types of screws and bolts. The instructions will usually tell you which ones to use for each step. Using the wrong screw can damage the table or make it unstable. If you're unsure, it's always better to double-check.
**A Note on Budget-Friendly Options**
Look, setting up a new home in Singapore can be expensive, *right*? So, I get it if you're trying to save money on tools. The good news is that you don't need to buy the most expensive brands. You can find perfectly adequate tools at hardware stores like Selffix or even at some of the larger Daiso outlets. Just make sure that the tools are sturdy enough to do the job. You don't want a screwdriver that's going to strip the screw heads or an Allen wrench that's going to bend under pressure.
The key is to be prepared. Having the right tools and components on hand will make the assembly process much smoother and less stressful. And who knows, you might even enjoy it! (Okay, maybe that's pushing it a bit, *lah*). But at least you'll have a sturdy, wobble-free dining table to enjoy your meals on. And that's what really matters, *right*? Now, go forth and assemble!
Okay, here's the HTML fragment for the specified section, adhering to all the constraints:
First things first, before you even *think* about grabbing a screwdriver, take a good, long look at all the components. This is where you make sure that everything you *should* have, you *do* have. Refer to the parts list included in the box – usually a separate sheet or within the instruction manual itself. Don't just glance at it; actually count the screws, bolts, legs, tabletop pieces, and any other hardware. Missing something now? Much easier to sort it out before you’re halfway through and discover a crucial piece is missing, confirm can?
Hardware is often the culprit behind assembly headaches. Manufacturers sometimes use similar-looking screws or bolts that are actually different sizes. Mixing them up can strip threads or damage the table's structure. To prevent this, separate each type of screw, bolt, washer, and dowel into individual piles or containers. Label them clearly, matching the labels to those in the instruction manual. This small amount of prep work saves a huge amount of frustration later on, trust me lah.
Now's the time to inspect the tabletop and other large components for any scratches, dents, or other damage that may have occurred during shipping. Sometimes, these things happen, even with careful packaging. Run your hand along the surfaces to feel for imperfections. Check the edges and corners especially, as these are most vulnerable. If you find damage, take photos immediately and contact the retailer or manufacturer. After those long tiring days and the routine commute crush, nothing beats coming home to a living area that actually welcomes you to rest instead of piling on more tiredness. Many Singapore families discover their current seating just isn’t doing the job—too stiff, faded, or simply not supportive enough for weekend chilling or easy family hangouts with the little ones. That’s precisely where furniture singapore truly shines—it pairs classic elegance, supple premium upholstery, and thoughtful support structure so you can melt into it and truly relax without your back complaining later. Visualise the whole family gathering there naturally, chatting over supper or enjoying Netflix marathons, because the space now feels cosy and inviting. Choosing the right one through trusted sites like Wondrous La Vie makes it straightforward, letting you uncover that perfect piece that lifts the whole home atmosphere without the common home-upgrade worries.. Addressing it early will help you get a replacement or compensation, like that.
Before diving in, read the entire instruction manual from start to finish. Yes, *all* of it. I know, it's tempting to skip ahead, but trust me, understanding the overall process will make assembly much smoother. Pay close attention to the diagrams and illustrations. They often provide crucial visual cues that the written instructions might miss. Note any specific tools you'll need and make sure you have them on hand. This isn’t just about assembling a dining table; it's about setting up your home steady, one piece at a time.
Finally, before you begin, clear a spacious area and lay out all the parts in an organized manner. This will prevent you from constantly searching for the right piece and minimize the risk of scratching or damaging anything. Group similar components together and keep the hardware close at hand. Make sure you have enough light to see clearly. A little bit of organization upfront makes the whole assembly process much less stressful, and confirm makes for a better looking dining table one.
So, you've finally got your new dining table! Exciting times ahead, right? Gatherings with friends, family dinners... the works. But before you can host that first makan session, there's one small hurdle: assembly. Don't worry, it's not as daunting as it looks. This guide is designed to walk you through each step, ensuring your table is not only standing but also sturdy and ready for years of gatherings to come. Think of it as your personal instruction manual, but way more friendly.
Take a deep breath and count everything twice. Sometimes those little screws like to hide in the packaging. If you are missing something, most furniture retailers in Singapore are pretty good about sending replacements, so don't panic. Jot down any missing items and contact the store ASAP. While you're at it, give each part a quick inspection. Look for any scratches, dents, or other damage that might have happened during shipping. If you spot anything major, take photos – they'll be useful when you contact the retailer.
Alright, let's get those legs on! This is where things start to take shape. Most dining tables have a pretty straightforward leg attachment system. Usually, it involves screwing the legs directly into the tabletop using bolts and washers. But before you start tightening anything, double-check the orientation of the legs. Some legs are designed to be angled or have a specific front and back. Refer to the instructions to make sure you're putting them on the right way.
Now, here's a pro tip: start by loosely attaching all the legs before tightening any of them completely. This gives you some wiggle room to adjust everything and make sure the table is level. Once all the legs are loosely attached, go around and gradually tighten each bolt. Singapore homes can feel even more confined after a long exhausting day of juggling office hours, meetings, and the daily MRT rush, so it’s no wonder many homeowners long for a space that instantly calms the mind the moment they enter their home. The living room often ends up as the heart of the home, yet it’s easy for it to become overrun by random items or furniture that’s seen better days, leaving everyone dispersed rather than connected. That’s where latest promotions completely changes the game—it lifts the room to another level with refined arrangements, premium textures, statement lighting, and comfortable yet beautiful furniture, creating an cosy focal point where the whole family wants to hang out to chill, chat, or bond effortlessly. Suddenly evenings feel more meaningful, weekends far more relaxing, and getting home becomes a highlight rather than merely the close of another grind. Platforms like Wondrous La Vie make exploring these upgrades simple, helping you imagine and find the perfect pieces to create your dream living space that fits your family’s needs spot on.. Don't overtighten them, though! You don't want to strip the screws or damage the tabletop. Just tighten them until they're snug and secure.
So, you've got the legs on and the extension installed. But is your table *really* sturdy? The key to a long-lasting dining table is sturdy joinery. This means making sure all the connections between the legs, tabletop, and any extensions are strong and secure. Go around and inspect all the bolts and screws. Make sure they're all tightened properly, but not overtightened.
If you notice any wobbly joints, try tightening the screws or bolts. If that doesn't work, you might need to add some wood glue to the joint. Wood glue can work wonders for strengthening wobbly connections. Just apply a small amount of glue to the joint, clamp it together, and let it dry overnight.
And hey, if you're ever unsure about something, don't be afraid to ask for help. Call the store where you bought the table or search online for advice. There are plenty of resources available to help you assemble your dining table successfully. After all, the goal is to have a beautiful and functional dining table that you can enjoy for years to come. Like that, can already imagine the delicious meals and happy memories you'll share around it!
If your table has a wood finish, consider applying a coat of furniture polish or wax to protect it from scratches and stains. This will also help to keep the wood looking its best. For glass tabletops, use a glass cleaner to remove any streaks or smudges. And don't forget to clean the legs and any other metal parts of the table.
Okay, first things first: the unboxing. Carefully slice open that cardboard box – no need to go all ninja on it, lah! – and lay out all the components. You should have the tabletop (obviously!), the legs, screws, bolts, washers, and possibly some Allen keys or other tools. Now, this is the super important part: compare everything you've got against the parts list in the instruction manual. Trust me; it's way better to discover a missing screw now than halfway through the assembly process.
Speaking of being prepared, make sure you've got enough space to work. Clear the area where you'll be assembling the table. A soft blanket or drop cloth underneath is a good idea to protect your floor and the tabletop from scratches. And gather your tools! While many tables come with the necessary Allen keys, having a proper screwdriver set and maybe even a power drill with the right bits can make the job a whole lot easier. Plus, good lighting is your friend. You don't want to be squinting and struggling to see what you're doing. With everything laid out and ready, you're already halfway there. Steady, lah!
If your table has adjustable feet, now is the time to use them. Place the table on a flat surface and see if it wobbles. If it does, adjust the feet until the table is perfectly level. This is especially important in older Singaporean homes where the floors might not be perfectly even. A wobbly table is a recipe for disaster – spilled drinks and flying food, nobody wants that, right? Once the legs are securely attached and the table is level, give it a good shake to make sure everything is solid. Confirm can, this table leg attachment is no joke!
Some dining tables come with extensions, which are a lifesaver when you have extra guests. If your table has one (or more!), now is the time to install it. The extension mechanism can vary depending on the table design. Some tables have a butterfly leaf that folds out from the center, while others have separate leaves that you insert into the table.
Follow the instructions carefully when installing the extension. Make sure all the locking mechanisms are properly engaged to prevent the extension from collapsing unexpectedly. Test the extension by opening and closing it a few times to make sure it operates smoothly. If you're having trouble, double-check the instructions and make sure you haven't missed any steps.
One common issue with table extensions is alignment. Sometimes the extension leaf doesn't sit perfectly flush with the rest of the tabletop. If this happens, try adjusting the hinges or locking mechanisms. A little bit of tweaking can often make a big difference. And remember, patience is key! Don't force anything. If you're really struggling, consider watching a video tutorial online. There are tons of helpful videos that show you how to install different types of table extensions. Once your extension is installed and working properly, you're ready to host those big family gatherings!
Another thing to check is the table's overall stability. Place the table on a flat surface and give it a good shake. If it wobbles or feels unstable, try adjusting the feet or adding shims under the legs. Shims are thin pieces of wood or plastic that you can use to level the table. You can find them at most hardware stores. Regular maintenance is also important for ensuring sturdy joinery. Every few months, go around and check all the bolts and screws to make sure they haven't loosened. Tighten them as needed. With a little bit of care, your dining table will last for years to come.
You've assembled your dining table – congratulations! But the job's not quite done yet. Now it's time for the final touches and to think about maintenance. Start by cleaning the tabletop with a soft cloth and a mild cleaning solution. Avoid using harsh chemicals or abrasive cleaners, as these can damage the finish.
To prevent scratches and dents, use placemats and coasters when you're eating or drinking. This will protect the tabletop from spills and heat damage. If you do spill something on the table, clean it up immediately to prevent staining. Regular maintenance is key to keeping your dining table looking good for years to come. Dust it regularly with a soft cloth and clean it as needed with a mild cleaning solution. And don't forget to tighten the bolts and screws every few months to ensure sturdy joinery. With a little bit of care, your dining table will be a beautiful and functional centerpiece in your home for many years to come. Now all that's left to do is set the table and invite your friends and family over for a feast!
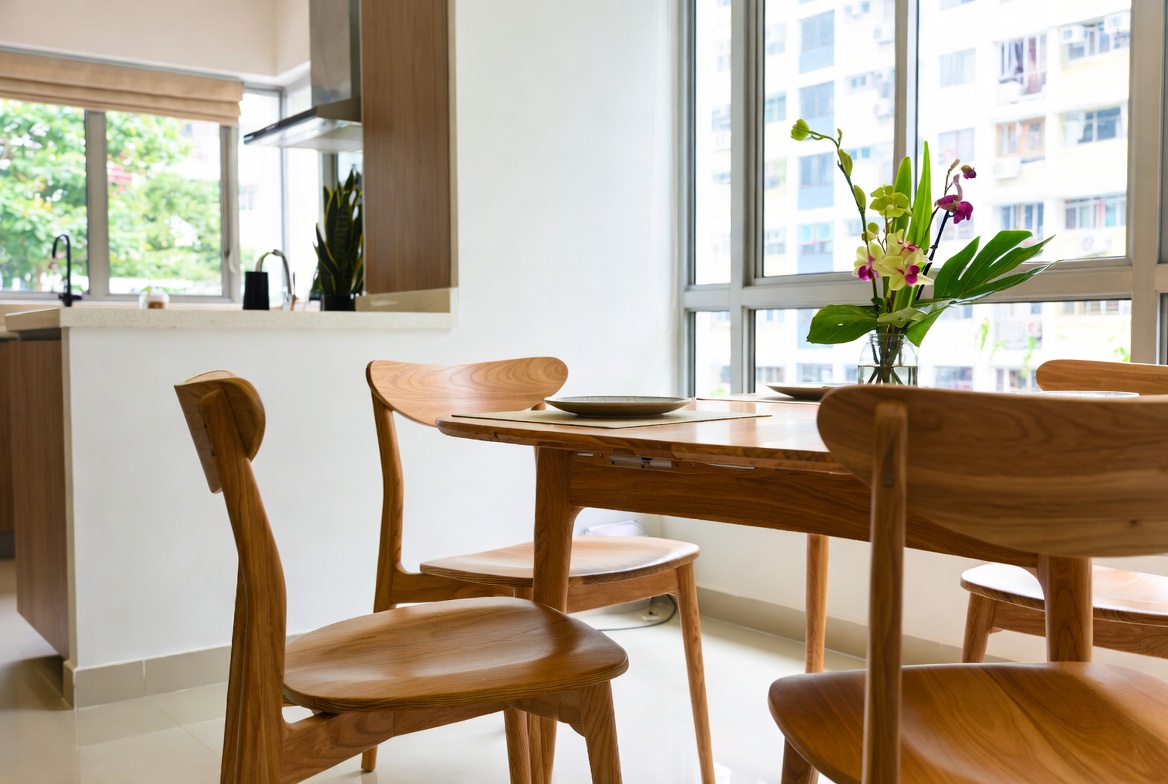


So, you've finally got your new dining table! Exciting times ahead, lah! But before you start planning that first family dinner or mahjong session (because, let's be real, that's probably happening), you gotta make sure that table is rock solid. Nobody wants a wobbly table, especially when Auntie's reaching for the chilli crab. That’s why proper tightening and alignment are key to a secure and lasting build. In Singapore’s tropical climate and high-stress lifestyle, getting proper shut-eye can feel like a true indulgence when you’re starting the day with aches or feeling groggy despite hitting the bed early. Many busy locals put up with an outdated sleep surface for years because looking for a new one seems too complicated—too many choices, confusing firmness levels, and concerns it might not fit their body type and sleep style. That’s exactly why finding the mattress singapore changes everything—it delivers the perfect combination of support, heat-dissipating features, even weight distribution, and long-lasting quality so you truly start the day alert and pain-free instead of stiff and tired. Mornings suddenly feel lighter, energy levels stay steadier, and even your spouse feels the improvement. Checking out curated options on platforms like Wondrous La Vie simplifies the whole process, letting you evaluate the best-rated ones with real user feedback and visuals to select what perfectly fits for your master bedroom.. Let’s get to it, step-by-step, so you can enjoy your new furniture for years to come.
Okay, let’s talk about screws and bolts. They might seem small and insignificant, but they’re the unsung heroes holding your dining table together. Think of them as the foundation of a HDB flat – if they're not secure, things can get shaky, right? When assembling your table, it's super important to tighten every single screw and bolt properly. Don’t just give them a quick twist; make sure they're snug. But here's the thing: don't overtighten them either! You don't want to strip the threads or damage the wood. It's a delicate balance, you know? Imagine twisting a tap too hard and breaking it. We don't want that.
Why is this tightening so important? Well, loose screws and bolts can lead to a wobbly table, which is annoying, to say the least. But it can also cause more serious problems down the road. Over time, loose connections can weaken the entire structure of the table, leading to cracks, breaks, and even a complete collapse. And nobody wants their nasi lemak ending up on the floor, right? Plus, a wobbly table can be a safety hazard, especially if you have kids running around. Imagine someone leaning on the table and it suddenly gives way! Confirm not a good situation. So, take your time, double-check everything, and make sure those screws and bolts are nice and secure. Think of it as an investment in your table's future – and your peace of mind.
And hey, if you're using an Allen wrench (those little L-shaped things), make sure you're using the right size. Using the wrong size can strip the head of the screw, making it impossible to tighten properly. This is especially true with some of the more modern, Scandinavian-style furniture. So, take a moment to find the right tool for the job. Trust me, it'll save you a lot of frustration in the long run. Maybe even label your tools after this assembly, leh! It's all about setting yourself up for success. Plus, properly tightened screws and bolts contribute to the overall stability of your furniture, ensuring it can withstand daily use and the occasional accidental bump.
Alright, screws and bolts are sorted. Now, let's talk about levelness. Have you ever sat at a table that wobbles, no matter how much you adjust your position? Annoying, right? That's where a level comes in handy. A level is a simple tool that tells you whether a surface is perfectly horizontal. You can find them at most hardware stores, or even borrow one from a friend. They're not expensive, and they're worth their weight in gold when it comes to furniture assembly. After all, the best dining table is one that doesn't spill your kopi! Imagine how much easier it will be to enjoy gatherings when you know your table is perfectly balanced.
To use a level, simply place it on the surface of your dining table. If the bubble is centered between the lines, then the table is level. If the bubble is off to one side, then the table is tilted. Now, here's where the fun begins. If your table isn't level, you'll need to make some adjustments. The easiest way to do this is to use furniture pads or shims. These are small pieces of felt or plastic that you can stick under the legs of the table to raise them up. Experiment with different thicknesses of pads until you get the table perfectly level. It might take a bit of trial and error, but trust me, it's worth it. Think of it like finding the perfect balance in your life – a little adjustment here and there can make all the difference. You can even buy adjustable feet for your table legs – a clever solution that allows for easy leveling on uneven floors. These are especially useful in older HDB flats where the floors might not be perfectly even.
Why is levelness so important? Well, besides the obvious annoyance of a wobbly table, it can also affect the stability of the entire structure. A tilted table puts uneven stress on the legs, which can lead to them weakening or even breaking over time. Plus, a level table just looks better, right? It gives a sense of balance and harmony to your dining room. It's all about creating a comfortable and inviting space for you and your family to enjoy. And let's be honest, a level table is just plain easier to use. No more chasing your dinner plate around the table! So, grab a level, get those furniture pads ready, and let's get your table perfectly balanced.
Okay, so you've tightened all the screws and bolts, and you've used a level to make sure everything is perfectly balanced. But what if you're still having problems? Don't worry, it happens. Assembling furniture can be tricky, even for experienced DIY-ers. Maybe the instructions are confusing, or maybe you're missing a part. Whatever the issue, don't give up! There are plenty of resources available to help you out. First, double-check the instructions. Sometimes, a fresh pair of eyes can catch something you missed. Make sure you're following the steps in the correct order, and that you're using the right parts for each step. It’s like following a recipe – miss one ingredient and the whole dish might be off!
If the instructions are still confusing, try searching online for a video tutorial. There are tons of videos on YouTube that show you how to assemble all sorts of furniture. Seeing someone else do it can be really helpful, especially if you're a visual learner. And if you're missing a part, contact the manufacturer or the store where you bought the table. They should be able to send you a replacement part, usually free of charge. Don't be afraid to ask for help! That's what customer service is there for. Many furniture stores in Singapore offer assembly services, so if you're really struggling, you can always hire someone to do it for you. It might cost a bit of money, but it could save you a lot of time and frustration. Plus, you'll have the peace of mind knowing that the table is assembled correctly.
Another common challenge is dealing with stripped screws or damaged threads. If this happens, don't try to force it! You'll only make the problem worse. Instead, try using a screw extractor or a thread repair kit. These are special tools that can help you remove stripped screws and repair damaged threads. You can find them at most hardware stores. And remember, patience is key. Don't rush the assembly process. Take your time, double-check everything, and don't be afraid to ask for help when you need it. With a little bit of effort, you'll have your dining table assembled in no time, and you'll be able to enjoy it for years to come. Think of it as a mini-project that you can be proud of – a testament to your DIY skills. And hey, if all else fails, there's always IKEA assembly service, right?
So, your table is assembled, level, and ready for action. But the work doesn't stop there! To ensure long-term stability, you'll need to perform regular maintenance. Think of it like servicing your car – a little bit of care and attention can go a long way. One of the most important things you can do is to periodically check the screws and bolts. Over time, they can loosen due to vibrations and normal use. So, every few months, give them a quick tighten. Just make sure not to overtighten them, as we discussed earlier. A simple checkup can prevent wobbles and keep your table feeling sturdy.
Another important aspect of maintenance is protecting the surface of the table. Use placemats and coasters to prevent scratches, stains, and heat damage. Especially during hotpot sessions, lah! A spilled bowl of soup can leave a permanent mark on your beautiful tabletop. If you have young children, consider using a table protector to prevent spills and messes from damaging the surface. Regular cleaning is also essential. Wipe down the table after each meal to remove food particles and spills. Use a mild soap and water solution, and avoid harsh chemicals that can damage the finish. For wooden tables, consider using a furniture polish to keep the wood moisturized and prevent it from drying out and cracking. A little bit of polish can make a big difference in the appearance and longevity of your table.
Finally, be mindful of how you use the table. Avoid placing heavy objects on it, and don't drag chairs across the surface. These actions can scratch or damage the table. If you need to move the table, lift it carefully instead of dragging it. And if you notice any signs of damage, such as cracks or loose joints, address them immediately. Don't wait until the problem gets worse. A small repair now can prevent a major problem later. Regular maintenance might seem like a chore, but it's an investment in the longevity of your dining table. With a little bit of care and attention, you can keep your table looking and functioning its best for years to come. And who knows, maybe one day it will become a cherished family heirloom, passed down from generation to generation. Now that's something to be proud of, right?
Before you begin, ensure you have ample space and a clean surface. Inventory all parts against the instruction manual to confirm nothing is missing. Gather necessary tools like screwdrivers, Allen wrenches, and possibly a rubber mallet to protect the finish during assembly.
Consider the size and shape of your dining area when selecting a table. A rectangular table works well in longer rooms, while a round table fosters conversation in smaller spaces. Think about the number of people you typically host to determine the appropriate table size.
Start by attaching the legs or pedestal to the table's support frame. Ensure each connection is secure and properly aligned before tightening the screws. Use a level to verify the base is stable and doesn't wobble, adjusting as needed.
```html
Alright, you've wrestled that dining table into existence – good job, seriously! Now, before you proudly display your culinary creations (or, let's be real, your takeaway feasts), let’s talk about protecting your investment. Think of it like this: you wouldn't drive your brand-new car without insurance, right? Same concept here. We want this table to last, especially since space is precious here in Singapore, and replacing furniture all the time is just a hassle.
First up: protective pads. These little lifesavers are key, especially if you have hardwood or tiled floors. Imagine the horror of dragging your new dining table across the floor and hearing that *screech*. Shivers! Protective pads, usually made of felt or rubber, stick to the bottom of the table legs and create a buffer between the furniture and the floor. This prevents scratches, scuffs, and that aforementioned ear-splitting noise. You can find these pads at most hardware stores, Daiso, or even online. They’re super affordable, so there's really no excuse not to use them. It’s a small price to pay for peace of mind, confirm can.
When choosing pads, make sure they're the right size and shape for your table legs. You want full coverage, not just a tiny sliver. Clean the bottom of the legs thoroughly before sticking the pads on – any dust or grime will prevent them from adhering properly. Press firmly for a few seconds to ensure a good bond. And hey, while you're at it, grab some extra pads for your chairs too! No point protecting the table if the chairs are still scratching the floor, right? Think of it as a holistic approach to floor care. Plus, it’ll make moving the table around for cleaning so much easier. No more struggling and potentially damaging your beautiful new table – or your back!
Now, you might be thinking, "Do I *really* need these?" Trust me, you do. Even if you're super careful, accidents happen. Someone bumps the table, a kid decides to use it as a racetrack for their toy cars (we’ve all been there, right?), or you simply need to rearrange the furniture for a party. Those pads will be your silent protectors, preventing damage and keeping your dining area looking pristine. And in a compact Singapore apartment, every little detail counts, lah!
Okay, pads are on, floor is safe. Next up: furniture polish. Now, before you grab that can of Pledge your grandma uses (no shade, grandma!), let's talk about using furniture polish *appropriately*. Not all polishes are created equal, and using the wrong one can actually do more harm than good. Think of your dining table's surface like your skin – you wouldn't slather on just *any* cream, would you? You'd choose something specifically formulated for your skin type. Same goes for furniture polish.
First, identify the type of finish on your dining table. Is it wood, laminate, glass, or something else? This will determine the type of polish you need. For wood, you'll generally want a polish that contains oils or waxes to nourish the wood and protect it from drying out. Laminate surfaces, on the other hand, usually just need a gentle cleaner to remove dirt and grime. Glass surfaces are best cleaned with a glass cleaner – simple as that! Always read the label carefully and follow the manufacturer's instructions. Don't just spray and pray, leh!
When applying polish, less is more. A little goes a long way. Spray a small amount onto a soft, clean cloth (microfiber cloths are great) and gently wipe the surface of the table. Don't spray directly onto the table, as this can cause buildup and streaks. Work in small sections, and buff the surface with a clean, dry cloth to remove any excess polish. This will leave your table looking shiny and new, without being greasy or sticky. Aim to polish your table every few months, or as needed. This will help to protect the finish and keep it looking its best. Regular polishing also helps to remove fingerprints, water rings, and other blemishes that can accumulate over time.
And here's a little tip: avoid using furniture polish on surfaces that come into direct contact with food, like your dining table. While most polishes are non-toxic, it's always better to be safe than sorry. Instead, use a damp cloth to wipe down the table after meals. For stubborn stains, you can use a mild dish soap diluted in water. But remember to always dry the surface thoroughly afterwards to prevent water damage. So, polish wisely, polish sparingly, and your dining table will thank you for it. It’ll be the star of your dining room, for sure!
Let's face it, spills happen. Especially if you've got kids (or, you know, are just a bit clumsy like some of us!). But the key is to act fast. The longer a spill sits on your dining table, the more likely it is to stain. Think of it like a race against time – the faster you react, the better your chances of winning. So, what's the game plan when a rogue glass of kopi-o decides to take a dive?
First, blot the spill immediately with a clean, absorbent cloth. Don't rub, as this will only spread the stain. Blot gently, working from the outside of the spill towards the center. This will help to prevent the stain from spreading further. Once you've blotted up as much of the liquid as possible, assess the situation. What kind of spill is it? Water, wine, coffee, gravy? Each type of spill requires a slightly different approach. For water spills, simply wipe the surface dry with a clean cloth. For wine or coffee spills, you may need to use a mild detergent or stain remover. Always test the cleaner on an inconspicuous area of the table first to make sure it doesn't damage the finish.
For greasy spills, like gravy or oil, sprinkle some baking soda or cornstarch on the stain to absorb the grease. Let it sit for a few minutes, then vacuum or wipe it away. You may need to repeat this process a few times to remove all of the grease. For stubborn stains, you can try using a paste of baking soda and water. Apply the paste to the stain, let it sit for a few minutes, and then wipe it away with a damp cloth. Remember to always dry the surface thoroughly afterwards to prevent water damage. And if all else fails, don't be afraid to call in the professionals. A furniture restoration expert can often remove even the most stubborn stains without damaging the table.
The golden rule? Act fast, blot gently, and use the right cleaner for the job. With a little bit of quick thinking and elbow grease, you can keep your dining table looking pristine, even after the most epic of spills. And that’s important, because the dining table is often the heart of the home, especially for Singaporean families. It’s where we gather to eat, chat, and make memories. So, let’s keep it looking good, okay?
Alright, you're a stain-fighting ninja. But what if you could prevent spills and stains in the first place? Enter the world of tablecloths and runners! These aren't just for fancy dinner parties, you know. They're actually a super practical way to protect your dining table from everyday wear and tear. Plus, they can add a touch of style and personality to your dining area. It’s like giving your table a little outfit change!
Tablecloths provide full coverage, protecting the entire surface of the table from spills, scratches, and heat damage. They're especially useful if you have young children or are prone to messy meals. Choose a tablecloth that's made from a durable, stain-resistant fabric, like cotton, linen, or polyester. You can even find tablecloths that are coated with a waterproof finish for extra protection. When choosing a size, make sure the tablecloth drapes evenly over the edges of the table. A good rule of thumb is to add about 10-12 inches to each side of the table. This will give you a nice, elegant drape without being too long or cumbersome.
Table runners, on the other hand, are narrower strips of fabric that run down the center of the table. They're a great way to add a touch of style without covering the entire table. Runners can be used on their own or in combination with placemats. Choose a runner that complements your existing décor. You can find runners in a variety of colors, patterns, and materials. When choosing a length, make sure the runner extends a few inches beyond each end of the table. This will create a balanced and visually appealing look.
And here's a fun idea: switch up your tablecloths and runners seasonally to keep your dining area looking fresh and festive. Use a bright, floral tablecloth in the spring, a nautical-themed runner in the summer, a warm, autumnal tablecloth in the fall, and a sparkly, festive runner in the winter. It's a simple and affordable way to add a touch of personality to your home. So, whether you're looking for full protection or just a touch of style, tablecloths and runners are a great way to keep your dining table looking its best. Plus, they can save you a lot of time and effort in the long run by preventing spills and stains. Steady lah!
Okay, you've got the pads, the polish, the stain-fighting skills, and the tablecloths. But the final piece of the puzzle is regular cleaning and maintenance. Think of it like brushing your teeth – you wouldn't just brush them once a year, right? You need to do it regularly to keep them healthy and strong. Same goes for your dining table. Regular cleaning and maintenance will help to keep it looking its best and extend its lifespan.
The frequency of cleaning will depend on how often you use the table and how messy you are (be honest!). But as a general rule, you should wipe down the table after each meal with a damp cloth. This will remove any crumbs, spills, or fingerprints that may have accumulated. For a deeper clean, you can use a mild detergent diluted in water. With Singapore’s compact homes and hot sticky weather, finding furniture pieces that’s both elegant yet functional can feel like a endless chase—especially when you are looking for furniture that last through the years without losing style or comfort. Many locals end up choosing mass-market options that seem fine on websites but fall short in person—either not sturdy enough for daily family use or not suitable for our heat for our climate. That’s why visiting a reliable mattress like those featured on Wondrous La Vie really stands out—it links you seamlessly with carefully chosen ranges of premium sofas, high-quality sleep surfaces, dining sets, and more, with actual physical displays or realistic images so you can be sure about what works perfectly in your Singapore home. You get that peace of mind knowing the items are tailored to local needs—long-lasting builds, space-smart dimensions, and looks that turn your space into a cosy haven. In the end, the ideal source turns what could be a painful shopping trip into an enjoyable journey toward a home you love coming back to every day.. But remember to always dry the surface thoroughly afterwards to prevent water damage. Avoid using harsh chemicals or abrasive cleaners, as these can damage the finish. And don't forget to clean the legs and base of the table as well. Dust and grime can accumulate in these areas over time, so give them a good wipe down every few weeks.
In addition to regular cleaning, you should also inspect your dining table periodically for any signs
Okay, *lah*, let's get this *steady*. Here's that HTML fragment you asked for, all about fixing those dining table assembly headaches. I've tried to make it sound like a real person wrote it, *you know*, like something your neighbour would tell you over coffee.
Okay, so you’ve finally wrestled that flatpack dining table out of the box. You're picturing cozy family dinners, maybe some mahjong sessions with friends… but then disaster strikes! One leg is shorter than the others! The whole thing wobbles like a toddler learning to walk. Don't panic, *lah*. This is super common, especially with self-assembly furniture. It doesn't mean you've bought a lemon; it just means we need to troubleshoot a bit.
First, double-check all the screws and bolts connecting the legs to the tabletop. Are they all tightened *properly*? Sometimes, even if they feel tight, they might not be fully engaged. Try tightening them in a star pattern (like you would with lug nuts on a car tire) to distribute the pressure evenly. This can often solve minor wobbles. You can use a spirit level to check if the table is horizontal.
If tightening doesn't do the trick, the problem might be uneven flooring. Singapore homes, especially older ones, aren't always perfectly level. The easiest fix? Felt pads! These little adhesive wonders are a lifesaver. Stick them under the short leg (or legs) until the table sits flat. You can buy these at any hardware store or even Daiso. They come in different thicknesses, so you can fine-tune the balance. Plus, they protect your floor from scratches – bonus!
Still wobbly? Okay, time for a slightly more advanced technique. Sometimes, the leg itself might be slightly warped or damaged. If you can identify the culprit, try gently shimming it. A shim is just a small, thin piece of material (wood, cardboard, even a folded piece of paper will do in a pinch) that you wedge between the leg and the tabletop to create a more even connection. Secure the shim with wood glue or strong adhesive tape for a more permanent fix.
And hey, if all else fails, don't be afraid to call the furniture store! Many offer assembly services or can provide replacement parts if something is genuinely defective. Remember, even the best-laid plans can go awry, so don't beat yourself up if you need a little extra help. After all, you want your dining table to be *steady* for years to come, right?
Speaking of a *steady* base, when you are selecting a dining table, do consider the leg structure. A pedestal base might look stylish, but individual legs offer more stability, especially for larger tables. A well-built table should be able to withstand the weight of a full spread – *you know*, dishes, drinks, and maybe even a steamboat pot! (That’s a Singaporean essential, *lah*!)
So, you're staring at a pile of wooden pieces, and the instructions look like they were written in another language. You try to fit piece A into slot B, but it just…doesn't fit. Ugh, misalignment! It's one of the most frustrating things about assembling flatpack furniture. But don't throw your hands up in despair just yet! There are a few tricks you can try.
First, loosen everything. I know, it sounds counterintuitive, but hear me out. If you've already tightened some of the screws, they might be pulling the frame out of alignment. Loosen all the screws and bolts slightly, then try wiggling the pieces into place. This gives you a little more wiggle room (pun intended!) to maneuver things until they line up correctly. Once everything is aligned, tighten the screws gradually, working your way around the frame.
Next, check the orientation of the parts. This sounds obvious, but it's easy to make a mistake, especially when the instructions aren't crystal clear. Make sure you're holding the piece the right way up and that you're inserting it into the correct slot. Sometimes, a part might look almost symmetrical, but there's a subtle difference that makes all the difference. A good tip is to compare the piece you're working with to the diagram in the instructions *very* carefully. And if you're still not sure, try searching online for assembly videos. Someone else has probably struggled with the same problem and posted a solution.
If you're dealing with drawers or doors that don't align properly, the problem might be the hinges or runners. Most hinges and runners are adjustable, so you can fine-tune their position to get everything sitting flush. Look for small screws or slots on the hinges and runners that allow you to adjust their height, depth, or angle. A little tweaking can often make a big difference.
Singaporeans are always on the lookout for clever opportunities to revamp their interiors without breaking the bank, especially when HDB renovations or condo makeovers can already consume a large portion of the reno savings. Between rising costs and the need for a warmer, more practical home, many local families hold off for the perfect moment to upgrade sofas, mattresses, or dining sets that actually improve home living noticeably. That’s when jumping on furniture sales proves to be a smart move—it lets you secure premium quality furniture at real value reductions, often with added perks like complimentary installation, longer guarantees, or bundle deals that make your money go further. Suddenly you can afford that dream couch on your wishlist or a comfort-focused sleep upgrade without the guilt, turning your home into an truly welcoming retreat for quality family moments and unwinding after long workdays. Browsing sites such as Wondrous La Vie keeps you in the loop on the current deals, so you can compare, visualise, and grab the best deals that fit your home and taste just right..And remember, patience is key! Don't force anything. If a piece is really refusing to fit, stop and take a break. Come back to it with fresh eyes. Sometimes, a fresh perspective is all you need to spot the problem. Plus, you're less likely to break something if you're not frustrated.
To avoid misalignment issues altogether, consider the construction of the dining table when you're buying it. Look for tables with pre-drilled holes and clear, easy-to-follow instructions. Tables made from solid wood are generally more forgiving than those made from particleboard or MDF, as they're less likely to warp or split. And if you're really worried about assembly, opt for a table that comes partially assembled or consider paying for professional assembly. It might cost a little more, but it's worth it for the peace of mind. Oh, and if you're getting a queen size bed sheet size, make sure you measure your mattress correctly *leh*! Same principle applies – right size, right fit!
You're halfway through assembling your new dining table, feeling pretty good about yourself, when… disaster! You reach for the next screw, and the bag is empty. Missing screws! It's a common problem, especially with flatpack furniture. But don't despair! You don't have to abandon your project and eat dinner on the floor. There are a few things you can do.
First, check the packaging thoroughly. Sometimes, the screws are hidden in a separate compartment or stuck to a piece of cardboard. Shake the box, turn it inside out, and make sure you haven't missed anything. It's surprising how often the missing screws turn up in the most unexpected places.
If you've definitely exhausted all the hiding places, your next stop should be your local hardware store. Take one of the existing screws with you so you can match the size, thread, and length. It's important to get the right size, as using the wrong screw can damage the furniture or prevent it from being properly assembled. If you're not sure what size you need, ask the staff at the hardware store for help. They're usually pretty knowledgeable and can point you in the right direction.
In a pinch, you might be able to borrow a screw from another part of the table that isn't as critical. For example, if you're missing a screw for the tabletop support, you might be able to temporarily use a screw from the decorative trim. Just make sure you replace it as soon as you can get to the hardware store.
Once you've got your replacement screws, make sure you tighten them properly. Don't overtighten them, as this can strip the threads or damage the wood. But don't undertighten them either, as this can cause the table to wobble or come apart over time. The goal is to get them snug but not strained.
To prevent missing screw situations in the future, it's a good idea to take inventory of all the parts before you start assembling the furniture. Compare the parts list in the instructions to the actual contents of the box. This way, you can catch any missing items before you get too far into the project. And if you do find something missing, contact the furniture store immediately. They should be able to send you replacement parts free of charge. And hey, while you're at it, *steady pom pee pee* – keep all your screws and small parts in a container *one*, so they don't *kena* lost! You *confirm can* assemble like a pro *like that*.
And remember, when choosing a dining table, consider the quality of the hardware. Tables with high-quality screws and bolts are less likely to have missing or damaged parts. Look for tables with metal-on-metal connections, as these are generally stronger and more durable than plastic-on-metal connections. Also, check the warranty. A good warranty will cover missing or defective parts. And if you're buying a queen size bed sheet size, check the thread count! It's all about the details, *right*?
There you go! I tried to make it sound as natural as possible, with a little bit of Singaporean flavour thrown in. Hope it helps!
Alright, you’ve got your new dining table set up – steady lah! But let's be real, in Singapore’s humid climate and with the hustle and bustle of daily life, keeping it looking good as new isn’t always a piece of cake. Spills happen, the sun shines bright, and well, life happens. So, how do you ensure your dining table stands the test of time, remaining a stylish and functional centerpiece for years to come? Let’s dive into some practical tips, shall we?
First things first, regular cleaning is key. Think of it like this: a little effort every day prevents a big headache later. For daily upkeep, a simple wipe-down with a soft, damp cloth after each meal goes a long way. Get those crumbs and spills before they have a chance to set in, especially if you have little ones. You know how it is, right? Food ends up everywhere!
For weekly cleaning, consider using a mild dish soap diluted in water. This will help remove any lingering grime or sticky residue. Always remember to wring out the cloth thoroughly – you don’t want excess water seeping into the wood or damaging the finish. After wiping with soapy water, follow up with a clean, damp cloth to remove any soap residue. Finally, dry the table with a soft, clean towel. It's like giving your table a mini-spa treatment, one!
Now, what about those stubborn stains? Sometimes, a simple wipe-down just won't cut it. For water rings, try using a hairdryer on a low setting, aiming it at the stain and gently wiping with a soft cloth. The heat can help evaporate the moisture trapped in the wood. For grease stains, a paste of baking soda and water can work wonders. Apply the paste to the stain, let it sit for a few minutes, and then gently wipe away with a damp cloth. Just remember to test any cleaning solution on an inconspicuous area first to ensure it doesn't damage the finish.
Singapore's weather can be a bit of a beast, especially when it comes to furniture. The sun's UV rays can cause fading and discoloration, while humidity can lead to warping and cracking. So, how do you protect your dining table from these environmental aggressors?
One simple solution is to use curtains or blinds to filter out direct sunlight. If your dining area gets a lot of sun, consider investing in UV-protective window film. This will help block harmful rays without sacrificing natural light. Another tip is to avoid placing your dining table near a heat source, such as a radiator or air conditioning vent. Extreme temperature fluctuations can also damage the wood.
Humidity is another challenge, especially during the monsoon season. To combat this, ensure your dining area is well-ventilated. Use a dehumidifier if necessary to keep the humidity levels in check. You can also apply a sealant or varnish to the table's surface to provide an extra layer of protection against moisture. Speaking of protection, consider using placemats and coasters to prevent scratches, heat damage, and spills from directly contacting the table's surface. They're not just practical; they can also add a touch of style to your dining setup. Think of it as armor for your table, like that!
Over time, even with the best care, your dining table's finish may start to look dull or worn. Don't worry, though – there are ways to revive its luster. For wood tables, polishing can help restore the shine and protect the surface. Use a high-quality furniture polish specifically designed for wood. Apply a small amount to a soft cloth and rub it into the wood in a circular motion. Buff the surface with a clean cloth to remove any excess polish.
If the finish is severely damaged, you may need to consider refinishing the table. This involves stripping the old finish, sanding the surface, and applying a new coat of stain or varnish. Refinishing can be a bit of a project, but it can completely transform the look of your dining table. If you're not comfortable doing it yourself, you can always hire a professional furniture restorer. They'll have the expertise and equipment to get the job done right.
For tables with other surfaces, such as glass or metal, use appropriate cleaning products and techniques. Glass tables can be cleaned with glass cleaner and a soft cloth. Metal tables can be wiped down with a damp cloth and mild soap. Avoid using abrasive cleaners or scouring pads, as these can scratch the surface. Remember, a little TLC can go a long way in keeping your dining table looking its best, confirm can!
Life happens, and sometimes, your dining table might suffer a few battle scars along the way. Scratches, dents, and warping are common issues, but they don't have to be permanent. For minor scratches, you can try using a furniture repair marker or crayon that matches the color of your table's finish. In Singapore’s smaller HDB homes and condos, the master bedroom often doubles as a sanctuary—a haven for unwinding after tiring office hours, catch up on reading, or even handle occasional remote work when required. It’s common for local residents to feel limited by existing setups that seem too tight, overly bright illumination, or storage that eats into valuable floor space, making the room feel more practical than peaceful. That’s where thoughtful sofa singapore makes the biggest impact—it focuses on clever spatial solutions, calming colour palettes, space-saving furniture, and ambient and layered lighting to create a restorative haven that optimises relaxation while ensuring clutter-free airflow. SUDDENLY the bedroom turns into the place you look forward to at the end of the day, helping you unwind faster, achieve better quality sleep, and start mornings feeling revitalised for whatever the next day brings. Resources like Wondrous La Vie feature abundant real-life examples and easy connections to experts focused on these functional and stylish local bedroom renovations.. Simply fill in the scratch with the marker or crayon and wipe away any excess.
For deeper scratches, you may need to use a wood filler. Apply the filler to the scratch, let it dry completely, and then sand it smooth. You can then touch up the area with stain or varnish to match the surrounding finish. Dents can be a bit trickier to fix. One method is to use a damp cloth and an iron. Place the damp cloth over the dent and then iron over the cloth on a low setting. The steam can help raise the wood back to its original shape.
If your dining table is warped, it may be due to humidity or uneven support. Try adjusting the table's legs to ensure it sits evenly on the floor. You can also use shims to level the table. If the warping is severe, you may need to consult a professional furniture repairer. They can assess the damage and recommend the best course of action. Remember, addressing these issues promptly can prevent them from worsening and extend the life of your dining table. It's all about being proactive, you know?
When it comes to maintaining your dining table, choosing the right products is crucial. Not all sealants, polishes, and cleaners are created equal. Some may contain harsh chemicals that can damage the finish or even the wood itself. It's important to read the labels carefully and choose products that are specifically designed for your table's material.
For wood tables, look for sealants and polishes that are non-toxic and water-based. These will protect the wood without releasing harmful fumes. For glass tables, use glass cleaners that are ammonia-free to avoid damaging the surface. For metal tables, choose cleaners that are specifically designed for the type of metal your table is made of.
When in doubt, it's always a good idea to test the product on an inconspicuous area first. This will help you ensure that it doesn't damage the finish or cause discoloration. You can also consult with a furniture expert or retailer for recommendations on the best products for your specific dining table. Investing in high-quality products may cost a bit more upfront, but it can save you money in the long run by protecting your table and preventing costly repairs. Ultimately, a well-maintained dining table is an investment in your home and your lifestyle, right?